Firmware/Screenshot
Tools for screenshots in Open Firmware.
The frame buffer is an area of memory that holds the RGB565 image shown on the display. This buffer can be written to a file, in order to take a picture of the screen.
Contents
Preparation
- make a USB drive with ext2 filesystem, with nothing important on it,
- download xo-4-bmp.fth to the USB drive,
- at Open Firmware ok prompt, load the file,
ok fl u:\xo-4-bmp.fth
- prepare the screen as you need it, and then make a screenshot, using one of the methods below.
Save to a named file
ok fb-save u:\test.bmp
Writes the frame buffer to a named file.
Save to an file named for date and time
ok fb
Makes a file name using the clock date and time, in UNIX time_t format, and writes to a file u:\%d.bmp where %d is replaced by the value.
Save after a command completes
ok page banner fb
Use this method to enter commands which set up the screen as you need it, and before the ok prompt returns write the frame buffer to a file.
Save using the rotate key
On XO-1.75 or XO-4, we add an asynchronous event handler to detect the rotate key, which is on the bottom left of the laptop next to the wireless LED.
Set up the display in the way you want to capture it, then press the rotate key until red LED is seen, then release rotate key. At this time the image is saved into memory. The red LED will blink to show how many images are in memory.
Then get to ok prompt and type cb-save to save the images to USB drive:
ok cb-save
An orange LED will be shown while saving each image. Then remove the USB drive and check the images on another computer, and make copies.
Before capturing more images, be sure to wipe the memory of the saved images, using cb-wipe:
ok cb-wipe
You can also review the images saved so far, using cb-show, press any key to step through the images:
ok cb-show
Save at a patched point
This method is very specific to what is being captured. In this worked example, we capture the touchscreen scribble image at the end of a touchscreen test but before the screen is cleared.
Code Introspection
Learn how the driver selftest feature clears the screen.
ok dev /touchscreen
ok see selftest
...
ok see scribble
: scribble
   ev( ['] dot ev )ev
;
ok see )ev
: )ev
   cursor-on page ['] (.tsmsg) to .tsmsg
;
The screen is cleared by page which is called by )ev.
Code Creation
Create a new my-scribble definition that does a screenshot before clearing.
ok : my-scribble ev( ['] dot ev fb )ev ;
Code Replacement
Replace the scribble definition with our new one.
ok patch my-scribble scribble selftest
ok dend
Activation
ok test /touchscreen
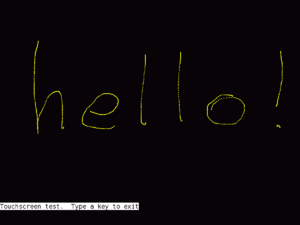
We then scribble on the display using a finger, and press any key to exit. This is when the screenshot is recorded to disk. Here is a sample screenshot:
Another
Another example is to capture the touchscreen fixed signal strength test:
ok select /touchscreen
ok : fb-page fb page ;
ok patch fb-page page watch-fss
ok watch-fss
Convert to PNG
Convert the images to PNG format on Linux; they are much smaller and the conversion is lossless, for example
% convert 1434598114.bmp 1434598114.png
XO-1
See bmp.fth.
