Measure: Difference between revisions
(Adding contact details) |
|||
| Line 68: | Line 68: | ||
# Record animal sounds , for example, sounds of birds and observe their waveforms. Which of these are high frequency sounds, which are the low frequency ones ? Adjust the frequency sliders accordingly. |
# Record animal sounds , for example, sounds of birds and observe their waveforms. Which of these are high frequency sounds, which are the low frequency ones ? Adjust the frequency sliders accordingly. |
||
# Whistle into the mic and compare the loudness and frequency of whistles by observing the waveforms. |
# Whistle into the mic and compare the loudness and frequency of whistles by observing the waveforms. |
||
# Get two people to try to whistle the same note, and look into Beat Frequencies. |
|||
# Turn the sensitivity slider up to the maximum and observe ambient noise - in a quiet room, near a noisy road |
# Turn the sensitivity slider up to the maximum and observe ambient noise - in a quiet room, near a noisy road |
||
# Measure the voltage of an AA size pencil cell. What settings do you use ? AC or DC ? |
# Measure the voltage of an AA size pencil cell. What settings do you use ? AC or DC ? |
||
Revision as of 19:38, 5 January 2008
see more templates or propose new |
SAFETY FIRST!
* WARNING: ELECTRICITY CAN KILL. RISK OF ELECTROCUTION: DO NOT, UNDER ANY CIRCUMSTANCES, APPLY AC LINE VOLTAGES FROM A WALL OUTLET OR MOTOR-GENERATOR OR OTHER POWER SUPPLY (E.G. CONVERTER OR INVERTER) INTO THE MICROPHONE INPUT, THE SPEAKER OUTPUT, OR ANY USB PORT.
- Make measurements of AC line voltages with the proper equipment only -- for example, a multimeter designed for the purpose. The laptop is not a multimeter.
- Read the following article. If you don't know what you are doing or are unsure, don't do it. Electricity can be dangerous.
* CAUTION: RISK OF BURNS, FIRE or EXPLOSION: Even a AAA battery stores enough energy to cause burns, and it may cause equipment damage if applied directly to the microphone input. If a 9 volt battery carried in a pocket makes contact with coins it will cause burns, and it will cause equipment damage if it is applied directly to the microphone input. Higher-power sources present increased risk of burns, fire, explosion and electrocution, the nature of which is unpredictable.
* CAUTION: RISK OF EQUIPMENT DAMAGE. DO NOT, UNDER ANY CIRCUMSTANCES, EXCEED THE INPUT AND OUTPUT SPECIFICATIONS; DAMAGE OR DESTRUCTION OF THE EQUIPMENT WILL RESULT.
Introduction
Children learn by doing things. It is said "Give a child a hammer, and the world becomes his nails".
This activity is a tool that allows kids to express their curiosity. It is a tool that allows kids to explore and learn by doing, by connecting and observing, span physical phenomena and real world events. Kids would learn by recording and observing the physical phenomena and by connecting their observations to a previously learned concept, or even better - learn the concept based on the experiments and observation. This activity enables children to measure DC and AC voltages by observing them on an oscilloscope-like interface, to watch waveforms in a frequency domain (spectrum analyzer), logging data at a specified time interval and drawing the graph of logged data.
Elements of the Measure activity
- There is an 1150 X 800 pixel window in which one sees the waveform. There is a light grey colored grid in the background which is like the scale.
- Measure Toolbar which allows one to switch between AC and DC modes, toggle Bias Voltage On/Off, view waveform in time domain or frequency domain, select frequency range display, and be able to pause the waveform on the screen.
- A Log Toolbar which allows one to select the data logging interval, start and stop the logging, and display the log.
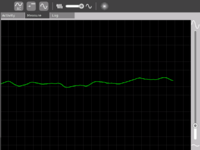
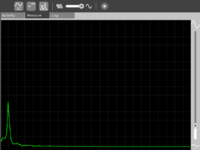
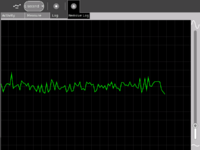
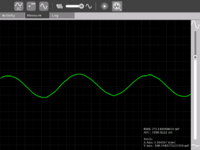
Screen shots of Measure Activity
A short video
<youtube>FE1ufEIXLVo</youtube>
This video is of Release Version 8 of the Activity. The latest release features an improved UI and few more features.
Measure Activity activities
- Record animal sounds , for example, sounds of birds and observe their waveforms. Which of these are high frequency sounds, which are the low frequency ones ? Adjust the frequency sliders accordingly.
- Whistle into the mic and compare the loudness and frequency of whistles by observing the waveforms.
- Get two people to try to whistle the same note, and look into Beat Frequencies.
- Turn the sensitivity slider up to the maximum and observe ambient noise - in a quiet room, near a noisy road
- Measure the voltage of an AA size pencil cell. What settings do you use ? AC or DC ?
- Measure resistance of water , other liquids
- Log temperature using a temperature sensor at one hour intervals. When in the day is it the hottest ? The coldest ?
- Some very interesting sensor ideas given by Arnans Roger , see - http://padthai.media.mit.edu:8080/cocoon/gogosite/documentation/makingSensors.xsp?lang=en
(Ideas 1 and 2 given by Erik Blankenship)
Downloading and running the activity on the XO
The link for the latest version of the activity is http://dev.laptop.org/~arjs/Measure-11.xo . Other previous versions can be found at http://dev.laptop.org/~arjs/
To install the .xo bundle, in the sugar shell (do not do this as root) type
sugar-install-bundle <path>/Measure-11.xo
Activity has been found running well on build 575 and higher. Since it is a CPU intensive activity, it works best on B3 and B4 machines. Also pre-B4 machines might not fully support the DC mode.
Measure Projects
- A low cost (possibly $2) probe that would increase the range of voltage that can be applied to the input.
- An ultrasonic distance measurement system that connects to the XO and allows the XO to log data. This has immense applications in water level monitoring in villages and also in robotics applications.
- A general purpose hardware kit that interacts with the measure activity. Something on similar lines to http://www.create.ucsb.edu/~dano/CUI/
- Sensors could be distributed along with the XO as peripherals. The advantage of this would be that the measure activity can be calibrated against the known specs of the sensors.
- Being able to measure resistance
- A low cost version of LEGO mindstorms system built around the XO. The XO has good hardware and software capabilities to achieve this.
- RS232 or serial interface would allow a host of electronic devices to interact and communicate with the XO.
- Build a sensor network using a sensor connected to each XO and utilize the mesh networking capability of the XO. This would give us a highly powerful, robust and reconfigurable sensor network.
- Build medical applications using sensors and the XO. See TeleHealth_Module
- Do some Fablab projects using the XO. See http://fab.cba.mit.edu/labs/vigyan/
- Collaborative music creation over the mesh using the music software on the XOs and giving input from an array of different sensors.
- Integrate sensor input into LOGO / Turtle activity
- Milk purity in rural areas. I remember reading about it in some FabLab's website - I think it requires an ADC, which we have.
- Temperature Monitoring and Logging
- Intrusion Alarm System
Hardware details
The Analog Devices AD1888 sound chip has the ability to sample DC voltages. Experimentally it has been found out that the range is fairly linear, however the range that it can sample is restricted to 0.3V - 1.9V , with all the internal gains turned to the minimum.
The XO hardware has been designed to facilitate measurement of DC voltages by the addition of an electronic switch that can be controlled via a setting on the Alsa mixer called 'Analog Input' . The high pass filter can also be turned on/off by a setting 'High Pass Filter' in Alsamixer. The ability to control V_REFOUT (bias voltage) is also available and is done by the control 'V_REFOUT' in alsamixer.
All the above settings are being handled in the activity by using an os.system("amixer <control name> <mute/unmute>")
Input specifications
* WARNING: ELECTRICITY CAN KILL. RISK OF ELECTROCUTION: DO NOT, UNDER ANY CIRCUMSTANCES, APPLY AC LINE VOLTAGES FROM A WALL OUTLET OR MOTOR-GENERATOR OR OTHER POWER SUPPLY (E.G. CONVERTER OR INVERTER) INTO THE MICROPHONE INPUT, THE SPEAKER OUTPUT, OR ANY USB PORT.
- There is a risk of electric shock resulting in death if the XO is used to measure mains voltage by direct connection. The audio input components are not designed for this. Dangerous voltages applied to the audio input may also be emitted on audio output, USB connectors, or the DC power input jack.
* CAUTION: RISK OF EQUIPMENT DAMAGE. DO NOT, UNDER ANY CIRCUMSTANCES, EXCEED THE INPUT AND OUTPUT SPECIFICATIONS; DAMAGE OR DESTRUCTION OF THE EQUIPMENT WILL RESULT
- * -0.5 to +5.0 volts ABSOLUTE MAXIMUM input voltage.
- * DO NOT REVERSE VOLTAGE: EVEN 1.5 volt BATTERY VOLTAGE IMPROPERLY APPLIED MAY DAMAGE LAPTOP
- * The extent of the damage is not easily predictable.
* CAUTION: RISK OF EQUIPMENT DAMAGE AND/OR DEGRADED EQUIPMENT PERFORMANCE. DO NOT EXCEED THE OUTPUT-CURRENT SPECIFICATIONS OF THE USB PORTS. The extent of the damage is not easily predictable.
The following specifications are based on terminal measurements of a G1G1 laptop and examination of the AD1888's specification sheet. Please correct them where necessary:
Specifications: Microphone input (red, standard audio jack):
- Monaural only: 3.5mm (1/8 inch) audio jack input (Note 0) (white jack of a stereo splitter)
- Insertion of the audio jack routes external input to the A-to-D converter and disables the OLPC's speakers
- Red jack of stereo splitter is open-circuited (i.e. not connected) [??]
- Absolute maximum input voltages: -0.5 volts, +5.0 volts (CAUTION: Exceeding these voltages will damage the laptop. See Note 1)
- Input impedance with BIAS OFF: approx 1100 ohms (Note 2)
- Input-DC offset voltage: (Note 3) +1.178 +/- ?? volts
- Range of DC amplification: TBD
- Range of AC amplification: TBD
Note 0: A solderable connector is the Radio Shack 274-286 "Mono 1/8" Phone Plug" with solder terminals and screw-on housing. A possible stereo connector is the similar Radio Shack 274-284 1/" Stereo Phone Plug" with solder terminals and screw-on housing. Only 1 of the two input-terminals of the stereo connector is available for input. The cost of the Radio Shack Mono plug is $2.99 US for quantity two plugs; cost of the Stereo plug is $3.99 US for quantity two plugs (neither are gold-plated). Other sources for resistors, wire, solder, naked USB and audio jack-connectors, "ball clips" (probes) etc can be found at www.mouser.com and www.digikey.com. Quantity pricing (e.g. Kobiconn plugs, 3.5mm MONO Mouser Part Number 171-PA-3191-1-E) is much reduced compared to the Radio Shack pricing (e.g. $0.71 USD single unit, $0.45 USD at quantity 100).
- Use insulated wire. To reduce electrical noise twist the attached wires approximately 1 twist per inch (1 twist per 2.5 cm).
Note 1: Measured between the center conductor and the shield (ground, i.e. +0 volts). When an input voltage is greater than +5.0 volts or less than -0.5 volts the input-protection circuitry draws currents greater than 100 milliamperes and will damage the laptop. Also, the AD1888 codec's absolute maximum voltage (given a 5.0 volts supply) is -0.3 volts to +6.3 volts.
- You must use input protection resistors and voltage divider if voltages greater than +5 volts will be applied. Resistors and a fast-blow fuse are recommended. Resistors should be present in both the ground circuit and the signal circuit, and this may introduce noise. A better circuit is a high-impedance differential-input amplifier. Recommended circuit TBD: see Note 3.
Note 2: With BIAS ON, measurements indicate a back-bias of +0.785 volts exists at the input. With BIAS OFF +0.020 volts (20mv) is present at the input. The BIAS voltage's effective source impedance seems to be approx 790 ohms. Any circuit that is to drive into the input (see Note 3) should do so with the BIAS OFF and have low-enough source impedance to sink and source into the 1100 ohm input adequately.
Note 3: This is the DC injection-voltage necessary to move the trace from the botton to into the center screen.
- A recommended protection circuit would be a differential amplifier (e.g. a single-operational-amplifier circuit that uses one half of an LM224 amplifier can process ground +0 volts as a possible input. Reversals of 1.5 volt cell battery voltages etc can then displayed. With a proper design ( e.g. a potentiometer-adjustable input-offset derived from a +1.25 volt bandgap reference and the second operational amplifier configured as a 2:1 amplifier) the input between the differential amplifier's inputs would match the AD1888's input range of +0 volts to +2.83 volts (2.83 volts peak-to-peak). +5 volts can be derived from the nearby USB port as described below. A naked USB connector-plug can be found at www.mouser.com (stock number 154-UAW16-E) at $0.68 USD. USB connectors with wires attached ("pigtails", "blunt end") can also be found at Mouser, Digikey, etc. for about $1.50 to $2.00 USD.
Simple differential amplifier
The following circuit allows the student or teacher to "input" both DC voltages (such as from a 1.5 volt battery, etc) and an AC voltage. The following design may change as it evolves:
- See revision history at bottom of this section.
Specifications
These specifications are valid given use of the preferred components as listed in the Bill of Materials:
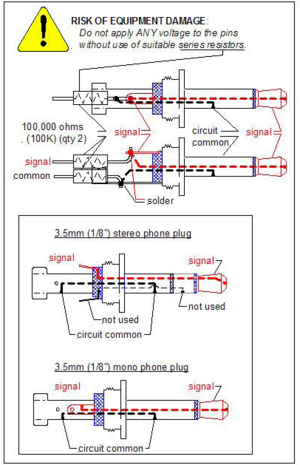
- Signal-input plug: mono audio jack (3.5 mm, 1/8", see above)
- Power-input plug: USB connector
- Use either a "naked" connector or a USB cable cut and stripped to reveal the red (+5 volt) and black (0 volt -- common) wires. Cut the other two wires flush and tape-over their ends individually.
- Voltage Gain: 1/10 (i.e. the circuit divides the input down by 10)
- Accuracy will depend on the ratios of R1:R3 and R2:R4.
- Input impedance: 100,000 ohms (100K) each side to circuit common
- Laptop settings: Set either (i) MEASURE to DC and OFFSET to OFF, or (ii) MEASURE to AC and OFFSET to OFF
- No harm will result if these setting are wrong, e.g. the activity starts in MEASURE = AC. The gain will be higher in AC, but the amplfier can be used in AC too).
- +5 volt power source -- derived from the nearby USB port (red and black wires inside a sliced-open USB cable)
- +5 volt current draw -- a few milliamperes
- Minimum power-source voltage -- approximately +4.0 volts [as low as +3.0 volts is possible, better meassurements TBD]
- Maximum input voltage: +/-15 volts useable, tested to +/-30 volts. See also AC and DC common-mode rejection specifications.
- I.e. apply the voltage of 15 volts (30 volts absolute maximum for testing) in both polarities by "flipping the battery"
- Frequency specification: DC to 1000 hertz (1 KHz). Beyond this frequency significant aliasing occurs.
- "Aliasing" appears as wiggles on what should be a pure sine wave (an envelope that modulates the input). This is caused by the sampling of the waveform done by the input-converter (codec).
- DC Common-mode rejection: both inputs tied together and voltage injected relative to the power-common (circuit 0 volts), tested to +/-30 volts DC: less than 0.001 volt DC (unobservable on the laptop).
- DC Common-mode rejection depends critically upon the matching to resistors R1 to R2 (100K) and R3 to R4 (10K). Matching of 0.1% is required either by buying 0.1% resistors, or buying e.g. a 100 or a 1000 of inexpensive metal-film resistors and sorting them.
- AC Common-mode rejection: measured relative to the power-common (circuit 0 volts), 0-1000 Hz, +6 volts AC rms injected: less than 0.001 volt AC rms (observable at the highest gain setting of the laptop: approx 2 scale divisions)
- AC common mode rejection depends critically not only on the matching of the resistors R1 to R2 and R3 to R4 but also upon stray capacitance in the circuit, the apparent impedance of the reference-voltage source (i.e. the reference-op amp's output impedance), the quality of the op-amps themselves, etc.
Circuit description
This simple circuit is called a "differential amplifer" and although not very fancy it does the trick. It derives its +5 volts input power from the USB port. The circuit uses a couple tricks, to be described below.
- This circuit has the advantage of not presenting an input voltage greater than +5 volts to the microphone input, plus the USB-port's circuit limits its +5 volt output-current to about 1 ampere in case something short-circuits the USB's output voltage.
- Any supply voltage derived from another source must be less than +5 volts. For example, three 1.5 volt batteries will also work at +4.5 volts -- as long as the batteries are not accidentally reversed !! -- but four 1.5 volt batteries at 6.0 volts present a risk of inputting more than +5 volts into the microphone input.
- Any externally-derived power voltage (batteries solar cells, etc) directly applied also risks of reveral. If a battery is to be used, add a reverse-protection schottky diode e.g. Avago 1N5711 static-protected by a 0.1 uf capacitor in series with the battery (i.e. a 4.5 volt battery with a 0.4 volt diode drop). A better scheme uses a low-current, +5 volt low-dropout-voltage regulator. Details TBD.
Trick #1 -- Artificial "ground": The analog-to-digital converter (codec, A1888) converts (works only on) plus-DC voltages between +0 volts (minimum, corresponding to bottom of screen with high gain (control near the top)) and +2.83 volts (maximum, corresponding to top of screen with high gain (control near the top)) . A special highly-stable reference voltage called a "band-gap reference" provides a steady +1.225 volt "offset" to "locate" the input at 1/2 of this range i.e. approximately +1.41 volts (one G1G1 unit +1.181 volts). This voltage places the trace in the center of the screen. Thus, input-voltages less than this "centering-voltage" will drive the trace lower than center, and voltages greater than this "centering-voltage" will drive the trace higher than center.
Trick #2 -- Matched resistors: The "common-mode rejection ratio" -- the ability of the circuit to reject noise that is on both signal-leads simultaneously -- is determined by the precision of matching of the two 100K resistors to 0.1%, and the two 10K resistors to 0.1%. The exact 100K-to-10K ratio (i.e. 10:1) is not particularly important, and will be good to +/-2% with typical 1% resistors. (All four can be matched for very precise 10:1 division, but the resistors themselves can drift with temperature and time). The resistors should also not "drift" too much with temperature; since they will, at about 100 parts per million per degree C, they all should be of the same metal-film type. The recommended type is a tempertaure-time-voltage-stable metal-film 1/4 watt resistor such as the Vishay CMF55-type (commercial type similar to the RN55D type).
The recommended approach is to buy a bunch of decent resistors (e.g. from Mouser at www.mouser.com, a quantity of 100 cost about $11.00 US, a 1000 cost about $25.00 US) and then sort them into 0.1% categories. Unfortunately this requires a digital ohmmeter. Another approach is to just buy precision resistors (at about 10x the cost). Other approaches TBD.
Bill of Materials (BOM)
The following BOM specifies relatively good-quality components. Prices of the resistors assumes a 100-piece buy; all other prices (e.g. bandgap reference, LM358AN, potentiometer) are single-unit. 100-piece buys would cut the cost by at least 1/3 if not more. Substitution of lesser-quality components (e.g. carbon composition resistors, generic LM358N, two 1N4148 signal diodes in series in place of the bandgap reference, single-turn "trimmer" potentiometer) would cut the cost even further but significantly degrade performance.
| Part | Description | Preferred Manuf | Preferred Part Number | Equivalents | Qty | each, USD | USD |
| C1, C2 | Capacitor: 0.1 microfarad (uf), 10%, 63 V, metallized polyester, 0.20 inch lead spacing, box style | Visay/ Roederstein | MKT1817410065 | AVX, Vishay/Roederstein, Wima, etc. | 2 | 0.25 | 0.50 |
| IC1 | IC: Dual op-amp, single-supply 3 volt min, 3 mv max input offset, 30 nA input offset current max, 8-pin DIP | Fairchild Semi | LM358AN or LM258N | Fairchild, ST Micro, National Semi, Texas Instruments, etc. | 1 | 0.28 | 0.28 |
| P1 | Potentiometer: 10K 15 Turn cermet rectangular: 0.2+0.3 x 0.1 inch lead spacing | Bourns | 3006P-1-104 | Vishay/Spectrol, Visay/Sfernice. BI technologies, etc. | 1 | 1.55 | 1.55 |
| R1, R2 | Resistor: 100K, 1%, 1/4 watt commercial, metal film, matched to 0.1% | Vishay | CMF55100K00FHEK | Generic: RN55D1003F | 2 | 0.11 | 0.22 |
| R3, R4 | Resistor: 10K, 1%, 1/4 watt commercial, metal film, matched to 0.1% | Vishay | CMF5510K00FHEK | Generic: RN55D1002F | 2 | 0.11 | 0.22 |
| R5 - R9 | Resistor: 10K, 1%, 1/4 watt commercial, metal film | Vishay | CMF5510K00FHEK | Generic: RN55D1002F | 5 | 0.11 | 0.55 |
| Z1 | IC: Bandgap reference, 1.225 volt fixed, 1%, TO-92 package | ST Micro | TS821AIZ | Any 1.225 - 1.235 bandgap in TO-92 | 1 | 0.64 | 0.64 |
| PL1 | PL1: Plug, mono audio 3.5mm (1/8 inch), black plastic handle | Kobicon | Mouser 171-PA-3191-1-E | Generic | 1 | 0.71 | 0.71 |
| PL2 | Plug: USB A-type, naked (no wires) | Kobicon | Mouser 154-UAW16-E | Generic USB cable | 1 | 0.68 | 0.68 |
| PCB | PC Board: | TBD | TBD | ||||
| wire | Red, Black, Blue multistranded (i.e. flexible) insulated wire 24 AWG | TBD | TBD | Do not use solid wire -- it is insufficiently flexible. | |||
| Total | 5.35 | ||||||
| Minigrabber" test clip with wires AWG -- red, black | TBD | TBD | Buy double ended and cut in half | 2 | 4.50/2 | 4.50 | |
| Optional | |||||||
| R10 | Resistor: 2K, 1%, 1/4 watt commercial, metal film | Vishay | CMF5510K00FHEK | Generic: RN55D2001F | 1 | 0.11 | 0.11 |
| LED1 | LED: green diffused 20 millicandela, 2.2V forward voltage, T-1, 0.1 inch lead spacing | Kingbright | WP7104SGD | Any color, any manufacturer: Avago HLMP-3507 | 1 | 0.13 | 0.13 |
| Socket | Socket: 8 pin DIP gold-flash contacts | Circuit Assembly | TBD | Any gold-flashed 8-pin DIP socket or equivalent | 1 | 0.50 | 0.50 |
More detail to follow
Construction Details
> This circuit was actually prototyped -- without use of an oscilloscope -- on a "plug board" purchased from Radio Shack. Components were purchased from Radio Shack (the audio jack, 15 turn potentiometer, Micronta digital voltmeter) and from www.mouser.com (resistors, bandgap reference, LM258N) and some old Roederstein capacitors were taken from a sample kit. A USB cable was cannabalized: with an Exacto knife cut off the "B" end flush, carefully slice the exterior insulation around the circumference about 4 inches from the end, and then carefully cut the insulation lengthwise to expose the 4 wires inside (practice first!). Pull back the braided shield and snip off, likewise peel away the interior aluminum shield and cut off.
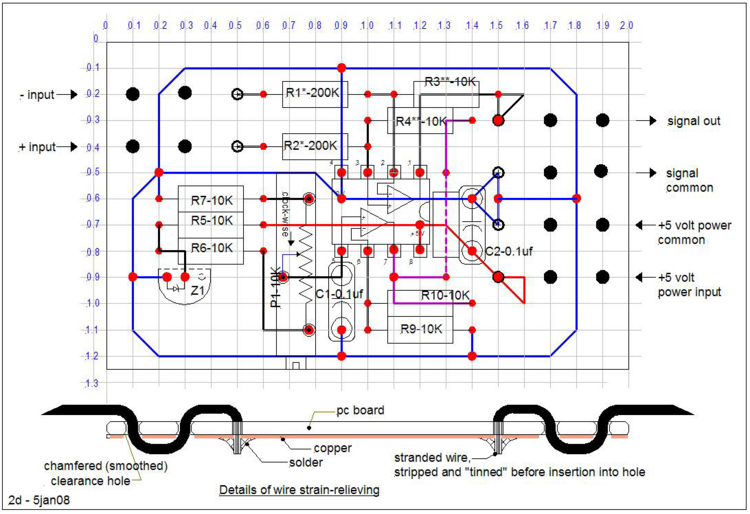
Point-to-point wiring: The most likely construction method will be on a piece of "perf" board (unplated PC board material perforated on 0.1 inch spacings) configured as shown in the assembly drawing -- a USB connector and an audio jack both connected to a PC board some distance (e.g. 1/2 meter) away, plus some E-Z-Hook "ball clips" about 1/2 meter long for input (see www.e-z-hook.com; E-Z-hook also sells very flexible 22 AWG lead wire -- highly recommended for this application).
The circuit common, +5 volts, etc. should be bare, solid, tinned copper wire such as 26 or 28 AWG. Carefully "stitch" the circuit common (i.e. run the common along the bottom except at the corners where you stich the wire to the top surface and then stich it back down again to the bottom), then solder various "tie-downs" to make a sufficiently-durable structure. Bend the components' leads (the resitors are shown on standard 0.40 inch lead-spacings) and use the leads to "wire" from point to point. Put the ICs in last.
Solder overheating, cold-solder joints, etc: Use rosin-core solder (expensive). Practice your technique. The components can take a few seconds of soldering heat. But prolonged application of heat, or the use of huge soldering tips (e.g. don't use a soldering "gun"), and monster blobs of solder will overheat the matched resistors R1* and R2*, R3** and R4**, the bandgap reference Z1 and the IC, melt away the PVC insulation of the lead-wires, etc. Best practice is to bend/circle leads around one another and then apply small amounts of solder. Be on the lookout for "cold-solder" joints -- places where the solder doesn't flow nicely and leaves the connection "unmade".
Home-made PC board: A better form of assembly is on a single-sided piece of copper-clad pc board drilled or punched on 0.1 inch centers drilled with approx 0.032 inch holes. (The copper will be on the bottom, the components on the top). Carefully remove etch with a Dremel tool -- the trick is to remove, with a tiny burr, as little etch as possible. Use a cork-backed, stainless steel ruler as a guide. If the copper is tinned, so much the better -- bare copper will tarnish; although this does not affect the circuit, soldering is more difficult. Another more difficult possibility is to buy single-sided unetched board. Carefully locate the holes (e.g. measuring and scribing with a dial caliper or pasting an accurate 1:1 drawing to the surface), mark each hole with a prick-punch (a sharpened steel nail will do), drill and then carve away etch with the Dremel tool.
Kits exist to etch pc boards. See www.mouser.com or www.digikey.com.
Conformal coating: Manufacturers use sprays (expensive) to "conformally coat" their boards for water-, dust- and fungus-resistance. Use multiple coats. See www.mouser.com or www.digikey.com.
Potting: The assembly should be put into a little plastic box, or "potted" or at least glued to a sheet of plastic (don't use wood -- it can absorb moisture and become conductive).
One approach would be to make or buy a box-mold and cast the assembly in a high-grade potting compound designed specifically for electronics. Once potted, unless it is in silicone rubber, the board cannot be repaired.
- Notes: If you plan to pot the assembly do not use an IC socket; solder the IC directly into the circuit. Test before potting. Do not expect nice adhesion of the potting compound to the wires. No potting materials stick well to vinyl insulation, the most common wire-insulation. If casting methods are used be sure to keep any light emitting diodes and the potentiometer adjustment out of the potting compound.
- Best molding/casting practice: Use only flexible RTV rubbers designed for the purposes of electronics molding (expensive). Hard molding compounds may shrink on curing and crack the components. Some RTVs may not cure properly when in contact with certain materials -- the result is a gooey, conductive mess hidden inside what appears to be a good "pot". Experiment -- plan to section a prototype.
- Do not cast with commercial silicone rubber -- silicone rubber outgasses acetic acid (i.e. vinegar), a corrosive.
- Do not use hard "potting" compound such as epoxy (expensive) or polyester resin (cheap). While clear polyester casting resin may work because it has low shrinkage, in general do not use hard potting compounds.
- Tools required: wire-stripping tool, Exacto knife, prototyping plug-board, little insulated jumper-wires (solid wire okay), ball clips, digital voltmeter, mold and molding materials if used.
- Soldering tools: rosin-core solder (NOTE: country-specific regulations may not allow use of lead-tin solder), soldering iron with small tip, solder-wick.
Best practices: The most difficult part of the design is how to assemble it into a robust object suitable for use by children. An assembly method might be as a part of the USB plug. But if the assembly is too long a child risks are bumping and injuring the connector. Given surface-mount components and a PC board the entire device can be shrunk into the connector with a cable for the audio jack and a pair of probes on a shielded cable. However, provision must be made for an external potentiometer-adjustment knob (the DC offset adjustment).
Commercial differential probes use batteries and an amplifier in a box connected by flexible leads to the test instrument, much as shown in the schematic.
More details to follow.
Revision History, simple differential amplifier
The design is subject to revisions as it evolves.
- REV 0: Prototype-test phase, redraw "layout" drawings, add info re E-Z-Hook to schematic & remove top-view symbols (2 Jan 08)
- REV 1: Correct "layout" drawing -- change potentiometer symbol from bottom to top view (3 Jan 08)
For software developers
- See tickets assigned to measure-activity on trac for ways to help out!
Brief overview of the code
- audiograb.py
- drawwaveform.py
- config.py
audiograb.py is the file that takes care of grabbing input audio samples. It uses a gstreamer pipeline in which the handoff signal of the fakesink element is used to intercept the data in the pipeline. Data logging is done in this class since we can use the sampling rate as a time reference; i.e. we know the sampling rate and also the number of elements in each buffer that is intercepted from the pipeline. So each atomic time interval is (1/Fs * bufferSize). This is the time interval after which we get a handoff signal.
drawWaveform.py is the class that handles the waveform drawing part. It creates and uses a cairo context to draw the background, the grid and the waveform. It uses a combination of pango and cairo for displaying the text as it was found out that cairo is itself not good at rendering text. All drawing occurs in the expose function which is the gtk expose event handler. It does drawing from the real time samples or from a file. In real time, it can either draw time domain or display the frequency domain samples. self.integer_buffer is one buffer that is obtained from audiograb.py and self.main_bufers is the buffer that accumulates all these buffers. The self.main_buffers is sampled at varying intervals of time, depending upon the frequency range selected, to form self.buffers which is the buffer that is scaled and drawn. self.main_buffers is sampled at a larger interval (set by self.spacing) for lower frequencies and at a shorter interval for higher frequencies. An example calculation is as follows. If we form 1 self.buffers by taking all consecutive elements, we would be sampling at 48khz. I have found that to draw a reasonable representation of a sine wave, one needs at least 8 -12 points. Hence the largest frequency that can be represented accurately is given by 48/12 = 4Khz, or less.Text is updated after every self.update_text expose events.
config.py contains all global variables.
Signals and timeouts used in the software
The handoff signal in audiograb.py is emitted whenever a new buffer is available. The signal handler is on_buffer which adds a gobject timeout. On timeout, _new_buffer is called which emits a custom signal new-buffer. The signal handler for this custom signal is _new_buffer in drawWaveform. Within _new_buffer, the new buffer is read and saved /stored. The expose event is queued in the main measure.py which causes the expose function to be called.
For content developers
I have yet to work on a to-do task list for the content. However, I wish to develop a complete page around each of the points (and more) enumerated in the Learning activities section mentioned above. Ideally I would want a short illustrative video on each page.
This page presents a solution for electrical signals to be input to the XO. For the corresponding problem on output, no such solution exists, but there are some ideas at Electrical output. One idea there is to use the modem connection as finely-timed output - clearly, this would also work for increasing the number of input signals, though it is probably more useful for timing than for fine measurement.
* WARNING: ELECTRICITY CAN KILL. RISK OF ELECTROCUTION: DO NOT, UNDER ANY CIRCUMSTANCES, APPLY AC LINE VOLTAGES FROM A WALL OUTLET OR MOTOR-GENERATOR OR OTHER POWER SUPPLY (E.G. CONVERTER OR INVERTER) INTO THE MICROPHONE INPUT, THE SPEAKER OUTPUT, OR ANY USB PORT.
- There is a risk of electric shock resulting in death if the XO is used to measure mains voltage by direct connection. The audio input components are not designed for this and damage is likely to result. The extent of the damage is not easily predictable. The only components intended for mains voltage are the pins of the AC adaptor. Dangerous voltages applied to the audio input may also be emitted on audio output, USB connectors, or the DC power input jack.
Temperature monitoring system
How to build
You need-
- LM35 or any similar temperature sensor
- USB connector
- Audio connector
- Some wire or a cable. You could use cut a USB cable and an audio cable from the middle
- Measure Activity
The USB port has two pins which are of use to us. One is the ground and the other one is the one which provides a constant 5V. When you cut a USB cable in the middle, you could find out by trial-and-error by using a simple Voltmeter which are the two wires corresponding to these two pins. If you don't have a Voltmeter, try using a simple LED and a resistor to do the job.
We provide the +5V that this temperature sensor requires from the USB port. For this we connect the +5V wire to the Vcc of the sensor. We connect the ground to the Ground terminal on the LM35. We connect the Vout of the sensor to the Audio Input jack.
How to operate
Set the Measure Activity to be in the DC Mode and Turn Off the Bias Voltage. Both these can be controlled by using the first two buttons on the 'Measure Toolbar'.
The DC voltage is proportional to the temperature . The voltage that the XO can read varies between 0.9 V - 3V. The output of the sensor would be from 0-5V, so, for for different ranges of temperature one can either use a potential divider for higher ranges or using resistances add a bias to the Vout of the sensor from the +5V of the USB again.
Learn More
The LM35 has an output voltage proportional to the temperature. The scale is 0.01V/C. Read the [Data Sheet] to learn more.
One could log temperature over a period of time - say at an interval of 1 hour for a complete day to know when is it the hottest / coldest.
Video
(put video with flame demonstration here, put pictures here - including ckt diagram)
Intrusion Alarm system
How to build
You need-
- A toy laser
- An LDR or a Photo-Voltaic cell
- Some wire
- Measure Activity
Open up the toy laser and remove the batteries. Connect a wire to the spring inside and connect the other wire to the metallic body inside. Connect both of these wires to the USB power supply wires. Click here to learn about how to determine the USB power supply lines.
Connect the LDR to the Audio Jack.
How to operate
Set the Measure Activity into DC Mode and turn ON the bias voltage. Setup the LDR and the laser to be in line and facing each other. When the path of the laser light gets cut, you should observe a marked increase in voltage indicated by the position of the waveform shifting up.
Learn More
The resistance of the LDR - Light Dependent Resistor is proportional to the amount of light falling on it. The potential drop across the LDR is dependent on the resistance of the LDR. When the path of the light gets cut, the resistance increases hence we notice a marked increase in voltage indicated on the screen.
Click here to know more about Bias Voltage and how it works.
Video
Put a video here and some pics
Acknowledgments
Thanks to Mitch Bradley and John Watlington for their help and suggestions during the development of the Activity.
Contact
Contact Arjun Sarwal through -
Email : arjun@laptop.org
IRC : arjs on #olpc #sugar


