Help Activity refresh/Chapter/The Frame: Difference between revisions
mNo edit summary |
(add File:Frame_only.png, better than nothing ;-)) |
||
| Line 7: | Line 7: | ||
Auto Frame Settings: Placing the cursor near the corners or edges will activate an auto frame display. The default setting can be changed to do this more or less frequently or ''never''. From the Home view go to My Settings and click Frame. Use the slide bar to adjust the settings and click the check mark (ok). |
Auto Frame Settings: Placing the cursor near the corners or edges will activate an auto frame display. The default setting can be changed to do this more or less frequently or ''never''. From the Home view go to My Settings and click Frame. Use the slide bar to adjust the settings and click the check mark (ok). |
||
[[File:Frame_only.png|800px|The Frame]]<!-- ToDo: annotation would be nice --> |
|||
MISSING IMAGE |
|||
The Frame view: |
The Frame view: |
||
Revision as of 21:34, 8 April 2012
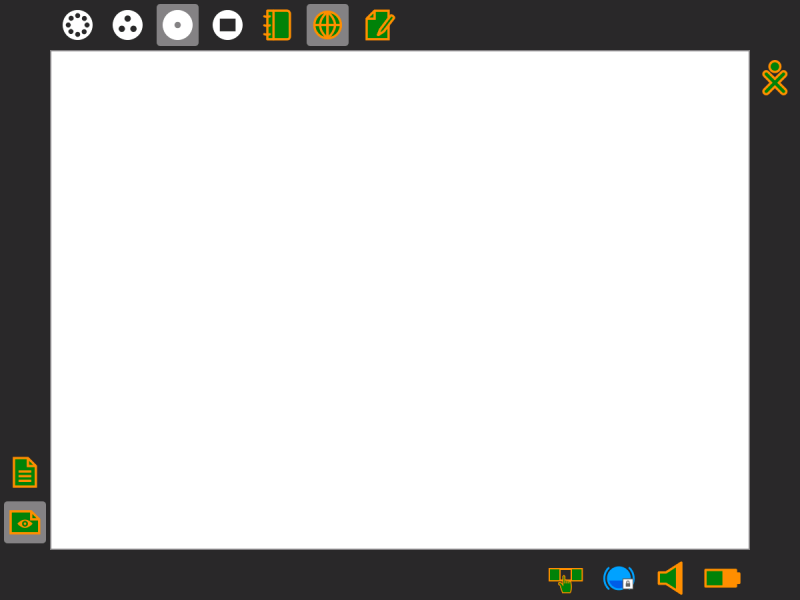
The Frame is the black border around the screen that holds the Activity taskbar, clipboard, wireless connections, battery level, incoming invitations and notifications, buddies, and global information that is used across all views.
Accessing the Frame: You can access the frame from any view. View the frame and switch between a full page view and a frame view by using the Frame Key on the keyboard, and/or by moving the cursor to the edge or corners of your screen, depending on your setup.
Frame Key (keyboard shortcut): The Frame key is the square icon on the upper right hand corner of your keyboard. It toggles the presence of the Frame on the screen.
Auto Frame Settings: Placing the cursor near the corners or edges will activate an auto frame display. The default setting can be changed to do this more or less frequently or never. From the Home view go to My Settings and click Frame. Use the slide bar to adjust the settings and click the check mark (ok).
The Frame view:
- Clipboard: The left edge of the Frame serves as a clipboard. You can drag objects such as images and text to and from the clipboard, and from and to activities.<ref>http://wiki.sugarlabs.org/go/Human_Interface_Guidelines/The_Laptop_Experience/Zoom_Metaphor</ref>
- Zoom menu: The Zoom menu (icons matching the important keyboard shortcuts toward the keyboard top left) appears on the upper-left edge of the Frame . Use it to move between the four Sugar views: Neighborhood, Group, Home, and Activity.
- Running Activity list: The sequence of currently started Activities appears on the top edge of the Frame in the order that they were started. The active Activity is highlighted. (The Journal always appears here first.) Here you can see open Activities, and save, close or switch between them.
- Sometimes an unlabeled circle appears here. It may represent an additional full-screen session started by an Activity whose icon already appears in the top edge of the Frame or an Activity that is having trouble completely starting.
- Invitations also show up on this portion of the Frame. They appear as icons in the color of the person who sent them. Hover and you can see who it is and join in.
- Active buddy list: People you are currently collaborating with appear on the right edge of the Frame.
- System status: Battery, speaker (volume), and network status appear on the lower edge of the Frame.
- External Storage Devices: External thumb and hard drives also appear on the lower edge of the frame. You can use them either in this view or in the Journal view.
MISSING IMAGE
You can drag items on the clipboard into Activities. A hover menu also lets you remove them from the clipboard, open them in an Activity, or save (keep) them in your Journal.
See http://wiki.sugarlabs.org/go/Design_Team/Designs/Frame
References: <references/>
