Emulating the XO: Difference between revisions
(Added missing "translations" tag.) |
(→Emulation for Development: Make a link description less misleading. Unfortunately, it suggests the recently moved page's title was not quite right.) |
||
| Line 21: | Line 21: | ||
[[Emulating the XO/Help and tips]] may help. Please report your experiences in [[User Feedback on Images]]. |
[[Emulating the XO/Help and tips]] may help. Please report your experiences in [[User Feedback on Images]]. |
||
There are [[ |
There are [[Emulating the XO/Limitations of XO disk images|limitations with XO disk images]]. |
||
=== Development using QEMU === |
=== Development using QEMU === |
||
Revision as of 21:13, 26 May 2007
Quick Start
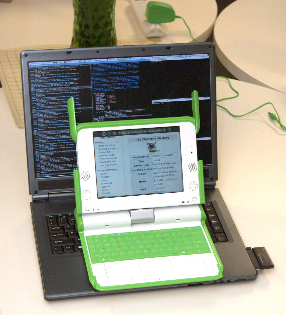
To set up a "virtual XO", and get a taste of the XO software, see Quick Start.
Alternatives to emulation
One way to run oplc software is using an emulator on your pc. See Software for other options. Compared to using a developer image LiveCD, it might be harder to set up, but easier to develop on. Compared to installing sugar, easier, but harder.
Emulation for Development
The most common approach is to use QEMU with kqemu acceleration. See Quick Start for the basics. But we will use a different .img, one with a few extra utility programs. See OS images. Including the latest stable build.
Instead of qemu, you can run VMware, and there are addition options on a Mac.
Emulating the XO/Help and tips may help. Please report your experiences in User Feedback on Images.
There are limitations with XO disk images.
Development using QEMU
If you wish to develop software on an emulated image, you will usually want a connection between your host and the laptop image.
You need a "*-devel*.img" image, rather than a standard (non-devel) one. The -devel image has extra software like sshd and wget.
Get network working on the laptop. See Using QEMU for Troubleshooting#Network. A simple echo ifup eth0 >> /etc/rc.local , run as root on the laptop, should do it. You should now be able to surf with the laptop's web activity. Under QEMU the Laptop image can see the host as IP address 10.0.2.2 .
Next, you have several alternatives:
- SSH using qemu -redir tcp:2222::22. (a good first approach)
- First-time setup
- Get the image's network working.
- Change the image's root password.
- Log into the image as root (no password needed yet!), type passwd , and then give it one. Complaints about "BAD" passwords won't stop things from working.
- Logging in as root is easy in qemu - you have a console window. Elsewhere...(? someone else will need to fill this in)
- Whenever you run qemu, add the argument -redir tcp:2222::22
- You can now log into the laptop image, from your real machine, using ssh. And you can use scp, etc.
- First-time setup
ssh -p 2222 root@localhost     # simple
ssh -o NoHostAuthenticationForLocalhost=yes -p 2222 root@localhost  #avoids annoying warning
- SSH using a key. (if ssh passwords get annoying, you can try this)
- If you create an SSH server on your host and install a key on your Laptop image that has logon rights for that server, you can ssh from the OLPC to your host. This avoids password typing.
- Adding platform-specific instructions might be useful? MitchellNCharity 15:59, 21 May 2007 (EDT)
- Using a web server. (if you don't want to deal with ssh, and have a webserver)
- If you have a web server, you might simply download stuff onto the laptop using the laptops's web browser.
