User:Nersesar
Registering
First of all, in order to upload a file on OLPCWiki, you have to be logged in.
If you have an OLPCWiki account, then you can go to the login page, by clicking on log in/create account link on the upper right corner of any OLPCWiki webpage. Type your Username and Password, and click the Login button.
If you do not have an account, then go to the same login page. Click on the Create an Account link; it will redirect you to the registration page. Type your future Username, Password. Then retype your password. Typing e-mail address and real name is optional.* Then click Create an Account button. Now you have an OLPCWiki account and you can follow the directories given above to log in.
* On the registration page you may be also asked to write the answer to mathematical addition or substraction. Don't forget to do that as well !!!
Uploading a File
Once you are logged in, you can continue by clicking Upload file link, which is among the links on the left side of any OLPCWiki website. You will be redirected to the upload page. Click Browse... button and choose the image(or other supported file) you want to upload. Page will automatically put the original file name and extension on Destination filesource; however, you can change it to a different one. Just keep in mind that this the name you wrote in Destination filesource will be the name you will be using in the scripts, and not the name of the file in your computer.
Image Script
To post an image you type, for instance
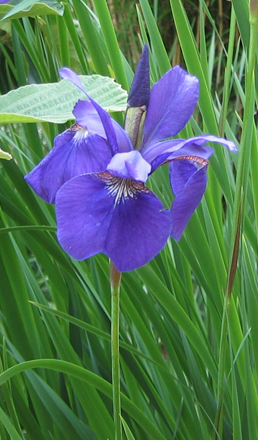
[[Image:Single_iris.jpg]]
It will bring you the following picture: 
You can additional features to this picture; first, let us start with making a frame for it:
[[Image:Single_iris.jpg|frame]]
Now try out the following:
[[Image:Single_iris.jpg|frame|left]]
You can also try out
[[Image:Single_iris.jpg|center]]
or
[[Image:Single_iris.jpg|frame|left]]
It is also possible to resize images with the following script
[[Image:Single_iris.jpg|100 px]]
Thumbnails are available as well; however, from this point on I will suggest to take the following general script:
[[Image:{name}.{extension}|thumb|{size}|{align}|{title}]]For example:
[[Image:Single_iris.jpg|thumb|220px|center|Ceasar Iris]]
It will be good if you use this style of writing the script, because otherwise it simply may not give you the desired result. For additional, information you can use this link on extended image syntax
Another cool thing you can do with this editting language is that you can create image galleries. Start with the following: type
<gallery caption="My Gallery">
</gallery>
This text actually creates a gallery with name "My Gallery"*.
*For some reason the name of the gallery does not appear on OLPCWiki, although it works on Wikipedia.
Now if you want to add some pictures to gallery, write the following:
<gallery caption="My Gallery">
Image:Single_iris.jpg|Single Iris
Image:BuntzenWinter.jpg|Buntzen Winter
Image:Monday.jpg|Monday
</gallery>
The width of gallery is 4; thus, if you add two more pictures you will get a new row:
<gallery caption="My Gallery">
Image:Single_iris.jpg|Single Iris
Image:BuntzenWinter.jpg|Buntzen Winter
Image:Monday.jpg|Monday
Image:SnowLake.jpg|Snow Lake
Image:Sunset.jpg|Sunset
</gallery>


