XO1.75 Bringup
This page lists goals and plans for initial bringup of the XO 1.75 A1 motherboard, the first prototype of the XO-1.75 Laptop.
Status
Note that a check in any one of the two columns is generally sufficient to prove that the hardware works.
| Subsystem | OFW | Linux | Notes/Reference |
|---|---|---|---|
| CPU Boot | X | X | |
| Serial port | X | X | |
| PS/2 KB & Touchpad | X | X | XO_1.75_HOST_to_EC_Protocol |
| USB | |||
| SD (Int/Ext) | X | X | (Only at 25MHz so far) |
| DCON/Display | X | ||
| Audio playback (Int/Ext) | |||
| Audio recording (Int/Ext) | |||
| SDIO WLAN | X | ||
| EC/Host Communication | Partial | X | SPI hardware seems to be working |
| Battery charging | X | X | |
| EC SPI Flash Prog. | NA | ||
| OFW SPI Flash Prog. | X | NA | |
| Camera | X | ||
| Xorg | NA | X |
Goals
The goal of a A-phase board bring-up is get a small number of boards to an acceptable state of functionality. At this point, a larger number of boards are modified to match and distributed for both extended testing of basic functionality (esp. memory stability) and development of software to access further functionality.
The following are the goals of this bringup:
- EC code booting and controlling the power sequencing properly
- CPU booting Linux on top of OFW
- Reliable memory and internal SD operation from OFW and Linux
- Reliable use of USB ports from OFW
- Support for the display and keyboard from OFW and Linux
- Support for reprogramming the EC SPI Flash from CPU
Non-goals
We can go home even if these aren't working
- Proper operation of audio interface
- Proper operation of the wireless LAN
- Proper operation of the battery charging subsystem
- Camera
- X under Linux
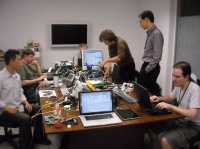
Personnel in Taiwan
- Wad (EE), Gary Chiang (EE), Richard (EC/OFW), Mitch (OFW), Paul (EC/Linux), Lennert (Linux) and Chris (Linux) from OLPC
- Mars (PM), Eddie (PM), Justin (EE), Beckham Chen (EE), Bryan Ma (EC) from Quanta R&D
- Greg from Marvell
Tools
- +3.3V SPI FLASH programmers - preferably clip-on - qty 3 (Mitch will bring one clip)
- +3.3V/+1.8V SPI FLASH programmers (2 purchased, Gary to obtain)
- Marvell (Bonnell) Debug dongles - qty 3 or more (Richard [1] and Mitch [1] to carry)
- Marvell JTAG box - qty 3 (Richard [1] and Mitch [1] to carry)
- Does the eXtreme Debugger software work under Linux or Wine? If not, we may need another Windows system (in addition to Mitch's laptop) to run it. Perhaps we can borrow one from Quanta - or maybe we could try running it under Windows on an XO, or in an emulator on a Linux laptop.
- Richard got the XDB software working on his Linux laptop, using XP inside VirtualBox.
- Does the eXtreme Debugger software work under Linux or Wine? If not, we may need another Windows system (in addition to Mitch's laptop) to run it. Perhaps we can borrow one from Quanta - or maybe we could try running it under Windows on an XO, or in an emulator on a Linux laptop.
- Marvell Bonnell unit with special SPI cable added (Richard)
- XP for XO SD cards (Marvell tools only supported under XP)
- XO-1.5 (for programming and barter --- wad [2] and Richard [1] to carry)
- Serial adapters (wad [6])
- SD cards, USB sticks (wad to carry)
- Access Point (Richard WRT54GL, WRT160N, [dd-wrt])
- Power strips (wad [2] to carry)
- Needle-probed voltmeter (wad)
- XO Serial connectors and SPI headers (wad)
- XO-1.5 Power supplies (wad [3])
- A screen, keyboard, touchpad, battery cabling, microphones, speakers, cameras (wad to carry)
- +1.8V capable WLAN cards (wad [3])
- 5 port XO 1.5 power supply (richard)
- SD card reader/writer (richard (1) wad (1)
Sequence of Events
- Oct. 15, 2010 - A1 boards are SMT assembled in Shanghai
- Oct. 17/18 - EE/EC/OFW Team arrives in Taipei
- Oct. 18 - Boards arrive and bringup starts
- Oct. 20 - First day at Quanta for Mitch
- Oct. 21 - Linux team hopefully has something to work with
- Oct. 29 - Lennert leaves
- Oct. 30 - Hopeful end date for bringup
- Nov. 1 - Chris returns to 1CC
- Nov. 3 - wad returns to 1CC
Hardware
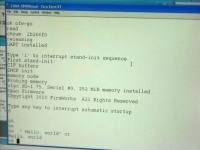
So far, we only have one blue wire to the A1 board. Two resistor values had to be changed, and one capacitor removed, but otherwise we have gotten the original design all the way to booting OFW without changes!
The power supplies are individually checked out on a couple of boards, then they all will be powered up allowing EC and first boot testing to proceed. Once OFW is running, we start some long-term memory testing. Hardware validation won't really happen until after bringup. At this point, all hardware testing is done as part of software bringup.
For more hardware documentation, see XO-1.75 A1.
Memory Checkout
In case the team is ready to test the memory before I (Mitch) arrive on Wednesday, I have prepared a CForth image that can be loaded into SRAM via JTAG (XDB). You can "dl" memory setup and test scripts into it. You don't need SPI FLASH - you can JTAG it right into SRAM very quickly.
To use it, get http://dev.laptop.org/~wmb/cforth-xo175.bin and http://dev.laptop.org/~wmb/cforth.xdb . Put them in XDB's working directory (#XDB's_Working_Directory), renaming cforth-xo175.bin to cforth.bin. Start XDB with the configuration jtag/SoC/ARMADA/ARMADA610_V6.xsf, and type in the XDB command window:
batch "cforth.xdb"
CForth should give you a prompt on the USB serial device (38400 baud) on the debug dongle (via UART1 on the SoC).
I will upload some test scripts that you can dl soon - check this space later for more details.
You probably won't need to recompile CForth, since you can add stuff just by dl'ing source, but if you should need to, you can get the source from git+ssh://dev.laptop.org/git/users/wmb/cforth . The build directory is build/arm-xo-1.75 - just type "make" therein. You will need an ARM cross-compiler. Edit src/cpu/arm/compiler.mk to point to your cross-compiler installation.
There is a Bonnell version in get http://dev.laptop.org/~wmb/cforth-bonnell.bin . That is the version I have tested. The difference between the XO and Bonnell versions is which UART is used (UART 3 for Bonnell and UART 1 for XO) and which GPIO pins it is connected to (51,52 for Bonnell and 29,30 for XO). The code that sets up the UART via those pins is init_io() in src/platform/arm-mmp2/consoleio.c and src/platform/arm-xo-1.75/consoleio.c .
Test Scripts
(I will be uploading more scripts soon; I'll announce on email)
- http://dev.laptop.org/~wmb/clockset.fth - Defines "clk-fast", which boosts the clock frequencies for the CPUs and the DRAM, supposedly to 800 MHz for the CPU cores and 400 MHz for the DDR3.
- http://dev.laptop.org/~wmb/initmfpr.fth - Sets up the pin muxing and GPIO directions for the XO board.
- http://dev.laptop.org/~wmb/inittwsi.fth - Turns on timers (so us and ms will work) and inits all the TWSI channels.
- http://dev.laptop.org/~wmb/initdram.fth - Inits the memory controller for the XO DRAM.
- http://dev.laptop.org/~wmb/initdram.xdb - XDB script to init the memory controller.
Modifying the Memory Init Scripts
The memory init scripts initdram.fth and initdram.xdb were auto-generated from a source file that lists the timing parameters separately, calculating the magic values to punch into registers. It's in the OFW source tree at cpu/arm/olpc/1.75/xo-dram.fth . If you need to fiddle with any parameters, it might be easier to modify that file and regenerate the scripts, instead of trying to hand-edit the hex values (or maybe not).
Here is how to regenerate the scripts after editing xo-dram.fth :
 cd cpu/arm/olpc/1.75/build
 make   # This won't completely work, but it will set things up for the next step
 ./build draminit
The result will go to stdout and you can cut and past it into a new initdram.fth file.
To make the XDB script (from the same directory):
  ./build
  ok fload ../dram.fth
  ok fload ../dram-xdb.fth
  ok fload ../xo-dram.fth
  ok bye
Memory Test Commands
In the following commands, if no error is encountered the error address returned is -1.
lfill ( address length value -- )
lcheck ( address length value -- error_address )
inc-fill (address length -- )
inc-check (address length -- error_address )
random-fill ( address length -- )
random-check ( address length -- error_address )
.table
what
XDB's Working Directory
XDB's default working directory is ~, which is /Documents and Settings/<yourname> on Windows. You can change that working directory in the XDB config file. To do so, start XDB, and after you have selected the config file but before clicking Start, click Settings and edit the Working Directory field in the General tab.
Fixing the Fuses
The Marvell CPU chips that we got for the A1 bringup came from the factory with the wrong fuse settings. To fix them, you need a machine than can run XDB . It needs a Quanta debug board and a 38400 baud serial connection to the mini-USB port on that debug board.
Get http://dev.laptop.org/~wmb/refuse_kit.zip and unpack it in C:\Program Files\Marvell\XDB5.0\xdb\configurations .
Connect the debug board to the JTAG dongle and to the board to be fixed. Turn on the board power.
Start XDB.
Select the "cforth.xsf" configuration file and click "Start".
Un-maximize the XDB window and expose the serial window so you can see messages from the board.
Click the FUSE button at the left side of the XDB button. After a few seconds you should see a message in the serial window saying the fuse programming succeeded.
Linux
After initial boot, this is mainly driver testing of hardware as functionality is confirmed with OFW.
- Initial boot
- USB
- SD
- Video
- DCON and OLPC display
- Audio
Miscellaneous
Documentation
Some of the documentation is becoming available on the XO 1.75 A1 board page.
Early documentation may be obtained from a secure FTP site on dev.laptop.org:
sftp://dev.laptop.org/home/docs/1.75/
sftp://dev.laptop.org/home/docs/marvell/
If you already have a login on dev, let wad know and he will get you access privileges.
Information is also available on the Team Tech wiki.
Lodging
We will be staying at:
Our recommended medical provider is:
- The Taipei Adventist Hospital - English speaking, decent care, just make sure to bring your own soap, towel, and arrange for outside food delivery. There is a Burger King across the street, so your confederate can smuggle in food, and then answer "yes" to the question "Is that a Whopper in your pocket"?

