XO 1.75 JTAG
A description of the JTAG interface on XO-1.75 Laptop production models (C1,C2).
Description
The JTAG interface on the Marvell Armada 610 SoC allows for complete testing of the devices as well as detailed control of program execution on any processor core. It was used during the initial bringup of XO-1.75 motherboards, before we had a working firmware to preload onto the OFW Flash ROM.
As all XO-1.75 onboard Flash ROMs have an interface for in-circuit programming, JTAG has rarely been used since the initial bringup. It is still useful for deep debugging of the onboard processors, and has been brought out to pads (CN16) on the "top" (or inner) side of the motherboard, starting with the B1 pre-production model.
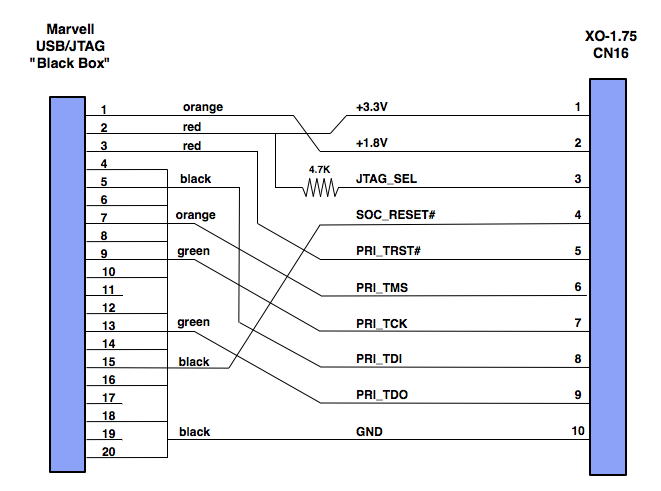
The intended connector for the motherboard is a 10 position 1.25mm Right Angle Shrouded SMD connector, such as the Molex Picoblade 53261-1071 (Digi-key WM7628CT-ND). The corresponding 10 pin plug is the Molex 51021-1000 (Digi-key WM1728-ND) which conveniently uses the same contacts as our serial adapter cables.
Additional Documentation
The following have most of the information needed to connect to the JTAG port:
Marvell USB/JTAG Adapter
In order to use the Marvell USB/JTAG adapter, you will need to solder the Molex Picoblade (chosen because it is much easier to solder than a flex cable connector) connector to the motherboard, and use a special cable:
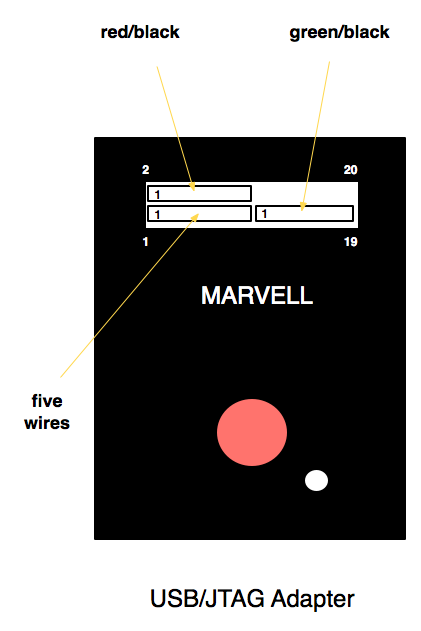
This is connected to the Marvel USB/JTAG adapter as:

