Demo notes/542
This page describes the basic instructions for Build 542, the Trial 2 Build for the B4 laptops. (See Hardware release notes, Software release notes, and Library release notes for additional information).
Contents
Important Notes
Please note that the B4 laptops are Beta units and that the software is Alpha. We expect that the Trial-3 software will be our first Beta software release. There are bugs (please refer to the bug tracking system at http://dev.laptop.org), and not all components are operational yet.
- There are still some outstanding issues with power management; battery life will improve over time.
More detail regarding the status of various software components is available on the OLPC Trial-2 Software Release Notes page in this wiki.
Getting Started
An overview of the laptop

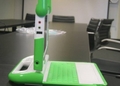
The laptop pictured above is a B2; this will be replaced by a picture of a B4 unit soon. The most significant changes between the B2 and B4 bezel options are that the position of the microphone has changed, it has been moved to the left side of the bezel, and the addition of LED indicator lights above both the camera and the microphone to indicate if one or both are turned on.
The keyboard


The center part of the Graphics Tablet, which is called the Trackpad (gray shaded area in picture), can be used as a pointing device. Move your finger around the Trackpad to move the cursor. The entire surface of the Graphics Tablet can be used with a stylus.
Opening the laptop
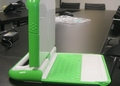
Position the handle away from you and lift both antennae ("bunny ears") up and towards you until the laptop clicks open.

The laptop display and the keyboard are connected on a hinge. Lift the laptop display up and hold the keyboard down to open.

Note that the laptops in these figures are B2 units (B4 units have a dual-tone XO on the back of the machines).
Power on and power off

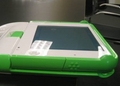
The Power Button is located in the bottom right-hand corner of the bezel surrounding the screen. Press the power button to turn the laptop on. The green power LED will come on immediately when turned on. However, it takes approximately two minutes for the laptop to boot.
Once the laptop is running, you can use the Power Button to suspend the laptop by pressing it briefly. To shutdown the laptop, you need to hold down the button for 10 seconds.
Using the laptop
Home View

Features of the Home View include the XO icon, the network-status indicator, the battery-status indicator, the Activity Circle (including the Journal), and the Frame;
If you leave the home view to engage in an activity, you can return to the Home View at any time by pressing the Home Key (circle with one dot) ![]() .
.
or by clicking on the Home Icon on the Frame (as per below).
The laptop can be shutdown from the hover menu on the XO figure in the home view. See image below.

XO icon
Each laptop is assigned a color dyad that is used as an identifier throughout the interface.
A menu appears when you place the cursor over the XO icon in the center of the screen. As of Build 542 (software build installed on this laptop), this menu is only used to shutdown the laptop. In the future, it may be used for setting user preferences, such as colors.
Activity Circle
The circle around the XO icon is used to display activities that are currently running on the laptop. The Journal is always displayed at the bottom of the circle (![]() ). You can resume an activity by clicking on its iconic representation in the circle.
). You can resume an activity by clicking on its iconic representation in the circle.

Network status
The status of the wireless network is indicated by either a circle (mesh) or triangle (infrastructure) on the Home View. Details regarding connectivity are described below.

Battery status
The battery status is indicated by the battery icon. The icon fills with color from left to right to indicate the current charge. Moving the cursor over the battery icon provides a pop-up with more information. Please note that the battery LED is illuminated when the battery is charging; it varies from yellow to green. A red light indicates that the battery is running low.

Frame
The Frame always appears on the Home View. The Home View does not appear in any other view. You can toggle the Frame with the Frame Key, which is located on the upper-right corner of the keyboard ![]() or by moving the cursor to any corner of the screen (aka 'Hot Corners').
or by moving the cursor to any corner of the screen (aka 'Hot Corners').

- Circle with eight dots: This icon takes you to the Neighborhood View; you can view network resources and other users on the mesh network;
- Circle with three dots: This icon takes you to the Group View; you can see users you have identified as friends;
- Circle with one dot: This icon takes you to the Home View;
- Circle with rectangle: This icon returns you to the Activity View; you can resume work on your current activity.
Bottom icons (Keys to take you to activities)
Different builds have different collections of activities. In Build 542, the activities available are (from left to right on the menu bar):

- BlockParty: a falling-block game;
- Draw: a drawing activity;
- Calculate: a calculator;
- Write: a word processor;
- Chat: a text chat program;
- Etoys: a programing environment;
- Browse: a web browser;
- News: a RSS (Really Simple Syndication) news feed;
- Connect4: a Connect4 game (connect the dot);
- Watch and Listen: a multimedia player;
- TamTam: a music activity;
- TurtleArt: a programing environment;
- Record: a video capture activity.
Right-side icons (your XO buddies)
This menu found on the right-hand side of the Frame contains the XO icons of the people with whom you are collaborating on XO online projects.

Left-side icons (clipboard)
The menu on the left side of the Frame is for the clipboard. Most activities support drag and drop onto and off of the clipboard.


Neighborhood View

Neighborhood Icon
From the Neighborhood View (sometimes referred to as the Mesh View), you can see who is present on the network; which activities and objects are being shared; and which networks are available. You can access the Neighborhood View by pressing the Neighborhood Key (circle with eight dots -- ![]() ) or by pressing the Neighborhood Icon (see picture above).
) or by pressing the Neighborhood Icon (see picture above).
Your XO icon will appear in the center of the screen. Moving your cursor over an icon will bring up a menu that provides additional details or actions you can take. For example,
 .
.
Getting connected
Icon representation in the Neighborhood View include the circle for the mesh  and triangles for the infrastucture
  access points. (The access points are randomly color-coded.) By default, the Network Manager (software program internal to the laptop) first tries to connect to a School server; if the connection to the School server fails, the Network Manager tries to connect with an access point; if connection to the access point fails, the Network Manager connects to a mesh point on Channel 1. This searching process can take up to five minutes, since there are many channels to check and timeouts associated with each one. You can override the Network Manager by clicking on a triangle (access point). The interior of the triangle blinks while the connection is being established. The exterior of the triangle blinks when the connection is established. (If you are connecting to a WEP access point, you will be prompted for a hexadecimal key. We currently do not support WPA access point.)
More details regarding the connection:
- if you connect to an access point, your laptop becomes a mesh portal point&mdashother laptops in the vicinity will be able to connect to the Internet through your laptop;
- similarly, if there is another laptop connected to an access point, you can connect to that laptop&mdashand the Internet&mdashthrough the mesh;
- if there are no access points available, your laptop will default to a mesh point on Channel 1, which enables your laptop to connect to other laptops;
- please be patient; it takes the Network Manager up to five minutes to progress through a number of the options until it finds a suitable connection.
Joining an activity
Pressing on an activity icon from the Mesh View launchs that activity on your laptop as a collaboration. The details of the collaboration varies from activity to activity.
Adding a buddy
Hovering over an XO icon creates a pop-up window with the name of the person associated with that icon and a menu that can be used to add this person to your Groups View as a friend.
Group View

From the Group View (also known as the Friend View), you can see which friends are on the network. You can access this view by pressing the Group Key (circle with three dots -- ![]() ) or by pressing on the Group Icon (as per above on the Frame).
) or by pressing on the Group Icon (as per above on the Frame).
Activity View
You can initiate applications from the Activity View, and you can resume your current activity by pressing the Actitvity Key (rectangle --![]() ) or by pressing the Activity Icon (as per above on the Frame).
) or by pressing the Activity Icon (as per above on the Frame).
Activities
Multiple activities can run at once—moving between them by returning to the Home view (key with one dot—![]() ) and then clicking on an activity that you'd like to return to.
) and then clicking on an activity that you'd like to return to.
![]()
Every activity has an Activity tab that includes a Stop Icon  . Clicking on this icon exits the activity. Alt-C works -- in most cases—as a shortcut for exiting activities. (The Keep Icon
  will be used for version control in the Journal.)
An instance of the activity can be renamed by typing into the text field ( ) on the Activity Tab.
Many activities can be run either stand-alone or shared with other users on the mesh ( ).
).

Journal
The Journal
details


The Journal is accessed from the Journal Icon (![]() ) at the bottom of the Activity Circle on the Home View.
) at the bottom of the Activity Circle on the Home View.
The Journal automatically logs your activities on the laptop. From the Journal, you can search by keyword and sort by activity or date. Clicking on an entry brings up a detail page from which you can resume an activity (by clicking on the Resume Icon  ) or copy its contents onto the clipboard (by pressing on the Copy Icon
  ).
).
The Journal also supports external media. When a USB key is inserted into the machine, the contents from the USB key are entered into the datastore of the laptop and become accessible through the Journal. Click on the USB icon  to access the content. You can also drag and drop Journal entries on to or off of a USB key.
Web Browsing

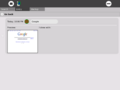
To launch the web browser, click the Globe Icon ![]() on the Frame. The browser has two tabs: the standard Activity Tab and a Browser Tab. The Browswer Tab has an address field, forward and backward history buttons, as well as a reload button.
on the Frame. The browser has two tabs: the standard Activity Tab and a Browser Tab. The Browswer Tab has an address field, forward and backward history buttons, as well as a reload button.
Etoys
Etoys start screen
The Etoys badge is used for sharing.

From the Home View frame, press the shooting-star icon ![]() ; the Etoys activity will load and present a launch screen.
; the Etoys activity will load and present a launch screen.
(Please see [www.squeakland.org] for an Etoys tutorial.)
TamTam
From the Home View Frame, click on the drum icon—![]() .
.

Use the keyboard to play sounds at different pitches.

Use TamTam Edit to compose music.

Use TamTam Synth Lab to create new instruments.
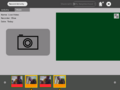
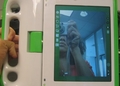
Record
The video and still image record activity is launched by clicking on the Camera (Eye) Icon—![]() . If you share the camera activity, then a Camera Icon appears in the Neighborhood View. Other users can launch the Record Activity from the Neighborhood View (
. If you share the camera activity, then a Camera Icon appears in the Neighborhood View. Other users can launch the Record Activity from the Neighborhood View ( )). Everyone shares pictures.

Record sharing
Record sharing


Watch and Listen
Watch and Listen is based on the Helix multimedia player. It supports a wide variety of audio and video formats.

Write
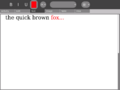
Write
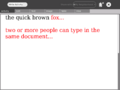
sharing


Write, based on the Abiword is abasic word processor. When shared, multiple people can simultaneously edit the same document (i.e., group editing) by launching activity from the Neighborhood View ( ).
).
Calculate

Calculator activity has the classic functions (sum, subtract, divide and multiply).But also scientific functions (cos, sin, exp, etc)
TurtleArt


TurtleArt is a programming environment that uses tiles.
Read


The Read (PDF) Activity allows you to share books on the mesh (in the Neighborhood View)  .
.
Chat


To start a chat, open Chat Activity by clicking on balloon icon—![]() . A Chat Icon will appear in the Neighborhood View on each laptop in the mesh: other users can join the chat by clicking on this icon (
. A Chat Icon will appear in the Neighborhood View on each laptop in the mesh: other users can join the chat by clicking on this icon ( ). Enter text at the bottom of the screen.
BlockParty
A Tetris-like game
Draw

This is an activity to make drawings and paintings.
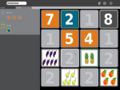
Connect4


Connect4 is a two-player game. Player One launches the game from the taskbar on the Home View. Player Two joins the game by clicking on the icon in the Neighborhood View (![]() ).
).
News Feed

An RSS feed.
Notes
Other Activities
There are many more Activities that can be loaded onto the laptop. Automatic installation is working in recent builds (547+) but not yet in Build 542.
Measure
Memory1

Memory2


Dual-resolution display
These are instructions for demonstrating both the color and the black-and-white modes of the display from any activity. In black-and-white mode, with the backlight off, the screen is high resolution and viewable in sunlight; it is the most energy-efficient setting.
On the top row of the keyboard is a long button with different-sized solid circles.

The two "radiant" circles control the backlight:
- Pushing the left-most circle dims the backlight; repeated pushing puts the display into B&W mode.
- Pushing the circle second from the left increases the brightness of the backlight and enables color mode.
(The two buttons on the right are for decreasing and increasing speaker volume.)
Handheld mode (or eBook mode)
When in this mode, keyboard and touchpad are covered, so only game controller buttons (which can be used for scrolling), camera, and microphone work.
Bring the display up to a 90-degree angle (and put the antennae down).
Rotate the display 180 degrees until it is facing backwards.
Lay the display down onto the keyboard.
Enjoy!


Bugs and or Known Issues
Keys that do not work
 — Journal search key
 — Bulletin-board key
 — Grab keys (on either side of the space bar)


