Demo notes/542/lang-he
| Translation of Demo notes/542 | original |
| english | עברית | changes |
מדריך למשתמש
דף זה כולל הוראות בסיסיות לגרסה ("בילד") 542, שהיא גרסת הניסוי מס' 2 המיועדת למחשבי לפטופ מסוג B4. למידע נוסף, ראו הערות לגרסת החומרה החדשה, הערות לגרסת התוכנה החדשה והערות לגרסת הספרייה החדשה (הקישורים הנ"ל מובילים לדפים באנגלית).
דף זה מתורגם לשפות אחדות והתרגומים משולבים במערכת הוויקי. להלן כמה גרסאות DOC הכוללות גם אלמנטים של ויקי:
- ספרדית - Image:Xo notes es-v2.pdf | Image:Xo notes es-v2.doc
- ערבית - Image:Xo notes ar-v2.pdf | Image:Xo notes ar-v2.doc
- צרפתית - Image:Xo notes fr-v2.pdf | Image:Xo notes fr-v2.doc,
- פורטוגלית - Image:Xo notes pt-v2.pdf | Image:Xo notes pt-v2.doc
- תאית - Image:Xo notes th-v2.pdf | Image:Xo notes th-v2.doc
- אמהרית - Image:Xo notes am-v1.pdf | Image:Xo_notes_am-v1_plus_font.zip | (צפייה בגרסת "וורד" .doc עשויה להיות כרוכה בהתקנת גופנים מיוחדים; גופנים אלה כלולים בקובץ מסוג zip.)
- הינדית - Image:Xo notes hi-v2.pdf | Image:Xo notes hi-v2 plus font-FINAL.zip | (צפייה בגרסת "וורד" .doc עשויה להיות כרוכה בהתקנת גופנים מיוחדים; גופנים אלה כלולים בקובץ מסוג zip.)
Contents
הערות חשובות
אנא שימו לב, מחשבי לפטופ מסוג B4 הם בגרסת בטא, אך גרסת התוכנה היא גרסת אלפא. גרסת הניסוי מס' 3 צפויה להיות גרסת הבטא הראשונה של התוכנה. יש עדיין באגים (למערכת המעקב אחר באגים, אנא פנו לאתר http://dev.laptop.org), ולא כל הרכיבים שמישים בשלב זה.
יש עדיין בעיות משמעותיות בניהול אספקת הכוח. אורך חיי הסוללה ישתפר עם הזמן.
פרטים נוספים על מצבם של רכיבי תוכנה שונים נמצא בדף OLPC Trial-2 Software Release Notes במערכת הוויקי הזאת.
התחלה
סקירת המחשב

נוריות נמצאות מעל המצלמה והמיקרופון, והן מורות אם אחד הרכיבים, או שניהם, פועלים.
המקלדת


החלק המרכזי של משטח הרישום, המכונה "משטח עקיבה" (הקטע בתמונה הצבוע אפור) יכול לשמש כמכשיר הצבעה (במקום עכבר). הניעו את האצבע על משטח העקיבה כדי להזיז את הסמן. אפשר להשתמש בחרט קהה על גבי כל חלק של משטח הרישום.
פתיחת הלפטופ
יש לאחוז בידית ולהזיז אותה ממך והלאה. יש להרים את שתי ה"אנטנות" ("אוזני החמור") ולכוון אותן אליך עד שנשמע קול נקישה.

יש להרים את "אוזני החמור"

הצג של הלפטופ והמקלדת מחוברים בציר. כדי לפתוח את הלפטופ, יש להרים את הצג, תוך החזקת המקלדת למטה.

הלפטופ נפתח בצליל נקישה

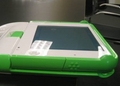
שימו לב, מכשירי הלפטופ בתמונות הם מסוג B2. למכשירים מסוג B4 יש ... XO על גבם.
הדלקה וכיבוי
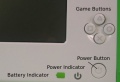
נורית ההדלקה

נורית ההדלקה נמצאת בפינה הימנית התחתונה של מסגרת המסך. יש ללחוץ על כפתור ההדלקה כדי להדליק את הלפטופ. נורית ההדלקה הירוקה תידלק מיד, אבל יש להמתין כשתי דקות עד שהמחשב ישלים את תהליך האתחול.
כשהמחשב פועל, אפשר לעצור אותו על-ידי לחיצה חטופה על כפתור ההדלקה. כדי לכבות את המחשב לגמרי יש ללחוץ על כפתור ההדלקה במשך 10 שניות.
שימוש בפלטופ
התצוגה הראשית

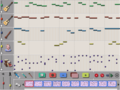
התצוגה הראשית כוללת את האייקון XO (צורת XO במרכז המסך), את מעגל הפעילויות (שכולל את אייקון הפנקס - ספר ועיפרון), את סמן מצב הרשת (מעגל או משולש הנמצאים מעל "מעגל הפעילויות"), את סמן מצב הסוללות (נמצא מתחת ל"מעגל הפעילויות") ואת המסגרת.
אפשר תמיד לחזור לתצוגה הראשית, גם לאחר כניסה לפעילות כלשהי, באמצעות לחיצה על הכפתור "בית" (מסומן במעגל שבתוכו נקודה) ![]() , או באמצעות הקלקה על האייקון "בית" (מסומן באותה צורה) הנמצא על המסגרת (כמתואר לעיל).
, או באמצעות הקלקה על האייקון "בית" (מסומן באותה צורה) הנמצא על המסגרת (כמתואר לעיל).

אייקון XO
Each laptop is assigned a color dyad that is used as an identifier throughout the interface.
A menu (hover menu) appears when you place the cursor over the XO icon in the center of the screen. As of Build 542 (software build installed on this laptop), this menu is only used to shutdown the laptop. See image above. In the future, it may be used for setting user preferences, such as colors. The XO can also be shutdown by holding the Power On/Off button down for 10 seconds.
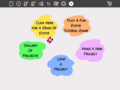
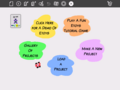
מעגל הפעילויות
The circle around the XO icon is used to display activities that are currently running on the laptop. The Journal is always displayed at the bottom of the circle (![]() ). You can resume an activity by clicking on its iconic representation in the circle.
). You can resume an activity by clicking on its iconic representation in the circle.

מצב הרשת
The status of the wireless network is indicated by either a circle (mesh) or triangle (access point--school server or other network) on the Home View. Details regarding connectivity are described below.

Network or Access Point Icon

Mesh Icon


מצב הסוללה
מצב הסוללה מסומן באמצעות אייקון הסוללה. האייקון מתמלא בצבע משמאל לימין כדי לתאר את מצב הטעינה הנוכחי. העברת הסמן מעל האייקון גורמת להופעת תפריט עם מידע נוסף. שימו לב, נורית הסוללה הנמצאת בפינה הימנית התחתונה של הצג נדלקת כשהסוללה נטענת. צבע הנורית משתנה מצהוב לירוק. צבע אדום מעיד על כך שהסוללה חלשה.

מסגרת
המסגרת מופיע תמיד בתצוגה הראשית. אתה יכול להסתיר את המסגרת, ולהציג אותה מחדש, באמצעות הכפתור "מסגרת" הנמצא בפינה הימנית העליונה של המקלדת ![]() , או באמצעות הזזת הסמן לאחת הפינות של המסך (המכונות "פינות חמות").
, או באמצעות הזזת הסמן לאחת הפינות של המסך (המכונות "פינות חמות").
![]()
- Circle with eight dots: This icon takes you to the Neighborhood View; you can view network resources and other users on the mesh network;
- Circle with three dots: This icon takes you to the Group View; you can see users you have identified as friends;
- Circle with one dot: This icon takes you to the Home View;
- Circle with rectangle: This icon returns you to your last open activity, so you can resume work on your current activity.
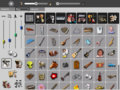
Bottom icons found on the display (Keys to take you to activities)
Different builds have different collections of activities. In Build 542, the activities available are (from left to right on the menu bar):
![]()
![]()
![]()
![]()
![]()
![]() File:Web.png
File:Web.png![]()
![]() File:Watch&listen.png
File:Watch&listen.png![]()
![]()
![]()
- BlockParty: a falling-block game;
- Draw: a drawing activity;
- Calculate: a calculator;
- Write: a word processor;
- Chat: a text chat program;
- Etoys: a programing environment;
- Browse: a web browser;
- News Reader: a RSS (Really Simple Syndication) news feed;
- Connect4: a Connect4 game (connect the dot);
- Watch and Listen: a multimedia player;
- TamTam: a music activity;
- TurtleArt: a programing environment;
- Record: a video capture activity.
Right-side icons on the display (your XO buddies)
This menu found on the right-hand side of the Frame contains the XO icons of the people with whom you are collaborating on XO online projects.
Left-side icons on your display (clipboard)
The menu on the left side of the Frame contains the icons for the clipboard. Most activities support drag and drop onto and off of the clipboard.

Hover

Neighborhood View

Neighborhood Icon
From the Neighborhood View (sometimes referred to as the Mesh View), you can see who is present on the network; which activities and objects are being shared; and which networks are available. You can access the Neighborhood View by pressing the Neighborhood Key (circle with eight dots -- ![]() ) or by pressing the Neighborhood Icon on the Frame.
) or by pressing the Neighborhood Icon on the Frame.
Your XO icon appears in the center of the screen in the Neighborhood View. Moving your cursor over another XO icon will bring up a menu that provides additional details (user's name) and actions you can take (add to list of Friends). For example:

התחברות
Icon representations in the Neighborhood View include the circle for the mesh network ![]() and triangles for the infrastucture
and triangles for the infrastucture ![]() access points (school server or other networks). (The access points are randomly color-coded.) By default, the Network Manager (software program internal to the laptop) first tries to connect to a school server; if the connection to the school server fails, the Network Manager tries to connect with an access point (a network); if connection to the access point fails, the Network Manager connects to a mesh point on Channel 1. This searching process can take up to five minutes, since there are many channels to check and timeouts associated with each one. You can override the Network Manager by clicking on a triangle (access point). The interior of the triangle (or circle) blinks while the connection is being established. The exterior of the triangle (or circle) will blink when the connection is established. (If you are connecting to a WEP access point, you will be prompted for a hexadecimal key. We currently do not support WPA access point.)
access points (school server or other networks). (The access points are randomly color-coded.) By default, the Network Manager (software program internal to the laptop) first tries to connect to a school server; if the connection to the school server fails, the Network Manager tries to connect with an access point (a network); if connection to the access point fails, the Network Manager connects to a mesh point on Channel 1. This searching process can take up to five minutes, since there are many channels to check and timeouts associated with each one. You can override the Network Manager by clicking on a triangle (access point). The interior of the triangle (or circle) blinks while the connection is being established. The exterior of the triangle (or circle) will blink when the connection is established. (If you are connecting to a WEP access point, you will be prompted for a hexadecimal key. We currently do not support WPA access point.)
More details regarding the connection:
- if you connect to an access point, your laptop becomes a mesh portal point—other XO laptops in the vicinity will be able to connect to the Internet through your laptop;
- similarly, if there is another XO laptop connected to an access point, you can connect to that laptop—and the Internet—through the mesh;
- if there are no access points available, your laptop will default to a mesh point on Channel 1, which enables your laptop to connect to other laptops;
- please be patient; it takes the Network Manager up to five minutes to progress through a number of the options until it finds a suitable connection.
הצטרפות לפעילות
From the Neighborhood View (also, called Mesh View), moving the cursor over an activity icon and pressing enter launches that activity on your laptop as a collaboration. Details of the collaboration vary from one activity to another.
הוספת חבר
Hovering over an XO icon creates a pop-up window with the name of the person associated with that icon and a menu that can be used to add this person to your Group View as a friend. Move the cursor to and select "Make a Friend" to add this person.

Group View
Group View

From the Group View (also known as the Friends View), you can see which friends are on the network. You can access this view by pressing the Group Key (circle with three dots -- ![]() ) or by pressing on the Group Icon on the Frame.
) or by pressing on the Group Icon on the Frame.
מעגל הפעילויות
You can initiate activities from the Home View by pressing the icon for that activity from the menu bar located at the bottom of the Frame. An icon representing the activity you started will appear in the Activity Circle and blink for a few seconds before launching into that activity. If you leave your activity without closing it, you can resume your current activity by pressing the Actitvity Key (circle with rectangle --![]() ) or by pressing the Activity Icon on the Frame.
) or by pressing the Activity Icon on the Frame.
You can open activities until the ring is full; you will not be able to start any more activities until you close one or more.
פעילויות
Multiple activities can run at once. You can move between running activites by returning to the Home View (key with one dot—![]() ) and clicking on an activity found in the Activity Circle.
) and clicking on an activity found in the Activity Circle.
Every activity has an Activity tab that includes a Stop Icon ![]() . Clicking on this icon exits the activity. Alt-C works -- in most cases—as a shortcut for exiting activities. (The Keep Icon
. Clicking on this icon exits the activity. Alt-C works -- in most cases—as a shortcut for exiting activities. (The Keep Icon ![]() will be used for version control in the Journal.)
will be used for version control in the Journal.)
An instance of the activity can be renamed by typing into the text field ( ) on the Activity Tab.
Many activities can be run either stand-alone or shared with other users on the mesh by selecting "My Neighborhood" within the activity (![]() ).
).
![]()
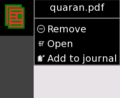
Journal
The Journal
Details View


The Journal is accessed from the Journal Icon (![]() ) at the bottom of the Activity Circle on the Home View.
) at the bottom of the Activity Circle on the Home View.
The Journal automatically logs your activities on the laptop. From the Journal, you can search by keyword and sort by activity or date. Clicking on an entry brings up a detail page from which you can resume an activity (by clicking on the Activity Icon or Key![]() ) or copy its contents onto the clipboard (by pressing on the Copy Icon
) or copy its contents onto the clipboard (by pressing on the Copy Icon ![]() ).
).
The Journal also supports external media. When a USB key is inserted into the machine, the contents from the USB key are entered into the datastore of the laptop and become accessible through the Journal. Click on the USB icon ![]() to access the content. You can also drag and drop Journal entries on to or off of a USB key.
to access the content. You can also drag and drop Journal entries on to or off of a USB key.
Browse
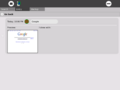
Browse is an Internet browser.


To launch the web browser, click the Globe Icon File:Web.png on the Frame. The browser has two tabs: the standard Activity Tab and a Browser Tab. The Browser Tab has an address field, forward and backward history buttons, as well as a reload button.
Etoys
Squeak Etoys is a media-rich authoring environment with a simple, powerful scripted object model for many kinds of objects created by end-users that runs on many platforms. It includes 2D and 3D graphics, images, text, particles, presentations, web-pages, videos, sound and MIDI, etc. It includes the ability to share desktops with other Etoy users in real-time, so many forms of immersive mentoring and play can be done over the Internet.
Etoys start screen
The Etoys badge is used for sharing.

From the Frame, press the shooting-star icon ![]() ; the Etoys activity will load and present a launch screen.
; the Etoys activity will load and present a launch screen.
There is a PDF guide to Etoys, and other tutorials here.
TamTam
TamTam is a suite of three music and sound related activities for the XO. TamTam is written in python with some C functions for speed-critical services. The audio engine for TamTam is Csound.
From the Home View Frame, click on the drum icon—![]() .
.
TamTamJam

Use the keyboard to play sounds at different pitches.
TamTamEdit

Use TamTam Edit to compose music.
TamTam Synth Lab

Use TamTam Synth Lab to create new instruments.
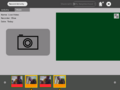
Record
This activity uses a camera to take still pictures or videos.
The video and still image record activity is launched by pressing on the Camera (Eye) Icon—![]() in the Frame. If you share the camera activity, then a Camera Icon appears in the Neighborhood View. Other users can launch the Record Activity from the Neighborhood View (
in the Frame. If you share the camera activity, then a Camera Icon appears in the Neighborhood View. Other users can launch the Record Activity from the Neighborhood View (![]() ) and share pictures.
) and share pictures.

Record sharing
Record sharing


Watch and Listen
Watch and Listen is based on the Helix multimedia player. It supports a variety of audio and video formats. Launch the Watch and Listen progrm by clicking on the File:Watch&listen.png icon in the Frame.

Multimedia

Write
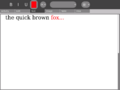
Write
Sharing


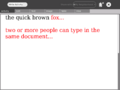
Write, based on the Abiword word processor, is a basic word processor. To launch Write, press the Write icon ![]() in the Frame. When shared, multiple people can simultaneously edit the same document (i.e., group editing). To launch Write as a group activity, press the Write Icon from the Neighborhood View (
in the Frame. When shared, multiple people can simultaneously edit the same document (i.e., group editing). To launch Write as a group activity, press the Write Icon from the Neighborhood View ( ).
).
Calculate
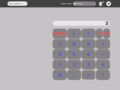
Calculate

Calculator activity provides classic calculator functions such as add, subtract, divide and multiply, as well as scientific functions such as cos, sin, exp, etc. To launch the Calculator application press the calculator icon ![]() from the Frame.
from the Frame.
Turtle Art


Turtle Art is a logo-like application that draws colorful art via a turtle and scratch-like visual programming elements that snap together in compilable ways.
To launch the Turtle Art application press the ![]() icon on the menu bar in the Frame.
icon on the menu bar in the Frame.
Read


The Read (PDF) Activity allows you to share books on the mesh (in the Neighborhood View) ![]() .
.
Chat
The Chat activity provides a simple interface for collaborative discussion, be it between two individuals or among a group as large as an entire classroom.


To start a chat, open the Chat Activity by clicking on the balloon icon—![]() in the Frame. A Chat Icon will appear in the Neighborhood View on each laptop in the mesh: other users can join the chat by clicking on this icon (
in the Frame. A Chat Icon will appear in the Neighborhood View on each laptop in the mesh: other users can join the chat by clicking on this icon (![]() ). Enter text at the bottom of the screen on one XO, and the text will appear on the screen on other XOs engaged in the chat.
). Enter text at the bottom of the screen on one XO, and the text will appear on the screen on other XOs engaged in the chat.
BlockParty
BlockParty is a falling-blocks puzzle game; the object of the game is to create a horizontal line of blocks wthout gaps. Launch Block Party by pressing the ![]() icon on the meunu bar in the Frame.
icon on the meunu bar in the Frame.
Draw
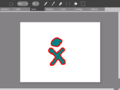
Draw

This is an activity to make drawings and paintings. Launch Draw by pressing the Draw icon ![]() on the menu bar in the Frame.
on the menu bar in the Frame.
Connect4
Connect4 is a two-player game; the object of the game is to be the first player to place four circles in a row.


To connect another player to the game, Player One launches the game from the menu bar on the Frame ![]() . Player Two joins the game by selecting the Connect4 icon in the Neighborhood View (
. Player Two joins the game by selecting the Connect4 icon in the Neighborhood View (![]() ).
).
News Reader
The NewsReader activity provides an interface for viewing news feeds (RSS feeds--Really Simple Syndication) of current news.
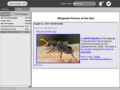
News Feed

To launch the News Reader, press the News Reader icon![]() on the menu bar on the Frame.
on the menu bar on the Frame.
הערות
פעילויות אחרות
There are many more Activities that can be loaded onto the laptop. Automatic installation is working in recent builds (547+) but not yet in Build 542.


Sunlight-readable display
The XO's unique display works both indoors and in direct sunlight. The display works in the following ways:
- A color image is generated from the backlight passing through color filters in the display.
- A high-resolution grayscale (black and white) image is generated from ambient light reflecting off of mirrors in the display.
- When the backlight is on and there is a source of ambient light—the sun, a room light, etc.—you see the combination of two displays.
- You can save power (and thus extend battery life) by turning the backlight off. The display remains visible, but there is no color.
- If the ambient light is too intense, the color is washed out; typically you would turn off the backlight in sunlight.
On the top row of the keyboard, there are three long buttons. The long button on the far right controls the lighting and sound on the display.
![]()
This long button contains four keys. The left two keys control the lighting.
- The small sun key on the left dims the backlight when pressed; repeated presses on this key puts the display into black and white mode.
- The large sun key, the second key from the left, increases the brightness of the backlight and enables color mode when pressed repeatedly.
The two keys on the right of the long button are used to decrease and increase speaker volume.
Handheld mode (or eBook mode)
When in the eBook mode, the keyboard and touchpad are covered. Only the game controller buttons, which can be used for scrolling, the camera, and the microphone, work.

Bring the display up to a 90-degree angle (and put the antennae down).

Rotate the display 180 degrees until it is facing backwards.
Lay the display down onto the keyboard.
Enjoy!


Keyboard shortcuts
- Ctrl-C – copy
- Ctrl-V – paste
- Ctrl-X – cut
- Alt-C – quit
- Ctrl-Alt-Erase – restart Sugar (and X Windows)
- Alt-= – toggle on/off developer console
- Ctrl-Alt-F1 – console (1)
- Ctrl-Alt-F2 – console (2)
- Ctrl-Alt-F3 – X Windows
- Alt-1 – save snapshot of screen into the Journal
(F1 is the same as the Neighborhood View Key; F2 is the same as the Friends View Key; F3 is the same as the Home View Key.)
באגים ו/או בעיות מוכרות
Audio suspend problem
There is a bug that causes the laptop to squeal if it goes into suspend mode while using TamTam. Please exit TamTam before closing the laptop (which puts it into suspend mode). The work-around is to turn off the laptop: When it is turned back on, the squeal is gone. (NOTE: fixed in later builds)
בעיות באייקון מצב הסוללה
The battery status icon does not always accurately reflect the percentage of charge left in the battery. Please monitor the battery LED located in the right-bottom corner of the display to determine when to recharge. If the battery LED is red, battery needs to be recharged.
מקשים בלתי פעילים
 — Journal search key
 — Bulletin-board key
 — Grab keys (on either side of the space bar)
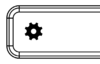 — View-source key (NOTE: enabled for Browse in later builds)


