Programming the Altera FPGA
The B-Test boards have an Altera Cyclone II FPGA that is used to emulate the CaFe chip.
This document tells how to reprogram it.
Contents
Assumptions/requirements
- You have Windows (Linux and Solaris versions of the programming software exist, but require an Altera subscription).
- You have the parallel port version of the Altera programming cable (there is a USB version, but I have the parallel port version so that is what I can document).
Getting the Software
You need the Altera "Quartus II Web Edition" software from http://www.altera.com/products/software/products/quartus2web/sof-quarwebmain.html
In addition to downloading the installer, you also have to get a license. There is a link on that page that gets you to the license dance. You have to fill out a contact form and complete a survey. When you get through the procedure, you'll get an email message with a license file attachment. Save that attachment to disk; you'll need it later. (Feel free to bitch and moan about this cumbersome process; everybody else has done so and you might as well get in on the fun.)
Download the installer and run it. Then run the installed program and tell it the location of your license file when it asks.
Install the driver for the programming cable according to the instructions in http://www.altera.com/literature/ug/ug_bbii.pdf - Chapter 1, Software Setup section.
Reworking the preB Board
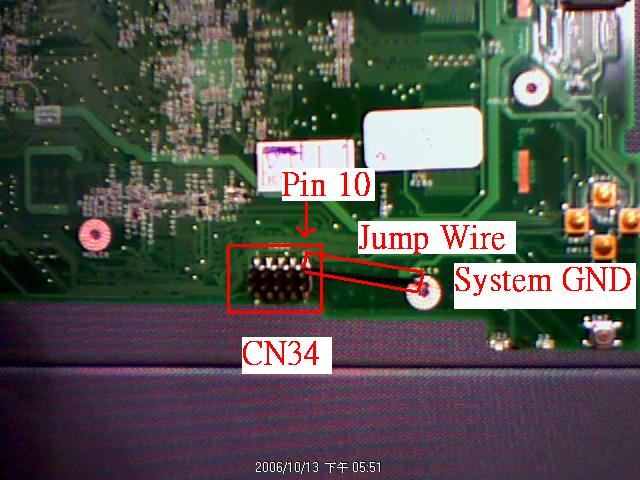
The preB test boards are missing a ground connection on the programming header. For reliable programming, you have to add a
jumper wire to make that ground connection. The wire goes from pin 10 of CN34 (on the bottom of the board) to a nearby ground point, as shown  .
.
Connecting the Cable
The programming cable connects to CN34, the 2x5 header connector on the bottom of the B1-test board. Pin 1 is marked with a white dot on the board. That corresponds to the red stripe on the ribbon cable.
Programming
Note - a nicer writeup of the following can also be found in http://www.altera.com/literature/ug/ug_bbii.pdf , Chapter 1, Setting Up the ByteBlaster II Hardware in the Quartus II Software .
In the Quartus Web Software program, select Tools>Programmer.
Click Hardware Setup.
Click Add Hardware
Choose Hardware type: "ByteBlasterMV or ByteBlaster II"
Choose Port: LPT1
Click OK
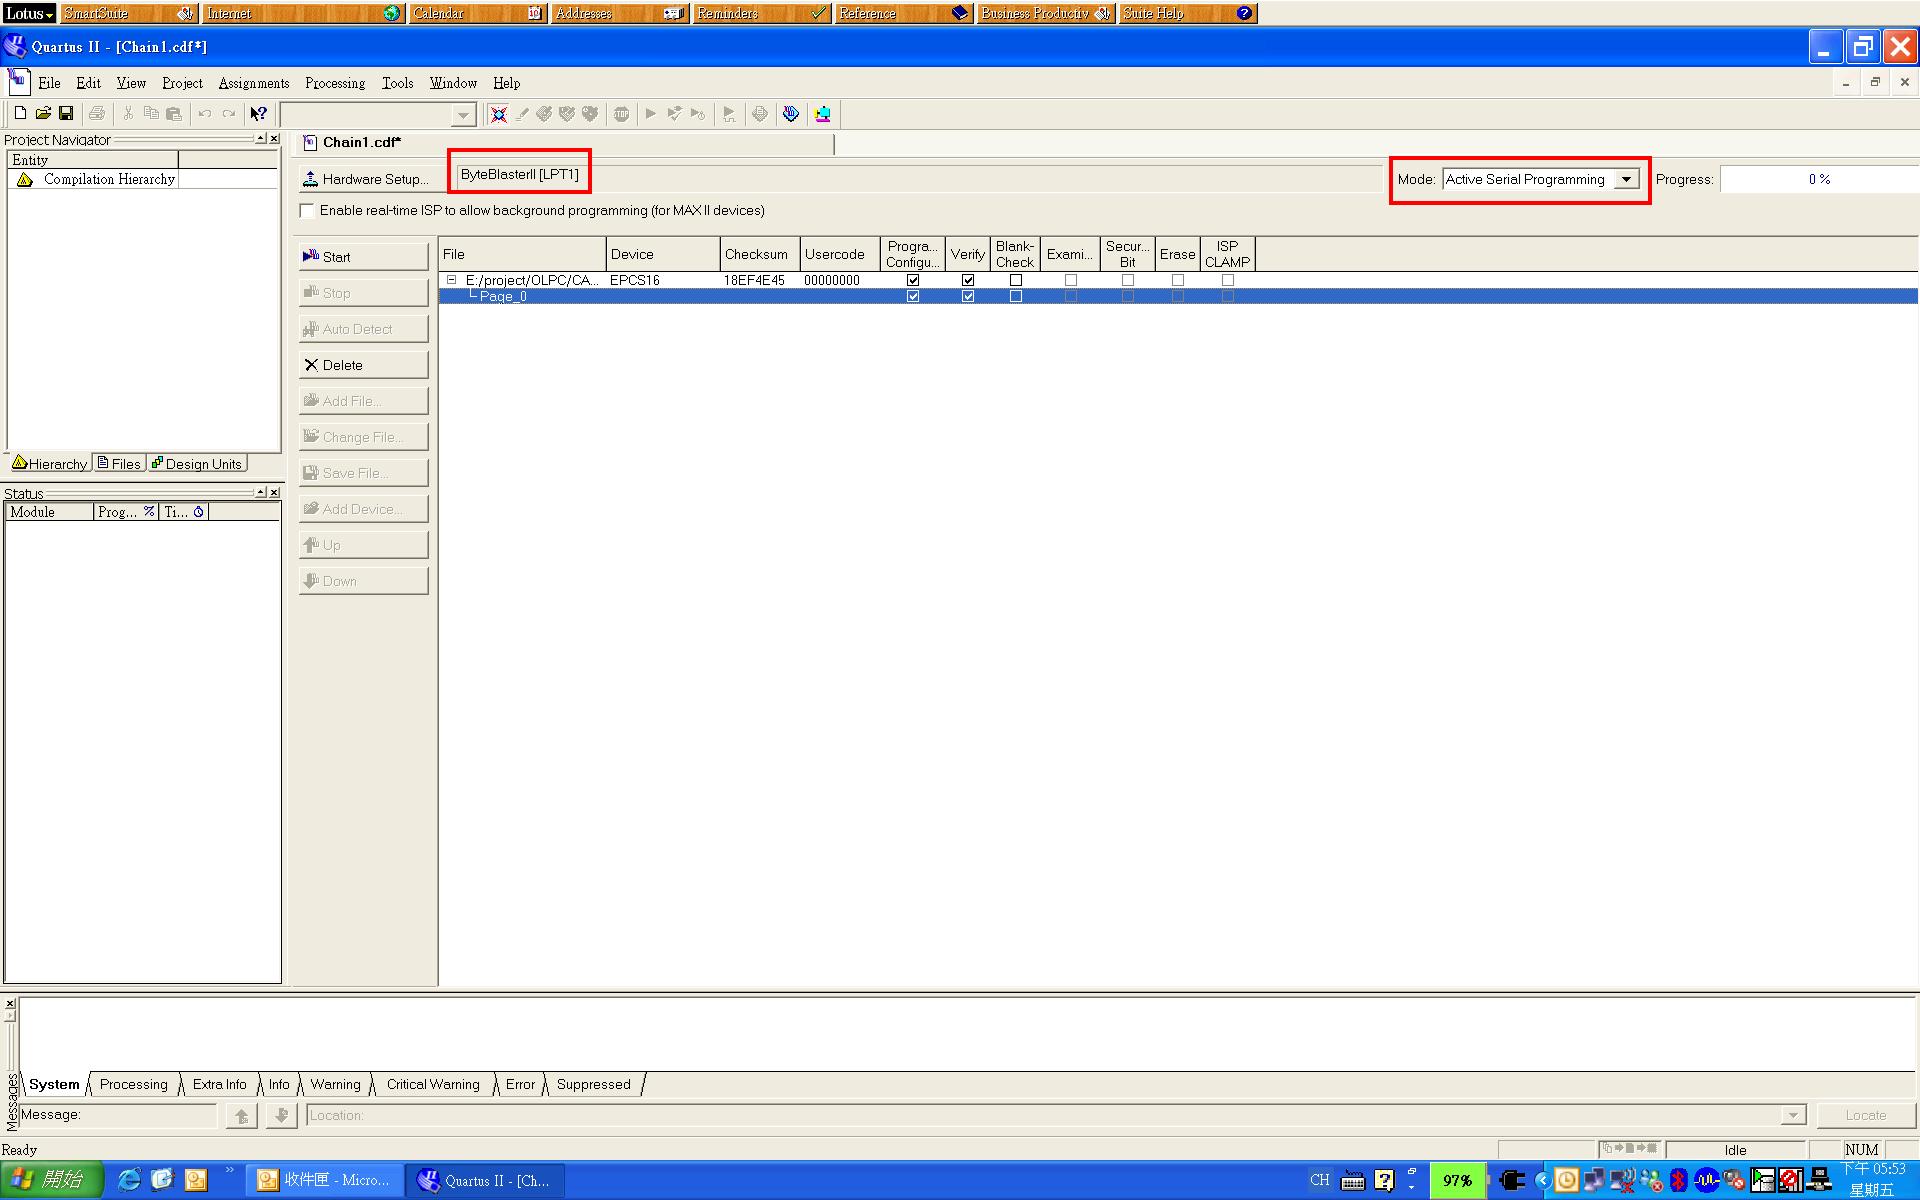
Choose Currently selected hardware: ByteBlasterII [LPT1]
Click Close
Choose Mode: Active Serial Programming
Click Add File ... and choose the .pof file containing the bits you want to program into the device.
Some information should appear in the hitherto-blank area of the programming dialog.
Check the two Program/Configure boxes and the two Verify boxes. Your screen should look like 
Click Start. It should start the process, and, over time, the following messages should appear in the Messages frame at the bottom of the Quartus II window:
Info: Started Programmer operation at Fri Oct 13 08:20:46 2006
Info: Device 1 silicon ID is 0x14
Info: Erasing ASP configuration device(s)
Info: Programming device 1
Info: Performing verification of type standard on device 1
Info: Device 1 silicon ID is 0x14
Info: Successfully performed operation(s)
Info: Ended Programmer operation at Fri Oct 13 08:23:51 2006