Serial adapters/Arduino
Jump to navigation
Jump to search
How to use an Arduino Uno as a serial adapter for an OLPC XO laptop.
Ingredients
- an Arduino Uno, called the Arduino,
- a computer running the Arduino development environment, called the host,
- a USB cable to connect the Arduino to the host, normally supplied,
- an OLPC XO laptop, disassembled to expose the serial connector, called the target,
- a way to connect wires between the Arduino and the target (jumper leads, solder, iron, connectors, etc).
Method
- disconnect all wires from the Arduino,
- connect the USB cable between the Arduino and the host,
- download passthrough-serial-adapter.ino and program it into the Arduino,
- on the host, start a serial terminal application like screen, and verify that pressing keys causes the D13 LED to flash,
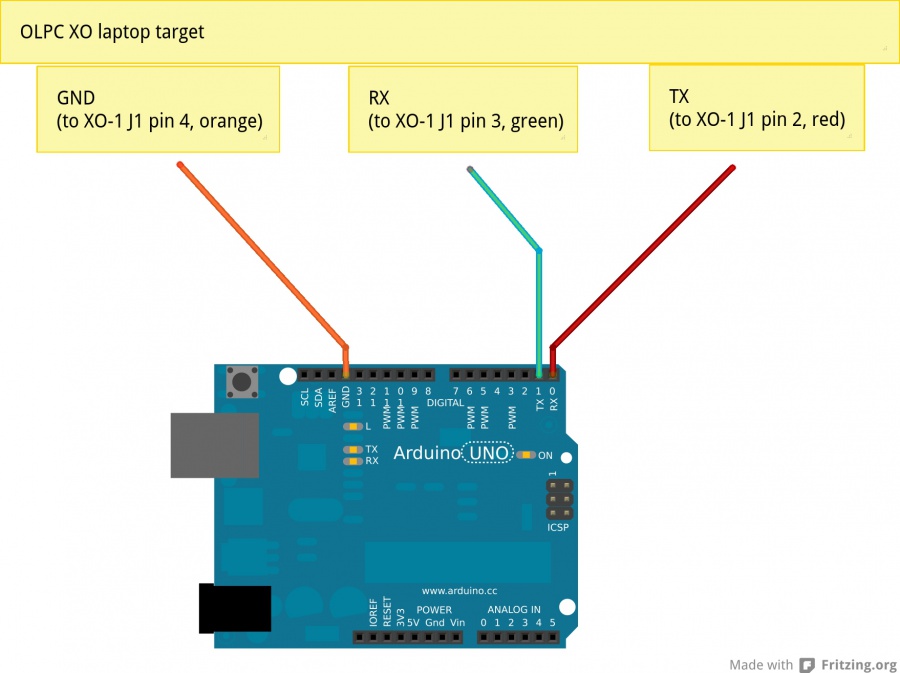
- connect a GND pin on the Arduino to the GND pin on the serial connector of the target,
- connect the D0 (RX) pin on the Arduino to the RX pin on the target; this carries keys from the host to the target,
- connect the D1 (TX) pin on the Arduino to the TX pin on the target; this carries text from the target to the host,
- turn on the target, and the boot text should be displayed,
- press Escape key, and the Ok prompt should appear.
