BookMorph Tutorial
Jump to navigation
Jump to search
A BookMorph in Etoys is a collection of pages, on which things can be placed. One use is creating presentations.
Hi, Richard,

> >   ... I was going to write how you would do step by step, but I guess
> > it is not what you would like, but just check the "Demon Castle"
> > tutorial which is currently bundled with the Etoys on the laptop.
> > Demon Castle uses BookMorph (or Book), which is surely accessible to
> > any user.  (And it has reasonably high production value.)
>
> Begging your pardon, kind sir, but a step by step procedure would be
> very welcome. My hope would be that if someone provides a sufficient
> tutorial for using Book and BookMorph to create a narrated slide show,
> then someone (else?) can put that tutorial into that very mechanism so
> that others may use it as an example and a tutorial.

  Sure.  I just couldn't tell that was what you wanted in the first
response.
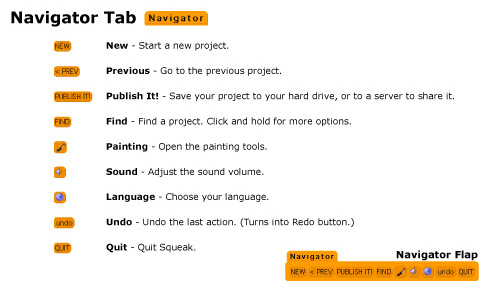
- Press the golden
 "Navigation" tab near bottom left to open it.
- In the Navigation bar, click on the "New" button to create a new project." Press the thumbnail created. You'll dive into a new clean project.
- In the new project, click on the red "Supplies" tab near bottom right to open it.
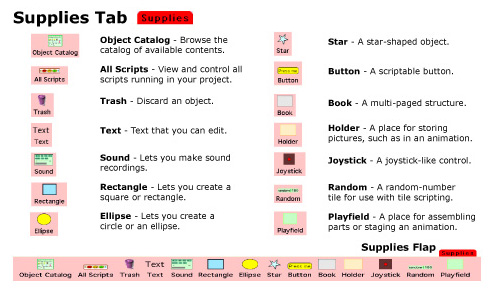
- Drag out "Book" icon from the opened "Supplies bin" to "world" or the desktop area.
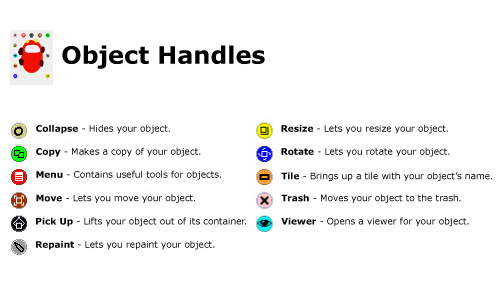
- Move and resize the opened Book with the yellow handle to cover most of the screen. (Later, you can make the book "full screen", but at first, it would not be convenient.)
- Press the golden "Navigation" tab near bottom left to open it. Hold "Find" button for a second to get a menu. From the menu, choose "find any file". You get a kind of a file browser.
- Navigate to a photo file you would like to import, select it, and press "Open" in the file browser. You can import the photo in the Etoys environment. (BTW, this way of importing *will* change eventually. Right now, Sugar doesn't have copy and paste of graphics between applications.)
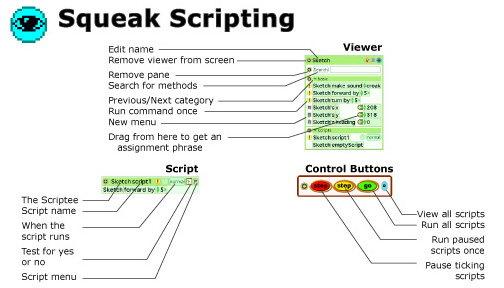
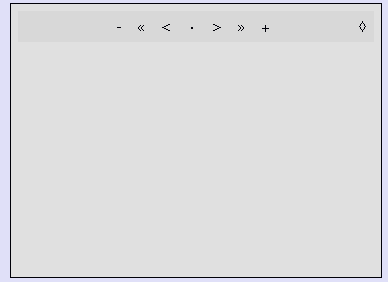
- You drop the photo onto a "page" of Book. To add a page to the Book, press the triangle button in the Book's title bar and get more buttons. "+" button creates a new page.
- Repeat the above to get as many photos/graphics as you want.
- Now, time to add some sound track. First, probably you would like to kill the default page turn sound effect. From the Book's extended menu, which is displayed only when more buttons are shown in the title bar, choose "visual and sound effects...", and "set sound effect for all pages". Then, choose "silence".
- From Supplies bin, drag-out "Sound" onto world.
- Connect a (physical) microphone, press Record, and speak whatever you like that covers a page. When you are done, press "Stop". To listen to the recorded sound, press "Play".
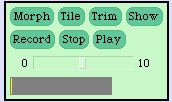
- If you are happy with the sound, press the "Tile" button. You type the name of sound (something like "SoundForPage1", or something that describe what it is.) Leave the created sound on the world for now.
- Get the Viewer for a page of the Book. To do this, you probably need to right click twice (or more) on the large part of the Book. If the name shown turns to "page", click on the light blue eye icon on the left edge.
- The first very item in the Viewer is the "make sound" command. If you drag-out it to the world, you get a "scriptor" with the command. Click on the name of the sound, and choose the new sound you created in the two steps above. To test the scriptor, click on the yellow exclamation mark button in the scriptor to execute the script.

- If it is good, hold the mouse button on the button that reads normal". Choose "opening" from the manu.
- Cycle through pages now. If you get to the page, the sound is played automatically.
- You repeat the recording and adding script to each pages, and you are almost done.
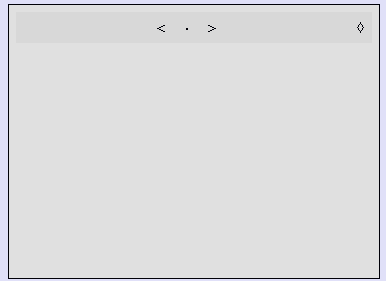
- Some beautification can be done. Make the page size of all pages are the same, hide most of the buttons in the title bar of the Book.
- Finally, you publish your project with the book by Pressing the "Publish" button in the Navigator bar. You supply the name of project, and press "OK". Choose where (in which directory in the file system) you would like to save the file, and press "Save".
- You are done. Quit Etoys, re-launch it, and press "Find" button (momentarily) in the Navigation bar. You should see the project where you saved it.


-- Yoshiki
_______________________________________________
Etoys mailing list
Etoys@laptop.org
http://mailman.laptop.org/mailman/listinfo/etoys