Todavía no se ha traducido la página original, Disassembly_bottom. Si quieres traducirla, copía el texto desde aquí y agregalo a esta página usando "edit" arriba. También hay que cambiar el "status=deseada" arriba a "status=incompleta".
Mientras tanto, se puede verla traducida por google.
This is a description of how to disassemble the bottom portion of an XO laptop. This is part of the Disassembly section of the Troubleshooting Guide and Repair Manual.
Video walkthroughs
These instructions are also available in video format with English subtitles, courtesy of ILXO.
OLPC Australia maintain a set of Help Videos.
PDF walkthrough
XO 1.5 Disassembly Bottom (20-page PDF, 1.7MB)
XO before disassembly
Removing the handle cover / reaching the spare screws
Step 1
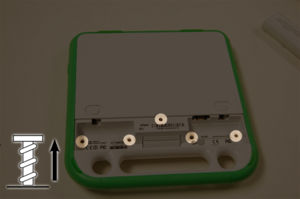
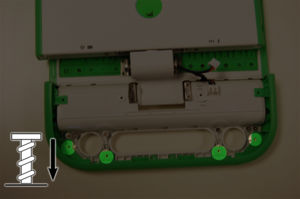
Take out the five screws under the battery case.
Step 2
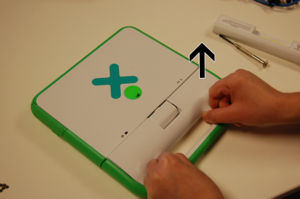
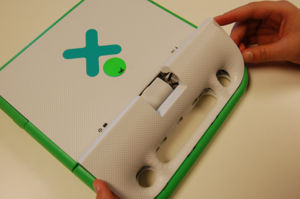
Pull off the white panel on the handle. The easiest way to do this is to push down on the tab at the bottom side of the white plastic screen hinge.
Notice the 6 extra screws in the handle.
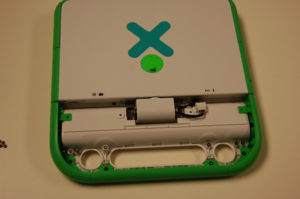
Removing the hinge / disconnecting the top and bottom halves of the XO
Step 1
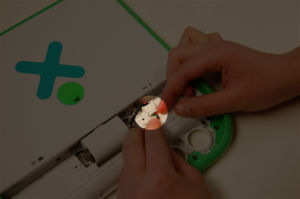
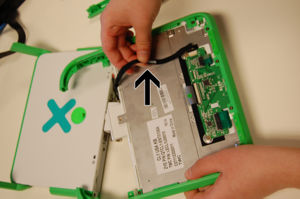
Unplug the connection between the battery and computer.
Step 2
Unscrew the hinge - there are 4 screws, which are larger than the other screws and should be set aside separately.
Step 3
Flip up the antennas and now you can separate the top half of the XO from the bottom half.
Set the top half of the XO aside.
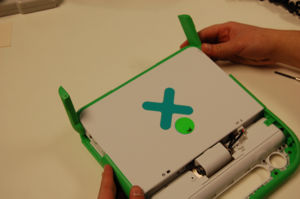
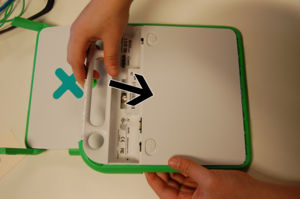
Removing the bottom cover
Step 1
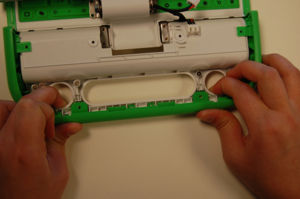
Remove the four screws in the handle.
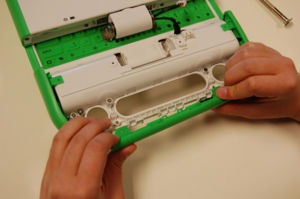
Pull out the green piece on the edge of the handle.
Push down the bottom of the laptop, then slide it towards you and/or slide the keyboard/top part away from you.
Warning: if you don't slide the bottom piece, you risk snapping some plastic tabs in the end opposite the handle.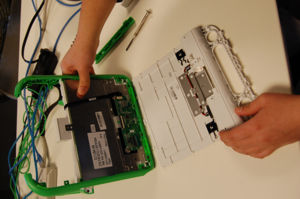
The bottom should come off as one piece.
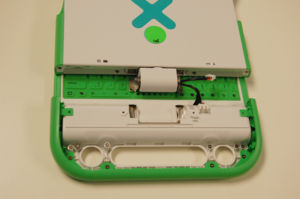
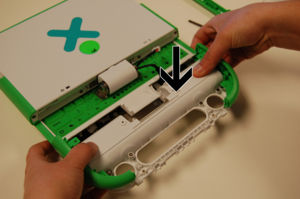
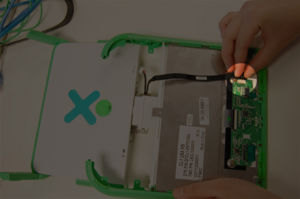
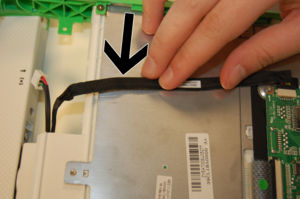
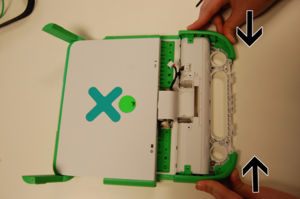
Step 2
Unstick the cable connecting the computer to the keyboard.
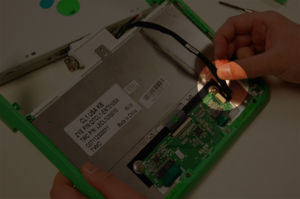
Unplug the cable from the touchpad/keyboard.
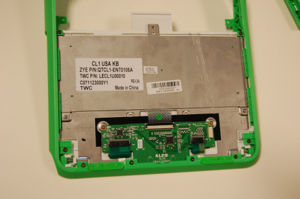
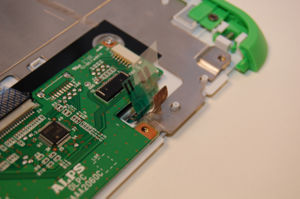
This is what the XO will look like when the cable is out of the way.
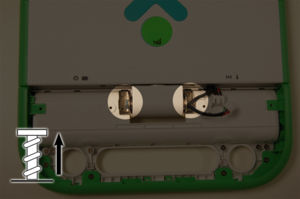
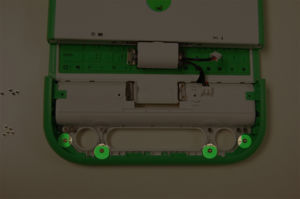
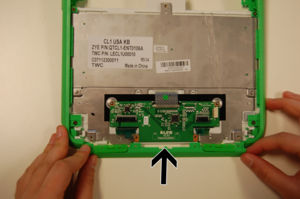
Removing the ALPS (touchpad and keyboard control) board
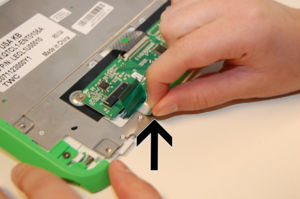
Step 1
Disconnect the ribbon cables from the keyboard/touchpad board. There are 3. Here's the first... (lift the black piece up to release the cable)
second cable... (works best if you press your thumb upon the cable with light force and pull it out using the friction between the thumb and the cable)
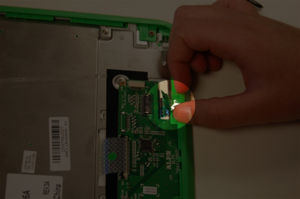
Step 2
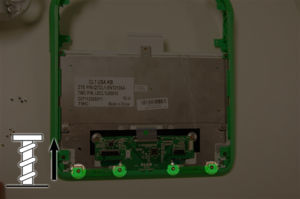
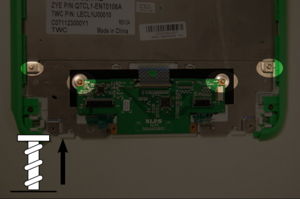
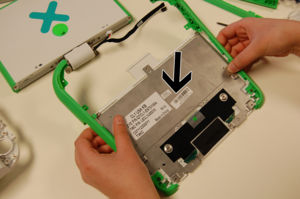
Remove the four screws holding in the green piece (the ALPS board) at the edge of the touchpad area.
Remove the green plastic piece.
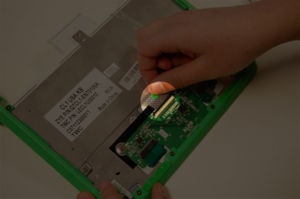
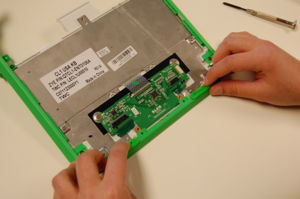
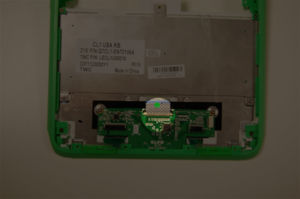
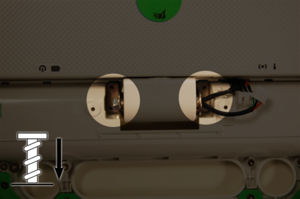
Step 3
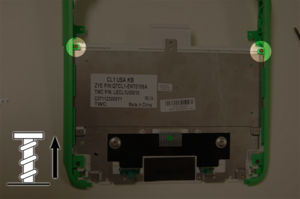
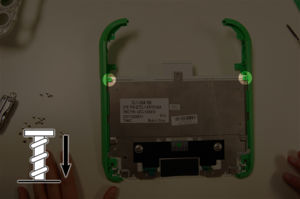
Pull up the silver tape tabs to free the keyboard.
This is what it looks like after the silver tape tabs are pulled up.
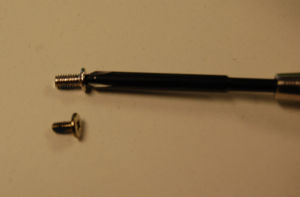
Remove four screws as shown. Note that these are shorter than the standard ones
Removing the keyboard
Step 1
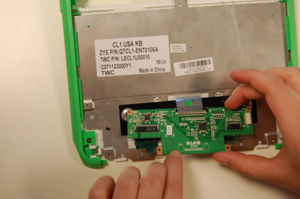
Remove the last two screws holding in the keyboard.
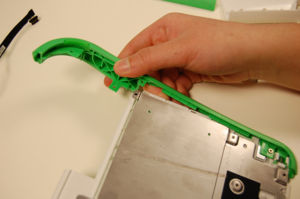
Pull the green side panels apart to free the board.
Warning: if you want to pull the side panels off completely, you should be aware that there are two one-way clips (ramps that snap into slots) holding them on to the white plastic body - the slots are located on each side at the top edge of the keyboard area, and at the bottom edge of the Enter key. You may find it helpful to gently warm the assembly, e.g. in the sun, before gently prying the side pieces apart from the body.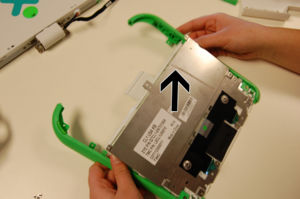
Pull out the keyboard.
Note: There are two plastic retaining clips sticking through slots in the metal keyboard backing plate, on either side of the keyboard ribbon cable. You should be able to release the metal keyboard assembly from these clips by sliding it forward.
Replacing the keyboard
Step 1
Put in the new keyboard, making sure that it lies flat. Ensure that the silver tape tabs remain upright during insertion!
Replace the two screws near the handle.
Carefully replace the keyboard/touchpad board.
Step 2

Make sure to use the right screws! You'll need the short silver ones.
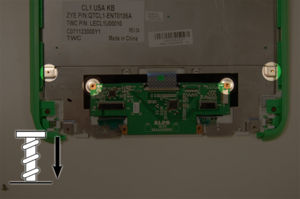
Using those screws, fasten the board and edges of the keyboard.
Replacing the ALPS (touchpad and keyboard control) board
Step 1
Put the green edge piece back in.
Replace the silver tapes. Place four screws in the four holes. The black tab faces are down.
Step 2
Replace the ribbon cables.
Replacing the bottom case cover
Step 1
Plug the connection cable back in.
Stick the connection cable down so that it doesn't slip.
Step 2
Replace the white bottom panel. This can be a little tricky, so make sure it sits flat. It is important for the small tabs in the bottom panel to line up. If you're having some trouble with this, you can make sure the cable to the battery is out of the way by plugging it in.
Snap the side panels in to hold the bottom panel.
Replacing the hinge / Reconnecting the top and bottom halves of the XO
Step 1

Latching the XO shut can help hold it in place.
Make sure to use the long silver screws on the hinge.
Screw down the hinge and replace the connection between the battery and computer.
Replacing the handle cover
Step 1
Replace the green edge piece on the handle.
Put in the four screws in the handle.
Step 2
Replace the white handle cover.
Step 3

Put in the last five screws, that go in under the battery.


