OLPC Firmware q2c16a
Contents
OLPC Firmware Release q2c16a - 2007-06-07
This is post-production firmware for the BTest boards. It will also work on ATest. Do not use it on pre-B1 boards - it will brick them because of the EC microcode.
BIG FAT WARNING!
The manufacturing data has moved locations. If you are upgrading from the B series of the firmware the manufacturing data will be moved to its new location. After that has happened you must not install anything from the B series of the firmware. If you do then you will erase your manufacturing data.
Download: q2c16a
Changes since OLPC Firmware q2c13
How to get the ok prompt
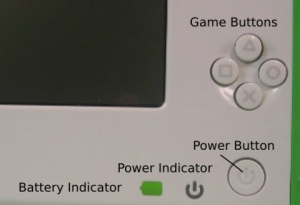
Press a game key after hitting the power button to enable the ok prompt. You still have to press the ESC key (upper left on the keyboard ![]() ) during the countdown. If you don't press a game key, the firmware goes into fastboot mode, in which:
) during the countdown. If you don't press a game key, the firmware goes into fastboot mode, in which:
- The keyboard is not probed, thus saving some time
- The USB bus is not enumerated, thus saving even more time
- The boot order is SD, NAND, wireless
- OFW does not put any text on the screen, just graphics
- When transferring control to the kernel, OFW freezes the screen using the DCON, which hides the Linux console text until Linux unfreezes the DCON. The intention is to migrate to a "pretty boot" scheme where there is no scrolling text in the normal boot case.
Change Log
- OFW r443+wlan reset workaround removal
- EC
- PQ2C16a
More change log notes pending..
Installation Instructions
- If you have a B1 or B2 system:
- Detailed upgrade instructions are located here.
- If your firmware version is earlier than the version in Auto Install Image then you can just use that procedure for the update.
Note: that this procedure will also upgrade the image in your nand flash -- which is the entire Linux operating system and all the files you may have edited or saved. This means it will ERASE what is in your nand and re-write it. So you will lose any data you have stored on the filesystem unless you back it up. If you do not want your files erased, then please use the first procedure above. - Do NOT use olpcflash to write new firmware images. Doing so will erase the manufacturing data that was added at the factory.
- After you reflash, you must power cycle by physically removing power from the system. A warm-start or button-induced restart is not sufficient. Please remove both the battery pack and wall adapter for 10 seconds.
- If you have an ATest system
- If you use olpcflash to write this image, you must use the --brick option.
Example:olpcflash --brick -w image.rom
The --brick option makes olpcflash update your EC code as well as the firmware.
- If you use olpcflash to write this image, you must use the --brick option.
