Clean-install procedure for 8.2: Difference between revisions
Jump to navigation
Jump to search
m (→Development Builds: fix header capitalization) |
m (remove Category:Procedures since Category:Update paths is its subcategory) |
||
| Line 39: | Line 39: | ||
:10. When the "ok" prompt returns, reboot the machine by typing reboot. |
:10. When the "ok" prompt returns, reboot the machine by typing reboot. |
||
[[Category:Procedures]] |
|||
[[Category:Update paths]] |
[[Category:Update paths]] |
||
Revision as of 07:17, 5 October 2008
This page provides parallel instructions for installing both signed builds (official or candidate releases) and unsigned development builds for Friends in Testing.
Note that a clean install will reflash your XO; everything you created will be deleted. See olpc-update for an update mechanism that preserves some data.
Official releases and candidate builds
For the general public
- Download the OS image (e.g. os767.img) and its signatures file named fs.zip to your local computer. These are compressed files, but DO NOT open them — in your browser click the right mouse button over the link and choose "Save Link/Target As...".
- Official OS images can be downloaded from http://download.laptop.org/xo-1/os/official/ (older, well-tested images), http://download.laptop.org/xo-1/os/candidate/ (newer, candidate images).
- Copy these files onto a clean (Full, not Quick!, formatted) USB storage device such as a USB flash drive. It must have at least 500 MB space free. Your USB storage device should now contain two files named something like: os767.img and fs.zip.
- Unmount the USB storage device and disconnect it from your computer when it is safe to do so.
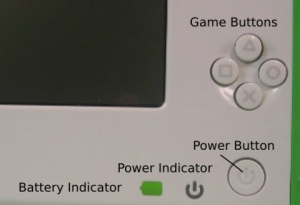
- Shut down your XO laptop. Connect the USB storage device to the XO Laptop and power up while holding all the four game keys. (this is VERY important!)
- Release the game keys when the XO asks you to. The XO will take a few minutes to rewrite its memory with the new OS image.
- Reboot.
- Check that you have the correct build:
- Follow How to check the OS and firmware versions.
- Verify that the build number matches build number of the image file you downloaded, e.g. "Update.1 708, firmware Q2D16" for en708-1.
- You will then need to install activities.
Development builds
For Developers
- Get a developer key for your XO laptop and save it in /security/develop.sig on a USB flash drive.
- Read OS images and its table of releases to choose an appropriate build.
- Other OS images can be found at joyride build stream (e.g. joyride-2230) and from many other sources.
- Download the OS image (e.g. Template:Official-img-link) and its CRC file (e.g. Template:Official-crc-link) to your local computer. Important: DO NOT open them. If your computer runs MS Windows, click your right mouse button on the link and choose "Save Link Target As". If you are using a Mac, use Safari for the downloads and hold down the control key when you click on the link and choose "Download linked file as...".
- Copy these files onto of a clean (Full (not Quick!) formatted) USB flash drive. Your USB flash drive should now contain two files named, for example, osos860.img and osos860.crc (and possibly the /security directory).
- Unmount the USB flash drive and disconnect it from your computer when it is safe to do so.
- Shut down your XO laptop. Insert the USB flash drive into the XO Laptop and power up while holding the escape key (the circled 'x' in the upper-left corner of the keyboard).
- Release the 'x' key when it asks you to. You should be at the Open Firmware "ok" prompt.
- Type
probe-usb copy-nand disk:\osNNN.img
- where osNNN.img is the file you downloaded (e.g. os708.img, os2230.img, or en708-1.img).
- 9. Press Enter, then wait while your machine reflashes.
- 10. When the "ok" prompt returns, reboot the machine by typing reboot.
