Sugar Standard Icons: Difference between revisions
Jump to navigation
Jump to search
No edit summary |
|||
| Line 12: | Line 12: | ||
# Save it as an .xbm image (note that if you are using Gimp, choose "Export" and do not choose "X10 Format Bitmap" for the resulting file) |
# Save it as an .xbm image (note that if you are using Gimp, choose "Export" and do not choose "X10 Format Bitmap" for the resulting file) |
||
# Create a mask. This is done with the tool [http://www.cit.gu.edu.au/~anthony/icons/support/scripts/xbm-mask xbm-mask]<br>("''xbm-mask my_cursor_file.xbm''" creates a file called "''my_cursor_file_mask.xbm''") |
# Create a mask. This is done with the tool [http://www.cit.gu.edu.au/~anthony/icons/support/scripts/xbm-mask xbm-mask]<br>("''xbm-mask my_cursor_file.xbm''" creates a file called "''my_cursor_file_mask.xbm''") |
||
# Now, in pygame you can use this code: |
# Now, in pygame you can use this code: |
||
a, b, c, d = pygame.cursors.load_xbm("my_cursor_file.xbm", "my_cursor_file_mask.xbm") |
a, b, c, d = pygame.cursors.load_xbm("my_cursor_file.xbm", "my_cursor_file_mask.xbm") |
||
Revision as of 06:39, 20 May 2009
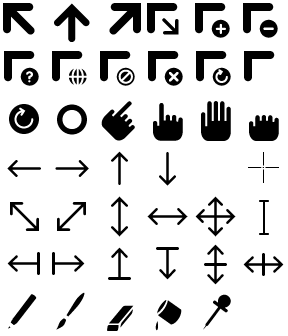
This page is a quick tutorial on how to use the standard icons in your activities.
Standard Sugar Cursors

They are available at dev.laptop.org/artwork
usage with pygame
- Download the Sugar-Icons from here
- Extract the icon you want to use (36x36 px)
- Enlarge the canvas to be 40x40px (or any multiple of 8)
- Save it as an .xbm image (note that if you are using Gimp, choose "Export" and do not choose "X10 Format Bitmap" for the resulting file)
- Create a mask. This is done with the tool xbm-mask
("xbm-mask my_cursor_file.xbm" creates a file called "my_cursor_file_mask.xbm")
- Now, in pygame you can use this code:
a, b, c, d = pygame.cursors.load_xbm("my_cursor_file.xbm", "my_cursor_file_mask.xbm")
pygame.mouse.set_cursor(a, b, c, d)
- To get the white border around the icons, you need to make another mask:
- Draw a black line around the white border of the icons
- Save it as .xbm (eg. black pointer > white border > black border > transparency)
- Create a (and overwrite the old) mask-file again
- Remove the black border around the white one
- Save and enjoy!