Making XO sensors/Making a Humidity Sensor: Difference between revisions
Jump to navigation
Jump to search
CallaUrrea (talk | contribs) No edit summary |
CallaUrrea (talk | contribs) No edit summary |
||
| Line 9: | Line 9: | ||
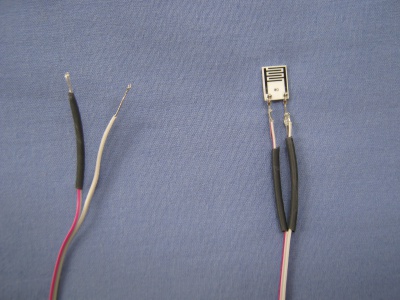
| Next, slide the rubber tubing up the wire so that it completely covers the two contact points, and then use X (hot air) to compress the rubber tubing onto the wire. |
| Next, slide the rubber tubing up the wire so that it completely covers the two contact points, and then use X (hot air) to compress the rubber tubing onto the wire. |
||
|- |
|- |
||
| [[Image:Humidity |
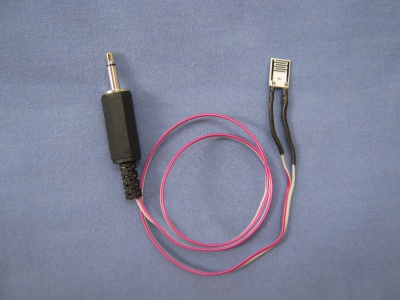
| [[Image:Humidity 04.JPG|400px]] |
||
| '''A completed Humidity sensor!''' |
| '''A completed Humidity sensor!''' |
||
|} |
|} |
||
Latest revision as of 17:14, 16 October 2009
Other sensor instructions
- Making XO sensors/Construir Sensor Luz
- Making XO sensors/How to connect sensors
- Making XO sensors/Lichtsensor
- Making XO sensors/Making a Humidity Sensor
- Making XO sensors/Making a Light Sensor
- Making XO sensors/Making a Magnetic Sensor
- Making XO sensors/Making a Switch Sensor
- Making XO sensors/Making a Temperature Sensor
- Making XO sensors/Making a Thermistor


