XO 1.75 B1
XO-1.75 Laptop Beta test model 1, also known as B1.
Contents
Description
The B1 are the fourth prototypes of the XO-1.75 built. Electrically, these are very similar to the A3 prototypes. Several hundred were made in July, 2011, for distribution to software developers.
Identification
These are the first fully assembled XO-1.75 laptops. While production 1.75 laptops will be identifiable by two rows of raised dots on the hinge cover, B1 laptops only have three dots (identical to the XO-1.5).
Two versions were built:
- Motherboard ID 1B1 --- these units do not have an internal full-size SD card slot, and instead provide SDRAM for use by the DCON. These units are assembled into a green/white case with a non-membrane keyboard. Some of these units are also equipped with a multitouch-capable projected capacitance touchscreen.
- Motherboard ID 1B2 --- these units have an internal full-size SD card slot, but no SDRAM for the DCON. These units are assembled into green/white cases with membrane keyboards.
Both versions use internal eMMC for Linux.
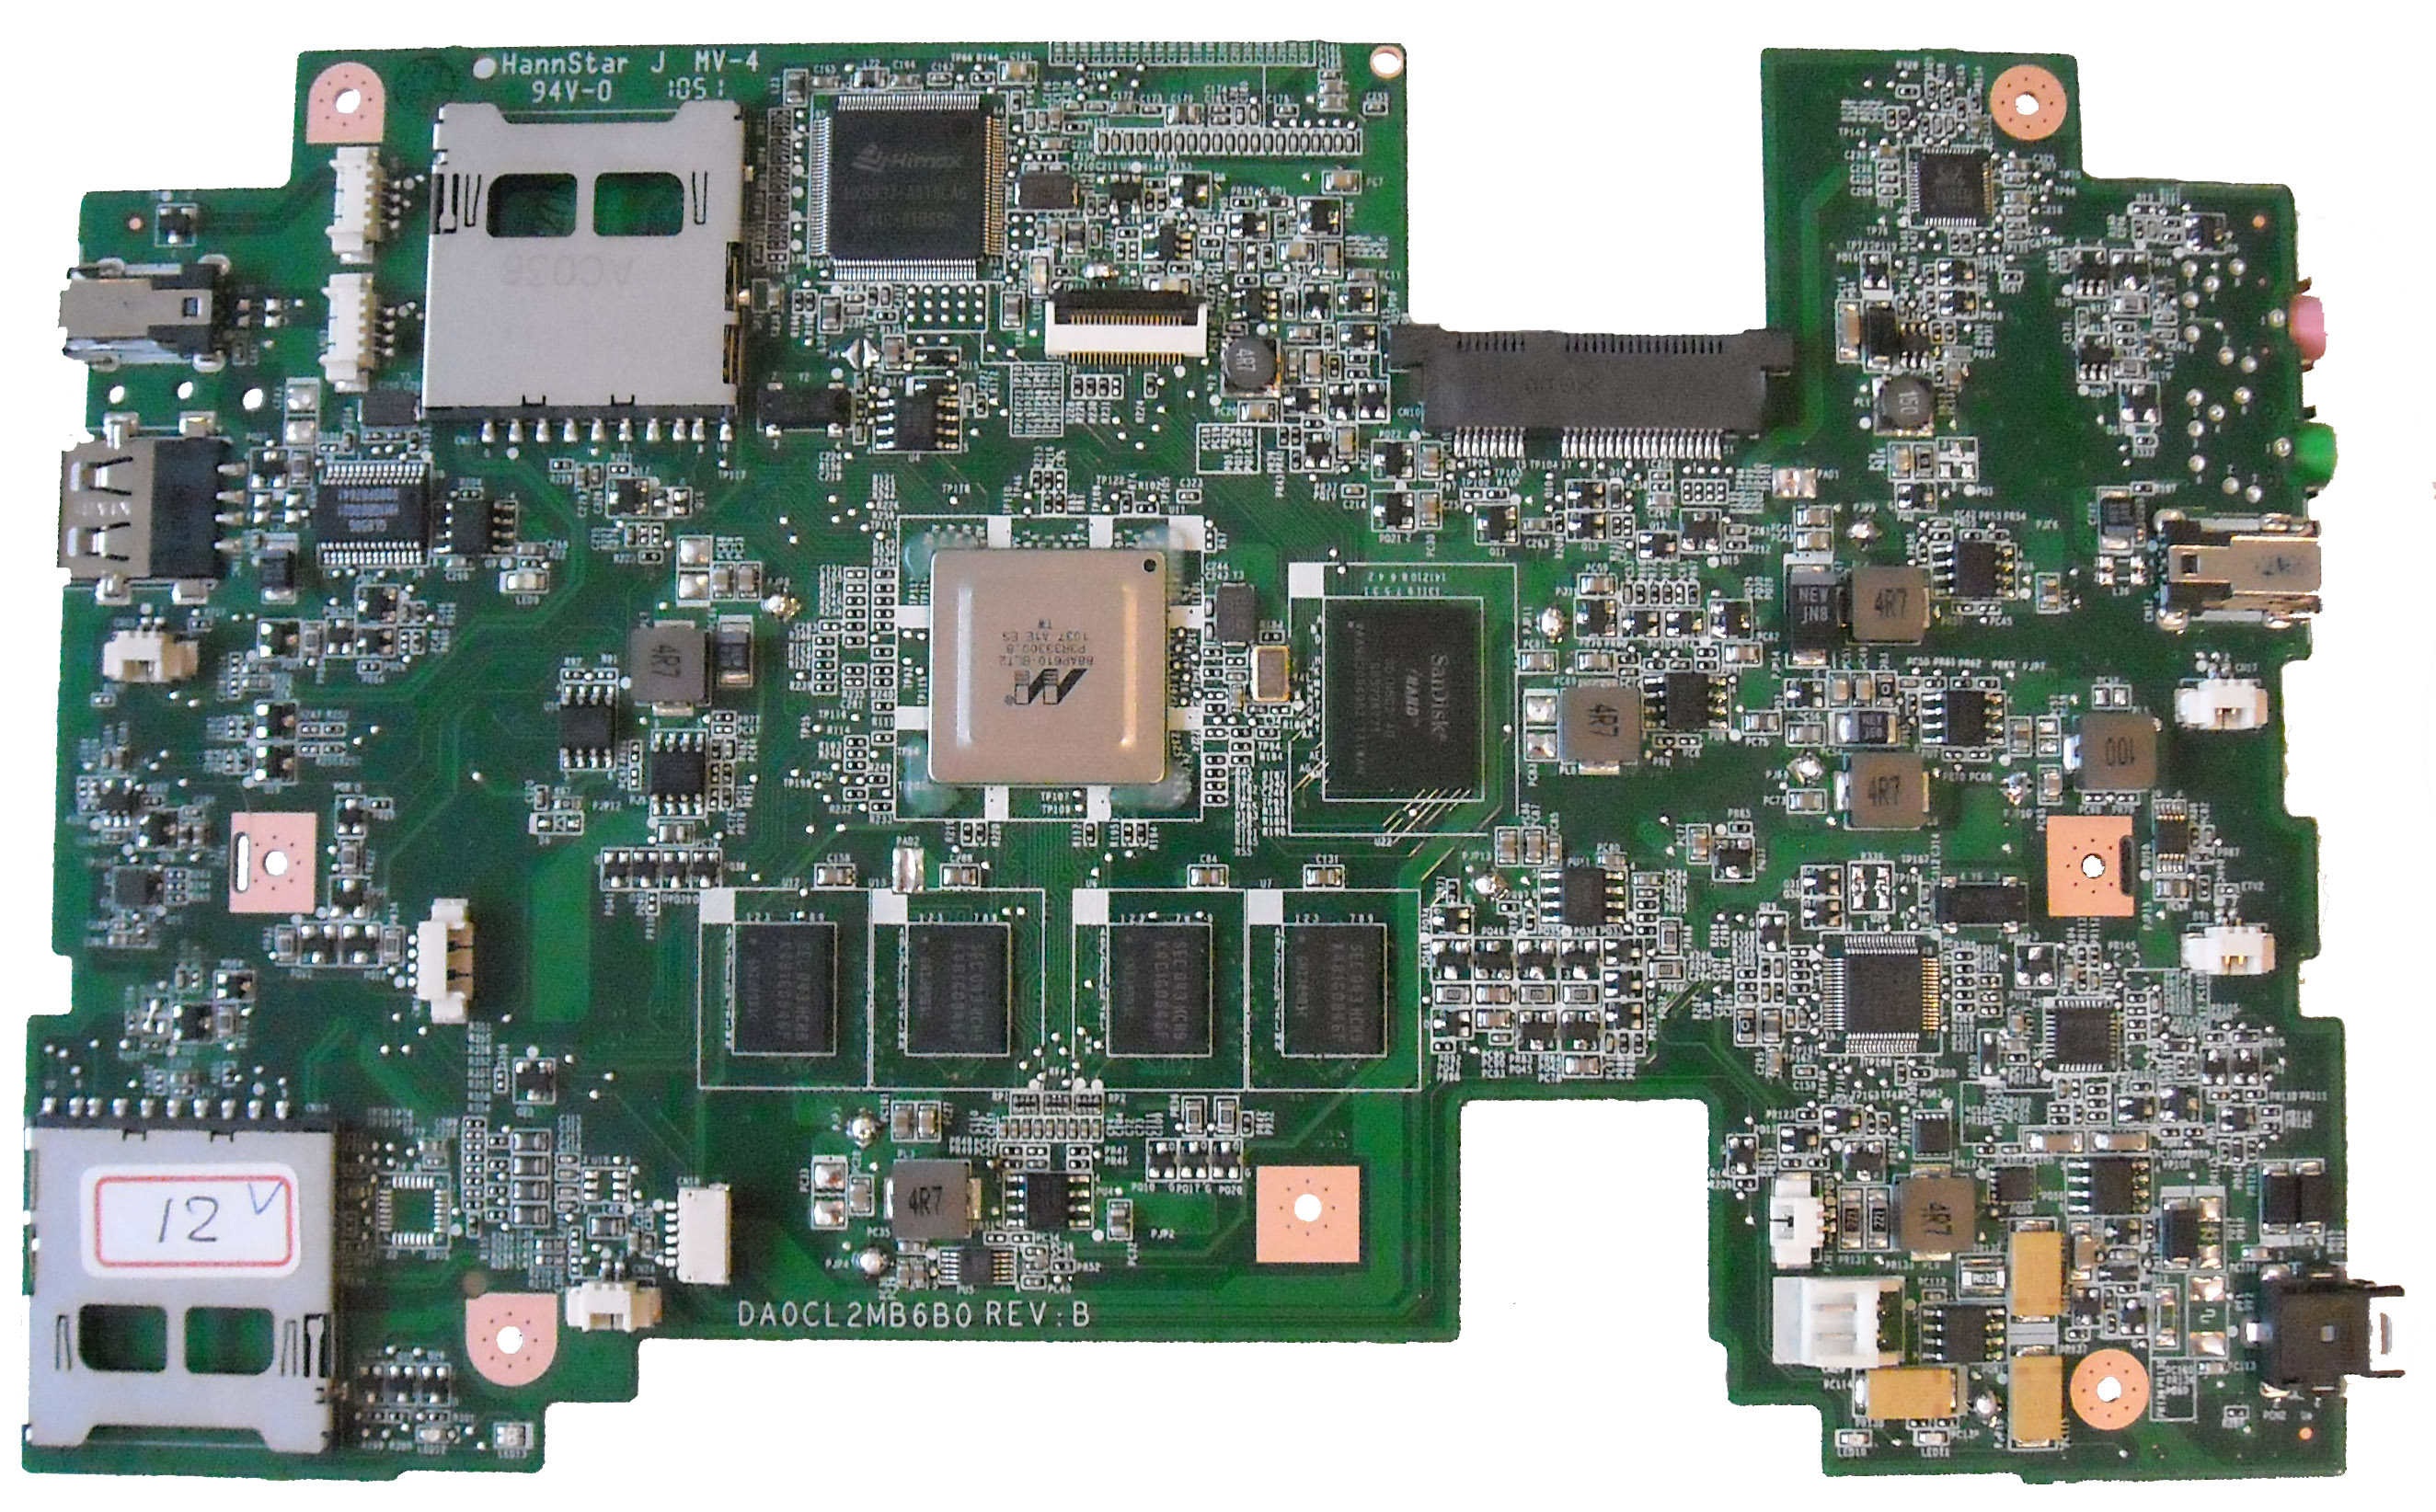
Photographs:
If you disassemble the laptop (instructions), you will see:

Software Support
XO-1.75 B1 use Q4Bxx firmware releases. These will not work on an XO-1 or XO-1.5. The current firmware release for B1 is [[1]].
There are three distinct pieces of software on the XO:
- Embedded controller (EC) firmware
- Open Firmware (OFW)
- Operating System and UI
Each resides in a different storage device on the motherboard, and can be updated individually --- instructions are included below.
At this point, OFW automatically upgrades the EC firmware at boot time, if the installed version is older than the version included in OFW. The laptop must have both a charged battery and external power supplied at boot time for this to happen.
Sometime in the future, the OS image will automatically upgrade OFW if necessary. This is not currently working (<trac>11071</trac>).
Upgrading OFW
To upgrade the version of Open Firmware, place a recent release of the Q4XYY firmware onto an SD device, and place it in the external SD slot.
Interrupt the Open Firmware (OFW) boot process by pressing the ESC key.
Type (assuming a q4b04 release):
flash ext:\q4b04.rom
Reboot by holding down the power button once this is completed. If you need to do this to a bare motherboard, you can use the flash! command which skips the tests for two sources of power.
Upgrading the EC code
Download the latest EC code from: http://dev.laptop.org/pub/ec/. It should be prefixed by "cl2" (e.g. cl2-4.0.2.02.img). Place this file on a USB stick or SD card, and insert it into the laptop being reprogrammed.
From OFW, type:
flash-ec u:\your_filename.img
If you need to do this to a bare motherboard, you can use the flash-ec! command which skips the tests for two sources of power.
Upgrading Linux
Linux images for the B1 are available at http://build.laptop.org/F13-arm/.
Installing from OpenFirmware using USB
You will need the .zd version of the OS image. Download it, then:
- Place the image on a USB stick, and insert it into any of the XO-1.75 laptop's USB ports.
- Get the Ok prompt,
- Install onto the internal SD card, by typing:
fs-update u:\os19.zd
Installing from OpenFirmware using SD card
You will need the .zd version of the OS image. Download it, then:
- Place the image on an SD card, and insert it into the XO-1.75 laptop's external SD slot.
- Get the Ok prompt,
- Install onto the internal SD card, by typing:
fs-update ext:\os19.zd
Installing from Linux using an XO-1.5
To install on an XO-1.5, boot an XO-1.5 to Linux, insert the SD card in the XO-1.5 external slot, then:
zcat os19.img.gz > /dev/mmcblk1
... and then power down, remove the SD card, and insert it in the XO-1.75.
Installing from OpenFirmware using an XO-1.5
You will need the .zd version of the OS image. Download it, then:
- Place the image on a USB stick, and insert it into the XO-1.5 laptop's USB port.
- Get the Ok prompt,
- To install onto the internal SD card, type:
fs-update u:\os19.zd
To install an image onto the external SD card, you need to type:
devalias fsdisk ext:0
fs-update u:\os19.zd
... and then power down, remove the SD card, and insert it in the XO-1.75.
Restrictions
There is a list of recommended modifications (ECOs). There is also a list of changes proposed from B1 to C1.
Possibility of Shorting Vin
If a large force is applied to the back panel, near the DC power input, there is good chance that the heat spreader will short the main internal power rail. This will do "Bad Things"™ to your motherboard.
This can be prevented by placing a piece of tape (electrical or cellulose) on the underside of the heat spreader, on the corner nearest the DC Power jack.
If you have not modified your laptop to fix this, we recommend removing the main battery before carrying it in a book bag.
Operation w. Solar Cell
Twenty-eight of the motherboards don't have the right resistor values for operation with a solar cell. These should be units with both a touchscreen and a non-membrane keyboard. If you have problems using a solar cell, please contact wad or Richard.
Occasional Accelerometer Hangs
We did not get a hardware fix for <trac>11041</trac> or <trac>10882</trac> onto the B1. A software fix can be applied which should prevent this problem from happening (already present in OFW Q4B05).
Antitheft
The antitheft circuitry, by default, does not prevent reprogramming the OFW SPI Flash. It will prevent reprogramming of the EC. Fixing this is a trivial ECO.
Documentation
Supporting documentation for these boards (all in PDF):
- Pinouts
- Connector Locations
- GPIO Mappings
- EC Pinout
- Component locations: bottom, top
Please note that production boards may have different pin mappings and connector locations.