Uploads by Joemck
Jump to navigation
Jump to search
This special page shows all uploaded files.
| Date | Name | Thumbnail | Size | Description | Versions |
|---|---|---|---|---|---|
| 08:25, 1 January 2008 | Touchpad-ribbon-cables-out.jpg (file) | 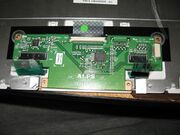 |
408 KB | Disassembly of the bottom half of a mass-production G1G1 XO-1. Keyboard/touchpad controller with the touchpad cables unplugged. The clear flap on the end of each ribbon cable is helpful in plugging them back in. | 1 |
| 08:22, 1 January 2008 | Screws.jpg (file) | 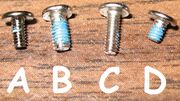 |
87 KB | Disassembly of the bottom half of a mass-production G1G1 XO-1. Photo showing the 4 kinds of screws used here. All are #1 philips head (or is that #0?). | 1 |
| 08:20, 1 January 2008 | Running-open.jpg (file) | 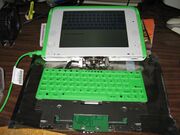 |
366 KB | Disassembly of the bottom half of a mass-production G1G1 XO-1. Running the Open Firmware keyboard diagnostic with the bottom half of the XO taken apart. I was working on a stuck Ctrl key. The screen shows it stuck right now. | 1 |
| 08:16, 1 January 2008 | Magnet.jpg (file) | 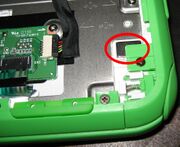 |
242 KB | Disassembly of the bottom half of a mass-production G1G1 XO-1. This lid-switch magnet falls out when you remove the left rail. Also, if you're using a (lightly!) magnetized screwdriver, you might want to use a different one for this screw, since the rotat | 1 |
| 08:13, 1 January 2008 | Left-rail-popped-off.jpg (file) | 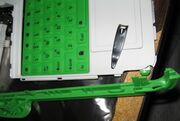 |
262 KB | Disassembly of the bottom half of a mass-production G1G1 XO-1. Removal of the left side rail, showing the two snap locations. I used the nail-clipper handle to slide in to undo the snaps. | 1 |
| 08:10, 1 January 2008 | Kbd-peel-back.jpg (file) | 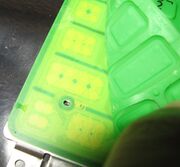 |
224 KB | Disassembly of the bottom half of a mass-production G1G1 XO-1. A look under the membrane in a corner of the keyboard. The rubber membrane just presses on a plastic membrane that's sealed onto a circuit board. This makes it more moisture- and dirt-resistan | 1 |
| 08:06, 1 January 2008 | Hinge-closeup.jpg (file) | 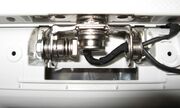 |
241 KB | Disassembly of the bottom half of a mass-production G1G1 XO-1. Closeup of the hinge after unscrewing it from the base. | 1 |
| 08:05, 1 January 2008 | Handle-open.jpg (file) | 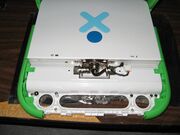 |
349 KB | Disassembly of the bottom half of a mass-production G1G1 XO-1. After removing hinge cover, the top panel of the handle, the green bar along the top, and 4 screws. The remaining 6 screws don't appear to do anything. | 1 |
| 08:00, 1 January 2008 | Glue.jpg (file) | 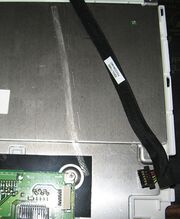 |
210 KB | Disassembly of the bottom half of a mass-production G1G1 XO-1. Strip of restick glue that holds down the cable from the touchpad/keyboard controller to the motherboard. | 1 |
| 07:58, 1 January 2008 | Small-screw-icon.jpg (file) | 15 KB | Disassembly of the bottom half of a mass-production G1G1 XO-1. This icon points at the 4 holes that take the smallest kind of screw. | 1 | |
| 07:56, 1 January 2008 | Kbd-tp-ctlr-top.jpg (file) |  |
242 KB | Disassembly of the bottom half of a mass-production G1G1 XO-1. Top (relative to how you see it when you remove it) view of the keyboard/touchpad controller board. This side faces down when the XO is fully assembled. CN5 connects to the keyboard, CN2 and C | 1 |
| 07:52, 1 January 2008 | Kbd-tp-ctlr-bot.jpg (file) |  |
193 KB | Disassembly of the bottom half of a mass-production G1G1 XO-1. Bottom (relative to how you see it when you remove it) view of the keyboard/touchpad controller board. This side faces up when the XO is fully assembled. The two buttons at the top of the pict | 1 |
| 07:50, 1 January 2008 | Kbd-top.jpg (file) | 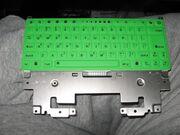 |
458 KB | Disassembly of the bottom half of a mass-production G1G1 XO-1. Top view of the keyboard. | 1 |
| 07:49, 1 January 2008 | Kbd-bot.jpg (file) | 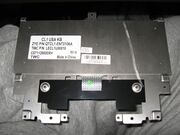 |
437 KB | Disassembly of the bottom half of a mass-production G1G1 XO-1. Bottom view of the keyboard. | 1 |