SqueakEtoysReference: Difference between revisions
Jump to navigation
Jump to search
No edit summary |
m (re-categorization) |
||
| (4 intermediate revisions by 3 users not shown) | |||
| Line 2: | Line 2: | ||
==='''Typical Etoys World'''=== |
==='''Typical Etoys World'''=== |
||
[[OLPC Squeak Etoys Picture Gallery]] |
|||
==='''Navigator Tab'''=== |
==='''Navigator Tab'''=== |
||
| Line 55: | Line 57: | ||
==='''Halos and Handles'''=== |
==='''Halos and Handles'''=== |
||
[[Image:InitialViewerForCar. |
[[Image:InitialViewerForCar.gif]] |
||
[[Image:CarWithHandlesAndBalloonHelp.JPG|200px]] |
[[Image:CarWithHandlesAndBalloonHelp.JPG|200px]] |
||
[[Image:CarWithHandles.JPG|150px]] |
[[Image:CarWithHandles.JPG|150px]] |
||
[[Category:Etoys]] |
|||
Latest revision as of 22:46, 11 January 2007
To Start Etoys on the XO
Typical Etoys World
OLPC Squeak Etoys Picture Gallery
If you click on the Navigator Tab ![]() you will open the Navigator flap.
you will open the Navigator flap.
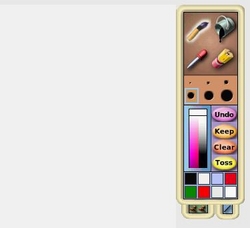
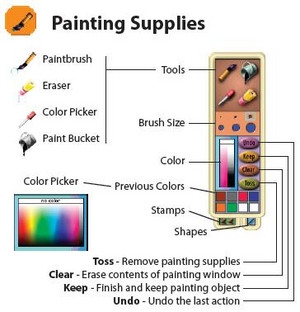
![]() The paintbrush icon will bring up the painting palette and a paint area.
The paintbrush icon will bring up the painting palette and a paint area.
Painting
The painting area is normally set to be translucent to allow easy tracing and to make it very clear just what is being painted. This area is a standard Etoy object and can be moved, scaled, and colored in various ways (see Graphical Properties Sheet). There is a Preference that can choose to have the painting area be the entire size of the screen.


