ByJove: Difference between revisions
No edit summary |
|||
| (7 intermediate revisions by the same user not shown) | |||
| Line 92: | Line 92: | ||
</p> |
</p> |
||
<p> |
<p> |
||
The status line displays a message telling you which of the moons are visible. A moon might not be visible if it is either in front of or behind the planet, as seen from Earth. So it's possible that the names of all four moons will be shown or fewer. (in very rare cases, none!) |
The status line displays a message telling you which of the moons are visible. A moon might not be visible if it is either in front of or behind the planet, as seen from Earth. So it's possible that the names of all four moons will be shown or fewer. (in very rare cases, none!) The names of the moons are always listed in the same order -- from the moon that orbits closest to Jupiter, Io, to the moon that orbits farthest away, Callisto. |
||
</p> |
</p> |
||
== Operating instructions == |
== Operating instructions == |
||
<p> |
<p> |
||
The initial display for |
The initial display for ByJove will show the position of the moons at the current time. (This assumes you have done the steps described above in "Installation and set-up".) |
||
<br> |
<br> |
||
<br> |
<br> |
||
[[Image: |
[[Image:ByJove_activity.jpg|center|ByJove]] |
||
<br> |
<br> |
||
</p> |
</p> |
||
<br> |
<br> |
||
<p> |
<p> |
||
Note that there are |
Note that there are four menu tabs: "Activity", "What", "When" and "About". "Activity" is pretty much the same as any other activity's "Activity" tab except that ByJove does not yet support collaboration so the "Share" control is missing. Let's look at each of the other tabs in order... |
||
=== The "What" menu controls === |
=== The "What" menu controls === |
||
<br> |
<br> |
||
[[Image: |
[[Image:ByJove_what.jpg|center|"What": Set display options]] |
||
<br> |
<br> |
||
</p> |
</p> |
||
<br> |
<br> |
||
<p> |
<p> |
||
"What" lets you change the color combinations of the |
"What" lets you change the color combinations of the plot. These settings get saved, too. So if you prefer black moons on white sky you can get that combination. Let's walk through each option and see what it does to the appearance of the map. |
||
<br> |
<br> |
||
<br> |
<br> |
||
[[Image: |
[[Image:ByJove_red.jpg|center|Night Vision ON]] |
||
<br> |
<br> |
||
</p> |
</p> |
||
<br> |
<br> |
||
The "Night Vision" option makes the activity's display mostly red on black. Red light doesn't affect your night vision so using this mode lets your eyes read the map and still remain sensitive enough to see the dim stars. <em>Hint: it also helps to set the brightness of the back-light as low as you can and still read the |
The "Night Vision" option makes the activity's display mostly red on black. Red light doesn't affect your night vision so using this mode lets your eyes read the map and still remain sensitive enough to see the dim stars. <em>Hint: it also helps to set the brightness of the back-light as low as you can and still read the screen to minimize the effect on your night vision.</em> |
||
<br> |
<br> |
||
<br> |
<br> |
||
<p> |
<p> |
||
But sometimes you will find it easier to work with a chart that's black on white like a page in a book. This mode is not good for use at night but it's fine in a classroom or in daylight. To get a black |
But sometimes you will find it easier to work with a chart that's black on white like a page in a book. This mode is not good for use at night but it's fine in a classroom or in daylight. To get a black plot on a white background, set "Invert Display". |
||
<br> |
<br> |
||
<br> |
<br> |
||
[[Image: |
[[Image:ByJove_invert.jpg|center|Invert Display ON]] |
||
<br> |
<br> |
||
</p> |
</p> |
||
<br> |
|||
<p> |
|||
Normally, StarChart shows its map with east on the left. This may seem odd to you because a terrestrial map would show east on the right. But if you face east and hold the map so that east is near the ground, you'll discover that with a terrestrial map, north on the map is now to your south! With StarChart's mirrored map, north is north and south is south when east is down. That means what you see on your XO's screen will match what you see in the sky. |
|||
</p> |
|||
<p> |
|||
But if you find it confusing to have east on the left and west on the right, you can set "Flip L/R" and get the map to be like a terrestrial map. |
|||
<br> |
|||
<br> |
|||
[[Image:Screenshot_--_StarChart5_-5.png|center|Flip L/R ON]] |
|||
<br> |
|||
</p> |
|||
<br> |
|||
<p> |
|||
Stars are grouped in imaginary figures called constellations. These represented scientific and navigational instruments, gods and goddesses, mythical and real animals and other patterns that people saw in the sky. Since drawing detailed pictures would make the chart too confusing, astronomers usually draw simple stick-figures. StarChart normally plots these standard figures. But you can turn that off and just see the stars themselves if you want -- after all, there are no lines drawn in the sky! |
|||
<br> |
|||
<br> |
|||
[[Image:Screenshot_--_StarChart5_-6.png|center|Plot Constellations OFF]] |
|||
<br> |
|||
</p> |
|||
<br> |
|||
<p> |
|||
Stars come in different brightnesses. Astronomers call these levels of brightness "magnitudes". The brightest stars are magnitude zero (well, in a couple of cases, brighter than that); the dimmest stars that you can see without a telescope or binoculars on a really dark night will be about magnitude 6. |
|||
</p> |
|||
<p> |
|||
There are a lot more dim stars than bright ones. So if StarChart always plotted all the stars you could see, there would be so many (over 1,000!) that it would be hard for you to read the map. So there's a control (actually six of them) that lets you select how dim the stars the activity should bother to plot. StarChart defaults to plotting stars of magnitude 4 or brighter. This is a good compromise between having not enough stars to appreciate what the sky looks like and having so many that it's confusing. This brightness is about what you would see on an average night in suburban locations. |
|||
</p> |
|||
<p> |
|||
Here is what the plot looks like when you have asked for only the brightest of the stars. This is what the sky might look like from the middle of a large city. |
|||
<br> |
|||
<br> |
|||
[[Image:Screenshot_--_StarChart5_-7.png|center|Only the Brightest Stars]] |
|||
<br> |
|||
</p> |
|||
<br> |
|||
<p> |
|||
And this is what the sky might look like from a mountain a long way from cities or towns on a moonless night. |
|||
<br> |
|||
<br> |
|||
[[Image:Screenshot_--_StarChart5_-8.png|center|All the Stars You could See]] |
|||
<br> |
|||
</p> |
|||
<br> |
|||
=== The "Where" menu tab controls === |
|||
<p> |
|||
This is the menu tab that lets you tell StarChart from what place on earth you would like to see the sky plotted. Usually, this would be where <em>you</em> are, but sometimes you might want to see what the sky looks like to someone living elsewhere. |
|||
<br> |
|||
<br> |
|||
[[Image:Screenshot_--_StarChart5_-9.png|center|"Where": Set location]] |
|||
<br> |
|||
</p> |
|||
<br> |
|||
<p> |
|||
A location on earth is specified by longitude and latitude. Longitudes go from zero to 180 degrees east or from zero to 180 degrees west. Latitudes go from zero to 90 degrees north or zero to 90 degrees south. |
|||
</p> |
|||
<p> |
|||
The StarChart activity will accept an angle as a number of degrees, including fractional degrees (like "123.45") or an angle as degrees, minutes and seconds. In this second type of angle, you must use a form like "123d27m33s". Enter longitude (be sure to select east or west) and latitude (be sure to select north or south) and click on the "Ok" button. If the new location is substantially distant from the old, the star map will look very different. |
|||
</p> |
|||
<p> |
|||
The "Make Home" button will set the selected location as your default observatory coordinates. This setting is then remembered for all future StarChart sessions. |
|||
<br> |
|||
<br> |
|||
[[Image:Screenshot_--_StarChart5_-10.png|center|Change location to Hawaii]] |
|||
<br> |
|||
</p> |
|||
<br> |
|||
<br> |
|||
=== The "When" menu tab controls === |
=== The "When" menu tab controls === |
||
<p> |
<p> |
||
These controls let you specify the time for which you want the |
These controls let you specify the time for which you want the moons plotted. |
||
<br> |
<br> |
||
<br> |
<br> |
||
[[Image: |
[[Image:ByJove_when.jpg|center|"When": change time and time-zone offset]] |
||
<br> |
<br> |
||
</p> |
</p> |
||
<p> |
<p> |
||
Normally, "Now" is selected and the current year, month, day, hour and minute and the number of hours and minutes that your time-zone differs from GMT by is shown in the time and offset fields. Additionally, the time field will automatically be updated to track the current local time and the plot will automatically be recomputed once |
Normally, "Now" is selected and the current year, month, day, hour and minute and the number of hours and minutes that your time-zone differs from GMT by is shown in the time and offset fields. Additionally, the time field will automatically be updated to track the current local time and the plot will automatically be recomputed once every ten minutes. In this mode, the plot will match the current positions of the moons and the plot will show the moons moving over time. But you can also use these controls to specify that you want a plot for a particular time in the future or past. |
||
</p> |
</p> |
||
<p> |
<p> |
||
| Line 213: | Line 145: | ||
</p> |
</p> |
||
<p> |
<p> |
||
When you click on the "Specify time" radio button, |
When you click on the "Specify time" radio button, ByJove stops the display from automatically being updated. Clicking on the "Now" radio button will set the time back to the current time and resume automatically updating the time fields and the chart. |
||
<br> |
<br> |
||
<br> |
<br> |
||
[[Image: |
[[Image:ByJove_set_time.jpg|center|set a new time]] |
||
<br> |
<br> |
||
</p> |
</p> |
||
<br> |
<br> |
||
<p> |
<p> |
||
Another time you have to use the "When" controls is to get a valid |
Another time you have to use the "When" controls is to get a valid plot for another place expressed in that place's local time. When you specify some place at a different longitude from your home location, you often will also need to know that place's time zone offset and set that as well. For example, to get a star chart for 8 PM on March 15th, 2008 for Hawaii, you would need to enter "Specify time; 2008/03/15,20:00; -10:00" using the "When" tools. |
||
<br> |
<br> |
||
<br> |
<br> |
||
[[Image: |
[[Image:ByJove_set_tz.jpg|center|set a new time zone offset]] |
||
<br> |
<br> |
||
</p> |
</p> |
||
<br> |
<br> |
||
=== The "Locate" menu tab controls === |
|||
<p> |
|||
These controls let you select an object and have it highlighted on the chart so you can tell where the object is in the sky. You can "locate" planets, stars (either by the constellation which contains the star or from a list of the brightest stars) or "deep-sky" objects. |
|||
<br> |
|||
[[Image:StarChart_s1_016.png|center|"Locate": selecting an object type]] |
|||
</p> |
|||
<p> |
|||
You begin by selecting the type of object. Then you pick the object itself. |
|||
</p> |
|||
<br> |
|||
<p> |
|||
Let's start by locating the planet Venus... |
|||
[[Image:StarChart_s1_017.png|center|"Locate": Locating Venus]] |
|||
The green cross marks where the object is. |
|||
</p> |
|||
<br> |
|||
<p> |
|||
Now let's try locating the planet Saturn... |
|||
[[Image:StarChart_s1_018.png|center|"Locate": This object has set or not yet risen]] |
|||
But Saturn has not yet risen, so it isn't visible right now. Instead of the green cross, you get a message saying that the object you wanted is currently below your horizon. |
|||
</p> |
|||
<br> |
|||
<p> |
|||
Now let's locate a star. There are two ways to do this: you can select an object type of "Stars by Constellation" or an object type of "Brightest Stars". "Stars by Constellation" will let you locate any star in the catalog but you need to know your constellation names. "Brightest Stars" will only find 50 or so stars but these are the ones whose names you probably already know. |
|||
[[Image:StarChart_s1_019.png|center|"Locate": One way to locate a star]] |
|||
Here we have located Alpharatz, a star in the constellation of Andromeda. |
|||
</p> |
|||
<br> |
|||
<p> |
|||
[[Image:StarChart_s1_020.png|center|"Locate": This star is too far south to see]] |
|||
We attempted to locate Canopus, one of the brightest stars in the southern sky. But the current location is too far north to ever see Canopus, so StarChart tells you that this object is always below the horizon. |
|||
</p> |
|||
<br> |
|||
<p> |
|||
[[Image:StarChart_s1_024.png|center|"Locate": Find a Bright Star]] |
|||
In this example, we use "Brightest Stars" to locate Deneb. |
|||
</p> |
|||
<br> |
|||
<p> |
|||
[[Image:StarChart_s1_025.png|center|"Locate": Find a Deep-Sky Object]] |
|||
And by selecting "Deep-Sky Objects" we located the famous Andromeda Galaxy. |
|||
</p> |
|||
<br> |
|||
=== The "About" menu tab === |
=== The "About" menu tab === |
||
<p> |
<p> |
||
The "About" tab displays the version information for the activity and lists the URL of this documentation page. |
The "About" tab displays the version information for the activity and lists the URL of this documentation page. |
||
<br> |
<br> |
||
[[Image: |
[[Image:ByJove_about.jpg|center|"About" this activity]] |
||
This is an easy way to determine which version of |
This is an easy way to determine which version of ByJove you are using and gives a quick reminder about where to find these operating instructions. |
||
</p> |
</p> |
||
=== The "Identify" feature === |
=== The "Identify" feature === |
||
<p> |
<p> |
||
Now we come to a capability of the activity that isn't obvious from the menu tabs. This is the ability to identify an object which is shown on the |
Now we come to a capability of the activity that isn't obvious from the menu tabs. This is the ability to identify an object which is shown on the plot by pointing the cursor at it and clicking the left mouse button. |
||
[[Image: |
[[Image:ByJove_identify.jpg|center|Clicking on Callisto]] |
||
Here, the operator has selected the |
Here, the operator has selected the outermost Galilean moon, Callisto. ByJove duly notes that the object is a moon and that its name is Callisto. This works for anything on the plot, including the planet Jupiter itself. |
||
</p> |
</p> |
||
<br> |
<br> |
||
<p> |
<p> |
||
But if you point to an empty part of the plot or outside the plot itself, you get a message saying that there is no object at that location instead. |
|||
[[Image:StarChart_s1_022.png|center|There's nothing here]] |
|||
But if you point to an empty part of the chart or outside the chart itself, you get this message instead. |
|||
</p> |
</p> |
||
=== Magnification Feature === |
|||
<p> |
|||
If you right-click on a point in the whole-sky plot, StarChart will show you a view centered on that point as you would see in a seven-power telescope. This is a circular field of view seven degrees in diameter. (A pair of 7X binoculars has a field of view roughly this big.) |
|||
<br> |
|||
[[Image:Screenshot_--_StarChart115_-26.png|center|Magnified View]] |
|||
<br> |
|||
StarChart will show all the objects from the whole-sky plot that fit in that field and will also automatically show stars as dim as magnitude 6.7. Since any instrument which magnifies the sky will also gather more light than your eye can, using binoculars or a spy-glass therefore will let you see objects dimmer than the visual limit of 6.3. |
|||
</p> |
|||
<p> |
|||
While magnifying, StarChart will hide the controls which would have let you set the limiting brightness. StarChart also hides the "Draw Constellations" button because we don't draw the constellations in the magnified view. The magnified view also cannot tolerate changing the observer's latitude and longitude and cannot tolerate changing time, so all the controls for "Where" and "When" are hidden and the plotting time does not advance. |
|||
</p> |
|||
<p> |
|||
But you can still use "Locate" and "Identify" as you would for the whole sky plot. |
|||
<br> |
|||
[[Image:Screenshot_--_StarChart115_-27.png|center|Locate a Deep-Sky Object]] |
|||
<br> |
|||
Deep-sky objects are automatically enlarged seven times to appear as big in the magnified view as they would appear in your instrument. |
|||
</p> |
|||
<p> |
|||
[[Image:Screenshot_--_StarChart115_-29.png|center|Identify Dim Star]] |
|||
<br> |
|||
Because stars are essentially points, their size is the same in the magnified plot as in the whole-sky plot. |
|||
<br> |
|||
[[Image:Screenshot_--_StarChart115_-30.png|center|Locate a Bright Star]] |
|||
</p> |
|||
<p> |
|||
Though if you ask to locate an object which might be visible in the whole-sky plot but is not visible in the magnified plot, you will get a specific error message saying "This object is not in the field of view.". |
|||
<br> |
|||
[[Image:Screenshot_--_StarChart115_-e3.png|center|Object is not in FOV]] |
|||
<br> |
|||
</p> |
|||
<p> |
|||
To return to the whole-sky plot again, simply right-click anywhere in the magnified plot. |
|||
</p> |
|||
== Error messages == |
== Error messages == |
||
<p> |
<p> |
||
ByJove will detect errors if you make a mistake when specifying a time or time zone offset on the "When" tab. |
|||
<br> |
<br> |
||
[[Image:Screenshot_--_StarChart5_-15.png|center|Location input error]] |
|||
<br> |
<br> |
||
[[Image:ByJove_time_err.jpg|center|Time input error]] |
|||
StarChart will restore the longitude and latitude settings to the default (your observatory location, if specified -- see below -- or 0,0) values. You may try again or simply click "Apply Location" again to confirm that you want to keep the good settings after all. |
|||
</p> |
|||
<br> |
<br> |
||
<p> |
|||
StarChart will also detect errors with the time and time-zone offset settings. |
|||
<br> |
<br> |
||
[[Image: |
[[Image:ByJove_tz_err.jpg|center|Time Zone Offset input error]] |
||
<br> |
<br> |
||
In this event, |
In this event, the activity will reset the time to the current local time and reset the zone offset to the offset of the local time-zone. |
||
</p> |
</p> |
||
== Advanced features and tricks == |
|||
=== Customize it === |
|||
<p> |
|||
Here are some changes you can make if you are comfortable using the Terminal, can find your way around the linux file-system and can use one of the pre-installed text editor programs. |
|||
</p> |
|||
<p> |
|||
<b>Prevent the plotting of the deep sky objects</b> |
|||
<br> |
|||
If you find that having deep sky objects plotted is unnecessary for your purposes, you may disable this feature. Simply rename the files "dso1.py" and "dso2.py" in the StarChart directory to something else (e.g.: dso1.bak and dso2.bak). To restore the functionality, simply name the files back to dso1.py and dso2.py and start the activity again. |
|||
</p> |
|||
<p> |
|||
<b>Disable the Magnification feature</b> |
|||
<br> |
|||
If you do not wish to support magnification, you may disable this feature using a similar technique. The file which must be renamed is stars2.py. |
|||
</p> |
|||
<p> |
|||
<b>For the traveler</b> |
|||
<br> |
|||
You may temporarilly override observatory location and time-zone offset by creating a file named travel.py in the StarChart directory. This file should contain one line of Python similar to this: |
|||
<br> |
|||
<pre> |
|||
data = [123.45, -67.89, +870.0] |
|||
</pre> |
|||
</p> |
|||
<p> |
|||
The first number is the longitude of the place you are traveling to. The second number is the latitude of the place you are traveling to. The third number is the number of minutes <em>different</em> between your home time-zone and the time-zone of the place you are traveling to. Again, be careful not to mess up the punctuation marks or this file will be rejected and your home location and time-zone offset will be used instead. |
|||
</p> |
|||
<p> |
|||
When you return home, simply delete the travel.py file and StarChart will go back to its usual default location and time-zone offset. |
|||
</p> |
|||
=== Tips === |
=== Tips === |
||
<p> |
<p> |
||
And here are some tips that will make using |
And here are some tips that will make using ByJove easier: |
||
</p> |
</p> |
||
* Use Alt+Enter to switch to full-screen mode after you have set up "What |
* Use Alt+Enter to switch to full-screen mode after you have set up "What" and "Where". This will hide the menus and make the plot somewhat larger. It's especially helpful when you want to use the Night Vision color scheme as the menus are still being drawn in the white-on-black default colors. |
||
* You can turn your XO into a red-light flashlight by setting both "Night Vision" and "Invert Display" then switching to full-screen mode. |
* You can turn your XO into a red-light flashlight by setting both "Night Vision" and "Invert Display" then switching to full-screen mode. |
||
* After |
* After identifying an object you may want to get the list of visible moons back. To do this, select the "When" tab and click on "Ok" without making any changes. |
||
== Revision history == |
== Revision history == |
||
Plese see [[ |
Plese see [[ByJove/Change_log|the change-log page]]. |
||
== Reporting bugs == |
== Reporting bugs == |
||
To report a bug or to see what bugs have been reported and/or fixed, please go to [[ |
To report a bug or to see what bugs have been reported and/or fixed, please go to [[ByJove/Bug_tracking|the bug tracking page]]. |
||
<br> |
<br> |
||
<br> |
<br> |
||
<br> |
<br> |
||
{{Activity page |
{{Activity page |
||
|icon=Image: |
|icon=Image:ByJove.svg |
||
|genre=Math and Science |
|genre=Math and Science |
||
|activity group= |
|activity group= |
||
|short description= |
|short description=Plot Jupiter's Moons |
||
|long description=This activity will display a plot of the |
|long description=This activity will display a plot of the positions of the Galilean moons of Jupiter at a specified time. |
||
|contact person=User:Davewa |
|contact person=User:Davewa |
||
|activity source=http://www.wa1gsf.net/downloads/XO/ |
|activity source=http://www.wa1gsf.net/downloads/XO/ByJove-1.xo |
||
|language= |
|language= |
||
|language codes= |
|language codes= |
||
|bundle URL=http://www.wa1gsf.net/downloads/XO/ |
|bundle URL=http://www.wa1gsf.net/downloads/XO/ByJove-1.xo |
||
|activity version= |
|activity version=1 |
||
|releases=7.1.2 (656), 8.1.0 (703), 8.1.1 (708), 8.2.0 (767), 8.2.1 |
|releases=7.1.2 (656), 8.1.0 (703), 8.1.1 (708), 8.2.0 (767), 8.2.1 |
||
|devel status= |
|devel status=4. Beta |
||
}} |
}} |
||
Latest revision as of 17:49, 23 October 2010
|
Warning: If your screen doesn't look like these screen-shots (especially, check the version shown on the "About" tab), your version of ByJove is not up-to-date.
Jovian Moons Activity
This activity will display the position of the four largest moons of Jupiter (the "Galilean Moons") as seen through binoculars.
You may specify a time (including time zone offset from GMT) that you wish to have a plot for. Alternatively, you can get a plot which is updated once every ten minutes showing the current positions. The program will show you a plot even if Jupiter is not currently visible in your sky.
You can use the "Identify" feature to determine which moon is which.
This program operates similar to the author's StarChart activity; if you are familiar with that one, the controls provided by ByJove are similar.
The latest version (identified as "Version 1.0, build 20") can be downloaded from here.
This version has been tested and confirmed to function on OLPC O/S release 8.2.1.
Preface
Call for suggestions
Help me take this activity to the next level! Please add comments on the "discussion" page associated with this article.
Where's the source code?
This activity is coded entirely in Python. Therefore, the source for the activity is distributed as part of the .XO file and can (with any tool that understands the compressed format of .XO files, e.g.: WinZip for the PC) be extracted directly from the bundle.
Disclaimer: there will be bugs
This is the first "beta" release. It functions and has all the initial features buit it still may contain bugs. It's not localized, so English is the only language for now.
Please see the bug tracking page for the list of known bugs or to report a bug.
Introduction
ByJove was created by a professional programmer. The XO is a wonderful observing accessory since it is light, compact and frugal of battery power while providing a reasonably large, reasonably high resolution color display.
This Activity is intended to support the star-gazer who has access to simple binoculars or a low-power spy-glass-style telescope. It can be used as a guide to the sky overhead or as a tool for planning future observations.
The current version of this activity is "Version 1.0 (build 20) of 2010.10.21.2330 UT", which can be confirmed by using the "About" feature. See the change log page for revision history.
Before you begin
Be sure your XO has been set to the correct time-zone offset and the correct local time! The astronomical algorithms need to compute GMT (UT) and can't do that if "now" isn't the right time. (This is only an issue if you don't plan to always use "specify time". But it's still an untidy way to operate your computer.)
Installation and set-up
For best results, remove any previous version of ByJove you may have installed. Re-start X (hit Ctrl-Alt-Backspace). Then, simply follow the usual procedure for downloading and installing an Extra Activity.
Once you have installed ByJove, start it and select the "When" menu tab.
Is the time (YYYY/MM/DD,HH:MM) the correct year, month, day, hour and minute for your location (it's 24-hour time -- 1:00 PM is 13:00 in that system)? Is the zone offset showing the correct hours and minutes that your locale is offset from GMT? (Hint: Eastern Standard Time in the USA is "-5:00" with respect to GMT.) If not, stop the activity and correct your time and time-zone using the Sugar control panel before proceeding.
If the time and date are correct, the activity will be displaying the position of Jupiter's moons as of right now.
How to read the plot
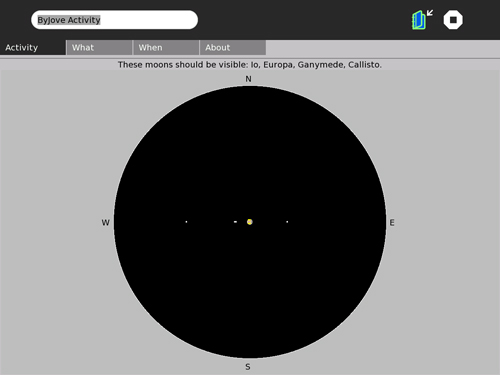
The field of view of your instrument is the large, mostly empty black disc. Jupiter is the small disc at the center of the plot. The moons are one or more small points of light to the left and/or right of Jupiter. (I don't plot possible "background stars", as this would only make the view confusing.) This view is much as you would see under good conditions if you centered Jupiter in a seven-to-ten-power telescope or a pair of 7x35 binoculars. I've drawn Jupiter's disc with a little detail representing the most prominent cloud bands and with a pale yellow color. Again, this is about what you would see.
The status line displays a message telling you which of the moons are visible. A moon might not be visible if it is either in front of or behind the planet, as seen from Earth. So it's possible that the names of all four moons will be shown or fewer. (in very rare cases, none!) The names of the moons are always listed in the same order -- from the moon that orbits closest to Jupiter, Io, to the moon that orbits farthest away, Callisto.
Operating instructions
The initial display for ByJove will show the position of the moons at the current time. (This assumes you have done the steps described above in "Installation and set-up".)
Note that there are four menu tabs: "Activity", "What", "When" and "About". "Activity" is pretty much the same as any other activity's "Activity" tab except that ByJove does not yet support collaboration so the "Share" control is missing. Let's look at each of the other tabs in order...
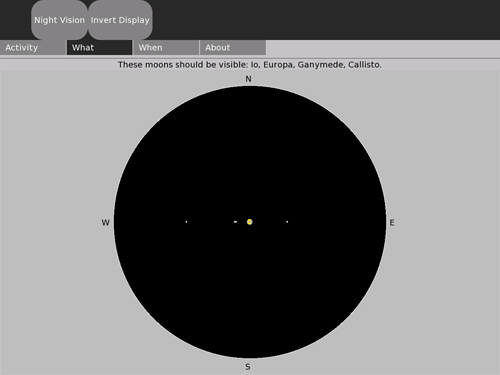
"What" lets you change the color combinations of the plot. These settings get saved, too. So if you prefer black moons on white sky you can get that combination. Let's walk through each option and see what it does to the appearance of the map.
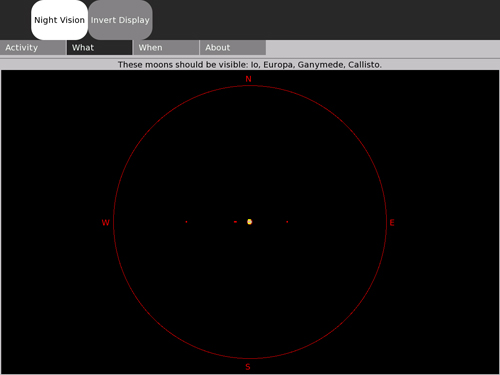
The "Night Vision" option makes the activity's display mostly red on black. Red light doesn't affect your night vision so using this mode lets your eyes read the map and still remain sensitive enough to see the dim stars. Hint: it also helps to set the brightness of the back-light as low as you can and still read the screen to minimize the effect on your night vision.
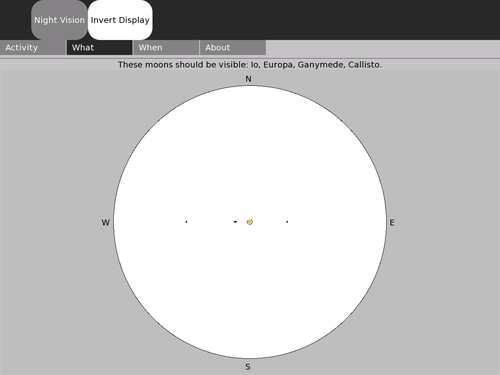
But sometimes you will find it easier to work with a chart that's black on white like a page in a book. This mode is not good for use at night but it's fine in a classroom or in daylight. To get a black plot on a white background, set "Invert Display".
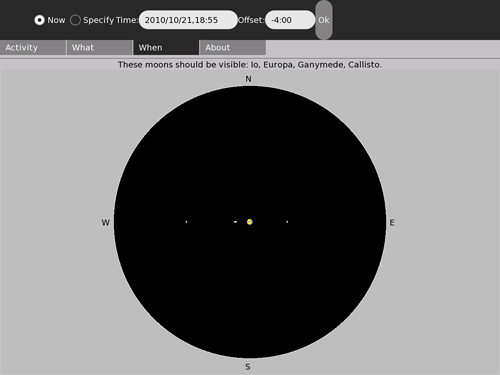
These controls let you specify the time for which you want the moons plotted.
Normally, "Now" is selected and the current year, month, day, hour and minute and the number of hours and minutes that your time-zone differs from GMT by is shown in the time and offset fields. Additionally, the time field will automatically be updated to track the current local time and the plot will automatically be recomputed once every ten minutes. In this mode, the plot will match the current positions of the moons and the plot will show the moons moving over time. But you can also use these controls to specify that you want a plot for a particular time in the future or past.
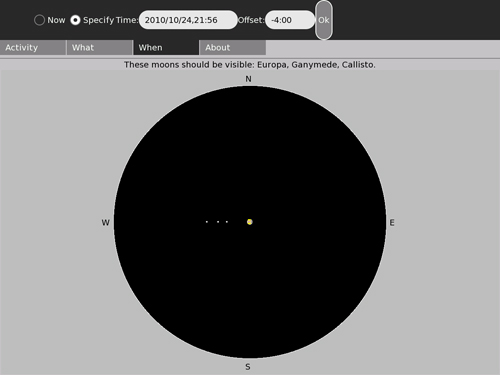
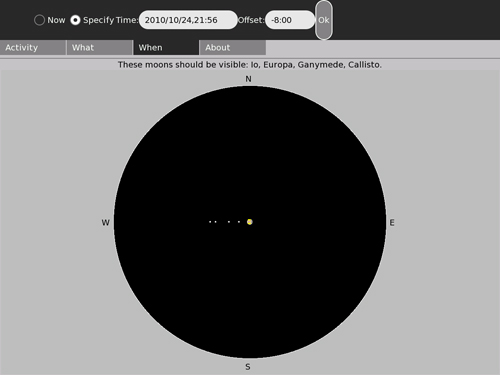
Click the "Specify time" radio button, since "Now" isn't what you want anymore. Now specify the new time, beginning with the year. Time is entered as a four-digit year, a two-digit month and a two-digit day, separated by slash (/) characters, a comma (,) and then the hour and minute in 24-hour time separated by a colon (:). Example: 2008/02/20,22:00 would be 10 PM on the 20th of February, 2008. Next, if your location observes daylight time, you may need to add or subtract an hour from the time-zone offset value if the time you entered is on the "other side of the daylight time boundary". Finally, click "Ok" to get the new plot.
When you click on the "Specify time" radio button, ByJove stops the display from automatically being updated. Clicking on the "Now" radio button will set the time back to the current time and resume automatically updating the time fields and the chart.
Another time you have to use the "When" controls is to get a valid plot for another place expressed in that place's local time. When you specify some place at a different longitude from your home location, you often will also need to know that place's time zone offset and set that as well. For example, to get a star chart for 8 PM on March 15th, 2008 for Hawaii, you would need to enter "Specify time; 2008/03/15,20:00; -10:00" using the "When" tools.
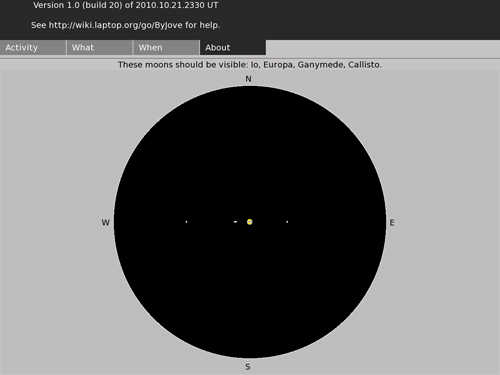
The "About" tab displays the version information for the activity and lists the URL of this documentation page.
This is an easy way to determine which version of ByJove you are using and gives a quick reminder about where to find these operating instructions.
The "Identify" feature
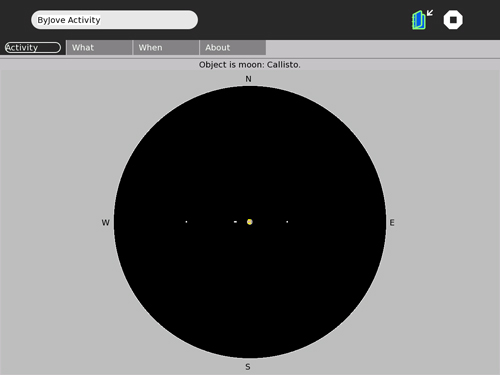
Now we come to a capability of the activity that isn't obvious from the menu tabs. This is the ability to identify an object which is shown on the plot by pointing the cursor at it and clicking the left mouse button.
Here, the operator has selected the outermost Galilean moon, Callisto. ByJove duly notes that the object is a moon and that its name is Callisto. This works for anything on the plot, including the planet Jupiter itself.
But if you point to an empty part of the plot or outside the plot itself, you get a message saying that there is no object at that location instead.
Error messages
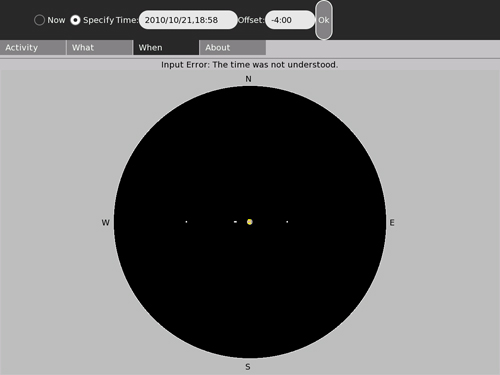
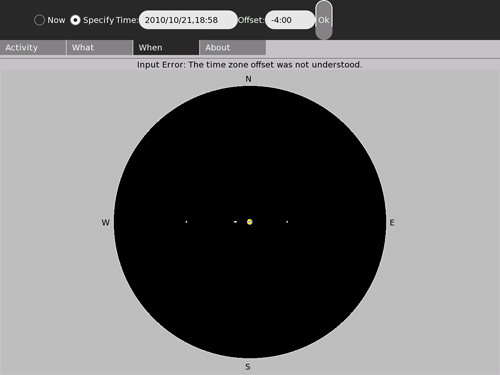
ByJove will detect errors if you make a mistake when specifying a time or time zone offset on the "When" tab.
In this event, the activity will reset the time to the current local time and reset the zone offset to the offset of the local time-zone.
Tips
And here are some tips that will make using ByJove easier:
- Use Alt+Enter to switch to full-screen mode after you have set up "What" and "Where". This will hide the menus and make the plot somewhat larger. It's especially helpful when you want to use the Night Vision color scheme as the menus are still being drawn in the white-on-black default colors.
- You can turn your XO into a red-light flashlight by setting both "Night Vision" and "Invert Display" then switching to full-screen mode.
- After identifying an object you may want to get the list of visible moons back. To do this, select the "When" tab and click on "Ok" without making any changes.
Revision history
Plese see the change-log page.
Reporting bugs
To report a bug or to see what bugs have been reported and/or fixed, please go to the bug tracking page.
Activity Summary
| Icon: | Sugar icon::Image:ByJove.svg |
| Genre: | Activity genre::Math and Science |
| Activity group: | ,|x|Activity group::x}} |
| Short description: | Short description::Plot Jupiter's Moons |
| Description: | Description::This activity will display a plot of the positions of the Galilean moons of Jupiter at a specified time. |
| Maintainers: | ,|x|Contact person::x}} |
| Repository URL: | Source code::http://www.wa1gsf.net/downloads/XO/ByJove-1.xo |
| Available languages: | ,|x|Available languages::x}} |
| Available languages (codes): | ,|x|Language code::x}} |
| Pootle URL: | |
| Related projects: | Related projects,|x|Related projects::x}} |
| Contributors: | ,|x|Team member::x}} |
| URL from which to download the latest .xo bundle | Activity bundle::http://www.wa1gsf.net/downloads/XO/ByJove-1.xo |
| Last tested version number: | Activity version::1 |
| The releases with which this version of the activity has been tested. | ,|x|Software release::x}} |
| Development status: | Devel status::4. Beta |
| Ready for testing (development has progressed to the point where testers should try it out): | ,|x|Ready for testing::x}} |
| smoke tested : | |
| test plan available : | |
| test plan executed : | |
| developer response to testing : |
