Measure: Difference between revisions
| (106 intermediate revisions by 20 users not shown) | |||
| Line 1: | Line 1: | ||
{{Activity migrated to sl.o |
|||
| download=http://activities.sugarlabs.org/en-US/sugar/addon/4197 |
|||
| git=http://git.sugarlabs.org/projects/measure |
|||
}} |
|||
{{Olpcboxtop|toptext=[[{{PAGENAME}}|Measure]]}} |
{{Olpcboxtop|toptext=[[{{PAGENAME}}|Measure]]}} |
||
{{ OBX activity |[[Image:Activity-measure.svg]]|bundled<!--|{{{text}}}--> }} |
{{ OBX activity |[[Image:Activity-measure.svg]]|bundled<!--|{{{text}}}--> }} |
||
| Line 4: | Line 8: | ||
{{ OBX test |[[Tests/Measure|Measure]]<!--|2007-09-18--> }} |
{{ OBX test |[[Tests/Measure|Measure]]<!--|2007-09-18--> }} |
||
{{ OBX devtickets |measure-activity}} |
{{ OBX devtickets |measure-activity}} |
||
{{ OBX SL_devtickets |Measure}} |
|||
{{ OBX pootle|1=http://dev.laptop.org/git?p=projects/measure;a=blob_plain;f=po/Measure.pot;hb=HEAD|2=xobundled}} |
{{ OBX pootle|1=http://dev.laptop.org/git?p=projects/measure;a=blob_plain;f=po/Measure.pot;hb=HEAD|2=xobundled}} |
||
{{ OBX xobundle|http://dev.laptop.org/~arjs/Measure- |
{{ OBX xobundle|http://dev.laptop.org/~arjs/Measure-21.xo|measure v21}} |
||
{{ OBX team |Adviser: [[User:Walter|Walter]], Core Development: [[User:arjs|Arjun]], Contributor(s): Cody Lodrige (drawing code optimization), |
{{ OBX team |Adviser: [[User:Walter|Walter]], Core Development: [[User:arjs|Arjun]], Contributor(s): Cody Lodrige (drawing code optimization), Eben Eliason (UI Design)}} |
||
<small>see more [[:Category:OBX templates|templates]] or [[OBX proposals|propose new]]</small> |
<small>see more [[:Category:OBX templates|templates]] or [[OBX proposals|propose new]]</small> |
||
{{Olpcboxbottom}} |
{{Olpcboxbottom}} |
||
= |
==What is the Measure Activity ? (Introduction)== |
||
{| |
{| |
||
|- |
|- |
||
|[[image:Measure_1.png|thumb| |
|[[image:Measure_1.png|thumb|200px|Measure Activity on the XO]] |
||
|[[image:Measure_tut_1_24.jpg|thumb| |
|[[image:Measure_tut_1_24.jpg|thumb|200px|Analog Input port on the XO (in pink)]] |
||
|} |
|} |
||
| Line 27: | Line 32: | ||
* Log data at a specified interval and store and retrieve waveforms |
* Log data at a specified interval and store and retrieve waveforms |
||
=Learning Activities |
==Learning Activities== |
||
==Introduction== |
|||
Children learn by doing things. It is said "Give a child a hammer, and the world becomes his nails". |
|||
This activity is a tool that allows kids to express their curiosity. It is a tool that allows kids to explore and learn by doing, by connecting and observing, span physical phenomena and real world events. |
|||
Children learn by doing things. It is said "Give a child a hammer, and the world becomes his nails." |
|||
==Activity activities (hands on learning activities)== |
|||
This activity is a tool that allows kids to express their curiosity. It is a tool that allows kids to explore and learn by doing, by connecting and observing, span physical phenomena and real world events. |
|||
See the [[Measure/Projects|projects]] page for detailed instructions on a few projects. Also see the [[Measure/Hardware|hardware]] page for other ideas. |
See the [[Measure/Projects|projects]] page for detailed instructions on a few projects. Also see the [[Measure/Hardware|hardware]] page for other ideas. |
||
==Projects and Activities Index== |
|||
All these activities in some way involve transducers. A '''transducer''' is a mechanism that converts a physical event -- motion of atoms in a gas or liquid or solid (heat), air-pressure waves (sound), photons hitting a surface (light), vibration of a wire, etc. -- into an electrical signal suitable for measurement by an "apparatus". |
|||
:Example: Our inner ears serve both as sound- and balance-transducers for our brain. Each tiny hair in the cochlea has its own ''resonant frequency''. When presented with a sound at its given frequency the hair vibrates; this motion causes the hair to transmit an electro-chemical "wave" on a neuron to the brain. Balance-signals come from the three ''semicircular canals'' that also have hairs that move in response to the position of our head. While electricity moves in a wire differently than does the electro-chemical "wave" in a neuron, the fact that electricity is involved in both cases emphasizes its biological and practical importance. |
|||
===Projects and Activities Index=== |
|||
[[User:Ndoiron/Out_Of_The_Box#Measure_Lessons|Measure Lesson ideas]] from Nick Doiron and others, from work in Uganda, Uruguay and Haiti: |
|||
* '''Record neurons from insects''' [[Projects/SpikerBox]]. The Spikerbox allows you to record neural activity from insects to learn how the brain works. |
|||
* '''Measure and record temperature''' [[Measure/Projects/Measure Temperature]] |
|||
* '''Build an oscilloscope probe''' [[Measure/Projects/Oscilloscope probe]]. Build a laptop-protective probe that allows you to measure voltages up to 24 VAC (40 volts peak) without damaging the laptop. |
|||
* '''Build a lighted graticule''' [[Measure/Projects/Lighted Graticule]]. Together with the oscilloscope probe, the graticule calibrates the screen in the following ranges: 0.5 volt per division, 0.1 volt per division or 0.010 volts per division, where a "division" appears as a lighted line on the graticule. The "zero" is adjustable up and down over the entire screen. |
|||
* '''Explore magnets and coils of wire''': [[Measure/Activities/Magnets and Wire]]. For the basics all you need is a couple little cylindrical magnets, a couple plastic sewing bobbins, some (ie.. 100 feet of 30 AWG) magnet wire, glue, tape and a couple paper cups. This also includes the following additional activities: |
|||
:* '''Build your own microphone and speaker''': (the speaker requires a 1:100 amplifier+driver circuit). |
|||
:* '''Build your own telephone''' (requires two magnets+coils, the amplifier, and a "driver" circuit). |
|||
:* '''Build a guitar "pick-up probe"''' Requires a 0.25 inch magnet (it fits nicely inside the coil) to convert a guitar-wire's vibrations into voltage that you can see on the laptop -- see the harmonics etc. |
|||
:* '''Build a tuning fork oscillator''': Build a steel tuning-fork, stick a magnet on each of its two tines, and then use the microphone probe to see its sinewave vibrations. Explore feedback (requires the 1:100 amplifier+driver circuit) to make your tuning fork hum at its natural frquency. Explore resonance (requires the signal generator -- see below). Careful design results in a useable frequency reference for other experiments. |
|||
*'''Build a signal-generator''': [[Measure/Projects/Signal-Generator]]. Describes the design of a voltage-to-frequency converter with better than 1% accuracy between 0 and 2000 Hz (0 to 2.000 volts). Together with a frequency-counter project (see below), the signal generator can double as a digital voltmeter. This, or a commercial equivalent, is necessary for a number of interesting activities. |
|||
*'''Build an ammeter:''' [[Measure/Projects/Ammeter]]. An '''ammeter''' or "amp(ere)-meter" measures electrical current (flow of electrons). A speaker coil, a magnetic compass, a 1000 ohm resistor and 5 volts from the laptop readily demostrate that (electro-)magnetism -- electrons moving in a coil of wire -- can cause motion. This experiment pursues the observation. With a magnet and a homemade -- but very-sensitive, balance-beam scale (made from the same 1/8 inch diameter steel rod used to build the tuning forks) -- I've detected (not measured) electric currents as low as 50 one-millionth of an ampere. The balance-beam scale's design is the fussy part, a more-suitable design is TBD. |
|||
:*'''Build a weight-measuring scale:''' The first step is a suitable balance beam scale with one side being pulled by the magnet+coil to "null" out weight in a pan on the other side. We then measure the "amps" required to null the weight. |
|||
*'''Build a length-transducer''':[[Measure/Projects/Length transducer]]. The simplest transducer for measuring length -- distance between two points in a straight line -- is a resistive "slider potentiometer". Although more complex this activity is more interesting because it reinforces the notions of electromagnetism. |
|||
:* '''Part I: Build a transformer''': Transformers can protect us from electrocution -- but they only work with alternating electricity (AC). They move, and change the voltage of, AC electrical energy without the input and output wires being in "galvanic" or direct physical contact. To build a "transformer" requires two pickup probes (coils of wire), an oscillator plus the driver/amplifier. The bottom-most coil serves as the driver (the input) and the top coil is the pickup (the output). What happens when the driving frequency changes? |
|||
::* Teaching point -- transformers and steel: Transformers work better when iron (steel) is inside the coils. Move the steel rod up and down inside the two coils and watch the "induced voltage" change on the screen. |
|||
::* Interesting teaching point about permanent magnets: A string of permanent magnets won't work as the "steel rod". Why? Because all the iron, cobalt etc atoms are lined up stiffly and can't be made to move by the teensy electrical field "induced" by the signal generator. |
|||
:* '''Part II: Build an LVDT (length-measuring device):''' Although the basic principle is shown with the moving-steel-rod experiment above, this experiment makes a better demonstration. This requires a third coil to be placed top-most in a stack of three coils with the driver coil in the middle, plus an appropriate hookup of the bottom and top coils "in series". The output can be seen on the screen to change dramatically with the location of the steel rod inside the three coils. |
|||
::* Can the LVDT be used together with a ''4th'' coil to build an ammeter? TBD. |
|||
* '''Build a (frequency-) counter:''' [[Measure/Projects/Frequency counter]]. This project can be used with the other projects and also -- together with the voltage-to-frequency oscillator -- serve as a voltmeter. It comes in two parts: |
|||
:*'''Build a 1-second "time base":''' Digital watches contain tiny crystal tuning forks -- remarkably inexpensive at $0.30 in single units -- that vibrate at at 32,768 Hz (cycles per second). With one of these and a couple inexpensive integrated circuits we can build a 1-second "time base". From the time base we derive "zero-the-counter" and "load-the-counts-to-the-display" pulses required by the event-counter. |
|||
:*'''Build an event-counter:''' A preliminary design uses four divide-by-ten counters (CD40110BE), four resistor arrays and four 7-segment LED to display accumulated counts -- over the one-second interval-- ranging from 0000 to 9999. (I have not found an inexpensive (e.g. less than $5.00) way of doing this -- exact design TBD). |
|||
* '''Build a "port-expander":''' [[Measure/Projects/Port expander]]. There aren't enough USB ports on the laptop to supply +5 volts to all the various projects described above. Also the heavy current draw of the 100:1 amplifer/driver can interfere with the other devices. A simple port expander can solve this problem (design TBD). |
|||
Some threads for interesting learning experiments are below - |
Some threads for interesting learning experiments are below - |
||
# Record animal sounds |
# Record animal sounds, for example, sounds of birds and observe their waveforms. Which of these are high frequency sounds, which are the low frequency ones? Adjust the frequency sliders accordingly. |
||
# Whistle into the |
# Whistle into the microphone and compare the loudness and frequency of whistles by observing the waveforms. |
||
# Get two people to try to whistle the same note, and look into Beat Frequencies. |
# Get two people to try to whistle the same note, and look into Beat Frequencies. |
||
# Turn the sensitivity slider up to the maximum and observe ambient noise - in a quiet room, near a noisy road |
# Turn the sensitivity slider up to the maximum and observe ambient noise - in a quiet room, near a noisy road. |
||
# Measure the voltage of an AA size pencil cell. What settings do you use |
# Measure the voltage of an AA size pencil cell. What settings do you use? AC or DC? |
||
# Measure resistance of water |
# Measure resistance of water, other liquids |
||
# Log temperature using a temperature sensor at one hour intervals. When in the day is it the hottest |
# Log temperature using a temperature sensor at one hour intervals. When in the day is it the hottest? The coldest? |
||
# Some very interesting sensor ideas given by Arnans Roger |
# Some very interesting sensor ideas given by Arnans Roger, see - http://padthai.media.mit.edu:8080/cocoon/gogosite/documentation/makingSensors.xsp?lang=en |
||
==='''How to build low cost sensors'''=== |
|||
* '''Specifications:''' |
|||
{| class="wikitable" |
|||
|- |
|||
! Name |
|||
! Description |
|||
! Vendor |
|||
! Reference |
|||
|- |
|||
| [[Image:Switch 04.JPG|thumb|center|200px|Switch]] |
|||
| Switch lever spdt 3A PCB |
|||
| http://www.digikey.com |
|||
| SW773-ND |
|||
|- |
|||
| [[Image:Thermistor 04.jpg|thumb|center|200px|Temperature]] |
|||
| Thermisor NTC 10K OHM 5% |
|||
| http://www.digikey.com |
|||
| 317-1258-ND |
|||
|- |
|||
| [[Image:Light sensor 03.jpg|thumb|center|200px|Light]] |
|||
| Photocell 5K-20K OHM 4.20 MM |
|||
| http://www.digikey.com |
|||
| PDV-P9203-ND |
|||
|- |
|||
| [[Image:Magnetic sensor 04.jpg|thumb|center|200px|Magnetic switch(1)]] |
|||
| Switch Reed 10-15AT SPST .5A |
|||
| http://www.digikey.com |
|||
| 420-1047-ND |
|||
|- |
|||
| Magnetic switch(2) |
|||
| Switch Reed SPST .5A 12-23 A/T |
|||
| http://www.digikey.com |
|||
| HE502-ND |
|||
|- |
|||
| [[Image:Humidity 04.JPG|thumb|center|200px|Humidity sensor]] |
|||
| Consists of a metal electrode on a humidity sensitive membrane mounted on a ceramic substrate |
|||
| http://www.rhopointcomponents.com |
|||
| SYH-1NC |
|||
|} |
|||
* '''Instructions in English:''' |
|||
:[[Making a Switch Sensor]] |
|||
:[[Making a Light Sensor]] |
|||
:[[Making a Humidity Sensor]] |
|||
:[[Making a Magnetic Sensor]] |
|||
:[[Making a Thermistor]] |
|||
=Downloading the Activity= |
==Downloading the Activity== |
||
Please visit the [[Measure/Download|download]] page to download the latest stable and unstable releases of the Activity. |
Please visit the [[Measure/Download|download]] page to download the latest stable and unstable releases of the Activity. |
||
==Kids guide to Measure== |
|||
==Teachers guide to Measure== |
|||
*[http://cnx.org/content/m13512/latest/ Talking about Sound and Music]. This content could make an excellent teaching supplement to Measure. Explains acoustic concepts. |
|||
*[http://cnx.org/content/m13246/latest/ Acoustics for Music Theory], another possibly useful teaching supplement. |
|||
==Hacker's guide to Measure== |
|||
=Getting started= |
|||
==The software== |
|||
[[Image:Measure_1.png|thumb|200px|right|Signal in time domain]] |
|||
'''Input''':One can connect sensors/give input voltage through the pink Mic jack on the left side of the display screen. When nothing is connected there, the default signal is the sound signal from the built in Mic on the XO. |
|||
''Graph'': The green moving line on the screen indicates the signal |
|||
===[[Measure/Start| Getting started]]=== |
|||
==Measure Temperature== |
|||
'''Grid and background''': The light grey lines that form a criss cross grid allow one to estimate the values of the signal at different instants of time. To get a value, multiply the scale value that appears when one clicks on the "Show values" button in the Measure Toolbar with the number of divisions the grid represents. |
|||
See also [[:Category:XO sensors]] for instructions on making other kinds of sensors. |
|||
===Construction=== |
|||
'''Slider on the right''': The slider on the right controls the magnification (gain) of the waveform. Move it up if the waveform that you see is too small and move it down is the waveform is going out of the screen. |
|||
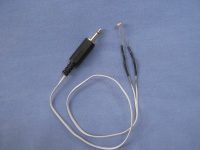
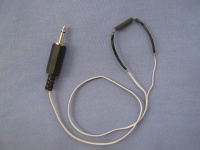
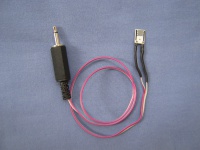
See [[Making XO sensors/Making a Temperature Sensor]] for detailed construction instructions. |
|||
[[Image:Measure_3.png|thumb|200px|right|Signal in frequency domain]] |
|||
===Operation and measurement=== |
|||
'''Please download the Activity from the link title "For LM35" from the unstable branch by going to the [[Measure/Download|downloads]] page. This release is a pre-calibrated version for using with this temperature sensor.'''' |
|||
'''Measure Toolbar''': Use this to view and modify the signal. |
|||
''AC/DC button'' -- This button selects whether you want to give a DC input or an AC input. Batteries, light sensors and temperature sensors have DC input. The microphone has an AC input. |
|||
''Bias control button'' -- Some sensors would require this ON to work properly, most of the times you wouldn't need to touch this button. The built in mic requires this to be OFF. |
|||
''Time/frequency button'' -- View the signal representation or a real time representation of the signal. Selecting this option is most fun when one is whistling into the microphone. This wouldn't be of much use when connecting external sensors. |
|||
''Slider'' -- Move it to the position that allows you to best view the waveform. This slider controls the frequency range. |
|||
''Show details'' -- Press this button when you want to see statistical data about the signal. The scales are shown in this option - the X axis scale and the Y axis scale. |
|||
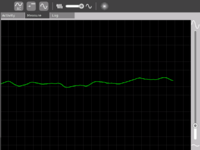
[[Image:LM35.png|thumb|center|300px|This is what your temperature measurement would look like]] |
|||
'''Log Toolbar''': Use this when you want to record data |
|||
''Snapshot/1 second/1 minute/1 hour'' -- Select the way you want to record data. Snapshot means taking a picture of the current waveform that you see on the screen. 1 second/1 minute/1 hour selects at what interval one can record data. |
|||
''Show saved data'' -- Shows you the saved waveform. Press it again to remove the display of the saved waveform. |
|||
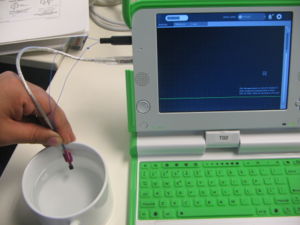
[[Image:Img_3842.jpg|thumb|center|300px|Measuring temperature of water]] |
|||
==$2 USB I/O and sensor board== |
|||
{| |
|||
|- |
|||
|[[Image:Measure_4.png|thumb|300px|left|Displaying result of a logging session]] |
|||
|[[Image:Ver_14.png|thumb|300px|left|Showing the statistics about the signal]] |
|||
|} |
|||
[[Image:Sensor_Laptop_Wide.JPG |thumb|center|Low Cost USB Sensor board|300px]] |
|||
See Edward Baafi's low cost USB sensor board [[USB_Sensor|here]] |
|||
== How to connect sensors (How to build a sensor-probe) == |
|||
'''This section details outlines steps to build a low cost probe for connecting sensors to the XO for Measure''' |
|||
==Learning activities== |
|||
{| |
|||
|- |
|||
| valign='center'| |
|||
[[Image:Measure_tut_1_1.jpg|thumb|center|210px|It'd be good to have these tools - A soldering iron, some soldering wire, a wire cutter/wire stripper and some insulating tape]] |
|||
| valign='center'| |
|||
[[Image:Measure_tut_1_2.jpg|thumb|center|255px|Wire stripper]] |
|||
| valign='center'| |
|||
[[Image:Measure_tut_1_3.jpg|thumb|center|250px|Soldering wire]] |
|||
|- |
|||
| valign='center'| |
|||
[[Image:Measure_tut_1_5.jpg|thumb|center|263px|Some connecting wires]] |
|||
| valign='center'| |
|||
[[Image:Measure_tut_1_4.jpg|thumb|center|250px|3.5mm audio jack (stereo or mono, any would do)]] |
|||
| valign='center'| |
|||
[[Image:Measure_tut_1_6.jpg|thumb|center|246px|A USB cable, or even a USB connector would do]] |
|||
|- |
|||
| valign='center'| |
|||
[[Image:Measure_tut_1_9.jpg|thumb|center|260px|The audio jack/connector]] |
|||
| valign='center'| |
|||
[[Image:Measure_tut_1_10.jpg|thumb|center|250px|Cut two pieces of wire and strip them at the ends]] |
|||
| valign='center'| |
|||
[[Image:Measure_tut_1_11.jpg|thumb|center|180px|Solder the wires to the connector as shown. Do make sure to have an identification mark (eg. a knot) to differentiate between both the wires.Call the wire connected to the central terminal as "Vin" the wire connected to the outer terminal as "Gnd"]] |
|||
|- |
|||
| valign='center'| |
|||
[[Image:Measure_tut_1_13.jpg|thumb|center|250px|Take the USB cable/connector]] |
|||
| valign='center'| |
|||
[[Image:Measure_tut_1_14.jpg|thumb|center|250px|Cut it in the middle and strip the wires]] |
|||
| valign='center'| |
|||
[[Image:Measure_tut_1_15.jpg|thumb|center|180px|We only need the red and the black wires.The USB port provides us with a source of +5V supply. Let's call the red wire as "+ve" and the black as "Gnd" and make the black one and the "Gnd" defined in audio connector as one, by connecting them together.]] |
|||
|- |
|||
| valign='center'| |
|||
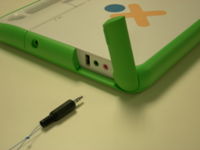
[[Image:Measure_tut_1_24.jpg|thumb|center|250px|The audio connector goes into the pink MIC input jack]] |
|||
| valign='center'| |
|||
[[Image:Measure_tut_1_27.jpg|thumb|center|250px|The USB connector goes into the USB port]] |
|||
|} |
|||
==Sensor Input into Turtle Art== |
|||
'''To summarize, do remember that we have identified three terminals |
|||
# The "Vin" terminal |
|||
# The "+ve" terminal |
|||
# The "Gnd" terminal (the Gnd of audio connector is connected to Gnd of USB connector" |
|||
''' |
|||
[[Turtle_Art|Turtle Art]] is an abstraction. By allowing sensors to control various aspects of motion of the Turtle, one is enabling kids to connect with their physical world and bring that connection into the abstraction that Turtle Art represents |
|||
I've integrated sensor support into Turtle Art. This basically allows one to add a "Sensor Input" block into Turtle Art. One can thereby control any aspect of the Turtle's motion depending upon the value of the sensor. When no sensor is connected, the default input is taken from the Mic. |
|||
=Let's measure Temperature! ( Featured activity of the month )= |
|||
'''''The code is in the git repository of Measure (look for the TurtleArt.activity folder)''''' |
|||
==Construction== |
|||
: This is weird. Talk to [[user:arjs|Arjun]] about fixing this so that it's merged into Turtle Art proper. |
|||
'''IMPORTANT - This section details how you can connect a temperature sensor to the sensor probe that you built. You should build the probe as outlined in [[Measure_/_Oscilloscope#How_to_connect_sensors_.28How_to_build_a_probe_to_connect_sensors_to_the_XO.29|how to connect sensors]] before moving forward. Most of all, you must remember that we need to know that we have three terminals (refer the section for details): |
|||
# The "Vin" terminal |
|||
# The "+ve" terminal |
|||
# The "Gnd" terminal (the Gnd of audio connector is connected to Gnd of USB connector |
|||
''' |
|||
===Screen shots=== |
|||
[[Image:Measure_turtle1.png|thumb|200px|center|The turtle that moves in proportion to sensor input. Increasing the temperature made it move in larger squares]] |
|||
[[Image:TA_sensors_learning_workshop.png|thumb|200px|center|Program made during learning workshop at OLPC by Adrian and other participants (11th - 14th Feb) to log sensor values at an interval of five seconds]] |
|||
[[Image:Measure_turtle2.jpg|thumb|200px|center|For demonstration, heating the temperature sensor. This caused the Turtle to move larger distances]] |
|||
===Try it out!=== |
|||
{| |
|||
If you wish to try out Turtle Art with sensors, please click [[Measure/Turtle|here]] to go the download and usage guidelines page. |
|||
|- |
|||
| valign='center'| |
|||
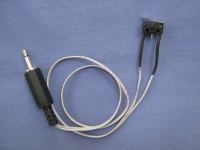
[[Image:Measure_tut_1_7.jpg|thumb|center|222px|You would need a temperature sensor like this one LM35. A link is here- http://search.digikey.com/scripts/DkSearch/dksus.dll?Detail?name=LM35DZ-ND]] |
|||
| valign='center'| |
|||
[[Image:Measure_tut_1_8.jpg|thumb|center|155px|Taken from the data sheet of the temperature sensor, Vs is where we would supply the '''"+ve"''' (positive supply voltage), gnd is where would connect "-ve" (ground) and Vout is the sensor output which we will connect to "Vinput"]] |
|||
| valign='center'| |
|||
[[Image:Measure_tut_1_16.jpg|thumb|center|250px|So we connect the "Gnd" to the righten-most terminal of the sensor ]] |
|||
|- |
|||
| valign='center'| |
|||
[[Image:Measure_tut_1_17.jpg|thumb|center|250px|And connect the "+ve" to the left-most terminal of the sensor]] |
|||
| valign='center'| |
|||
[[Image:Measure_tut_1_19.jpg|thumb|center|250px|You might want to keep insulation tape handy at this time]] |
|||
| valign='center'| |
|||
[[Image:Measure_tut_1_21.jpg|thumb|center|250px|Apply the insulation tape over both the terminals]] |
|||
|- |
|||
| valign='center'| |
|||
[[Image:Measure_tut_1_22.jpg|thumb|center|208px|Now lets connect the "Vin" connector from the audio jack to the center terminal of the sensor, called as "Vout"]] |
|||
| valign='center'| |
|||
[[Image:Measure_tut_1_23.jpg|thumb|center|250px|Insert the audio connector to the Mic jack (pink)]] |
|||
| valign='center'| |
|||
[[Image:Measure_tut_1_24.jpg|thumb|center|270px|]] |
|||
|- |
|||
| valign='center'| |
|||
[[Image:Measure_tut_1_28.jpg|thumb|center|250px|Connect the USB connector to the USB port. Our temperature sensing probe is ready!]] |
|||
|} |
|||
===Work remaining=== |
|||
==Operation and measurement== |
|||
* Input based on the frequency of signal. This would allow whistling at a higher frequency give a higher input |
|||
* Incorporating the various options (Bias/NoBias and AC/DC) into the UI of Turtle Art |
|||
===Acknowledgments=== |
|||
'''Please download the Activity from the link title "For LM35" from the unstable branch by going to the [[Measure/Download|downloads]] page. This release is a pre-calibrated version for using with this temperature sensor.'''' |
|||
Thanks to Brian Silvermann for helping me find my way in the existing Turtle Art code. |
|||
[[Image:LM35.png|thumb|center|300px|This is how your temperature measurement would look like]] |
|||
==Learning activities== |
|||
=Getting involved= |
==Getting involved== |
||
==Educators/Teachers== |
===Educators/Teachers=== |
||
We'd love help from educators. You can help by organizing learning activities around children wherever you are. Feel free to get in touch with us to discuss your ideas and co-ordinate efforts. |
We'd love help from educators. You can help by organizing learning activities around children wherever you are. Feel free to get in touch with us to discuss your ideas and co-ordinate efforts. |
||
Document these learning activities that you undertake and help teachers and educators all around the world to replicate the same activities! |
Document these learning activities that you undertake and help teachers and educators all around the world to replicate the same activities! |
||
==Software developers== |
===Software developers=== |
||
Help is needed from volunteers from Python developers. Please visit [[Measure/Software|this]] page to find out details. If you have experience in writing optimized Python code, please leave a note on the discussion tab of this page and someone will get in touch with you. |
Help is needed from volunteers from Python developers. Please visit [[Measure/Software|this]] page to find out details. If you have experience in writing optimized Python code, please leave a note on the discussion tab of this page and someone will get in touch with you. |
||
==Hardware enthusiasts== |
===Hardware enthusiasts=== |
||
Do interesting hardware projects around the XO. Visit the [[Measure/Hardware|Measure hardware]] page to learn more. You might also want to see the [[Measure/Projects|projects]] page. |
Do interesting hardware projects around the XO. Visit the [[Measure/Hardware|Measure hardware]] page to learn more. You might also want to see the [[Measure/Projects|projects]] page. |
||
We are B.E students working on Measuring activity of various sensors in OLPC. |
|||
=A note about safety= |
|||
We are having Temperature and humidity sensor, which we have to connect to OLPC. We have checked it through Terminal window whether anything is connected to that port or not. But it was not detected and the log format also does not appear.. So can you tell us how it can be detected? So please help us as early as possible. |
|||
===Community Photos=== |
|||
http://www.flickr.com/photos/tiayiti/sets/72157629707249381/ |
|||
[ADD YOUR OWN PHOTOS/VIDEOS HERE!] |
|||
==A note about safety== |
|||
[[Image:Cautionary warning -- Caution.png|left|50px]] |
[[Image:Cautionary warning -- Caution.png|left|50px]] |
||
| Line 201: | Line 217: | ||
* Make measurements of AC line voltages with the proper equipment only -- for example, a multimeter designed for the purpose. The laptop is not a multimeter. |
* Make measurements of AC line voltages with the proper equipment only -- for example, a multimeter designed for the purpose. The laptop is not a multimeter. |
||
If you don't know what you are doing or are unsure, don't do it. Electricity can be dangerous. |
|||
=Future plans= |
==Future plans== |
||
# Comparison of many graphs |
# Comparison of many graphs |
||
# Sharing of the graphs |
# Sharing of the graphs |
||
| Line 210: | Line 225: | ||
For a version by version plans page see [[Measure/Plans|here]] |
|||
=Acknowledgments= |
|||
* Walter Bender - (my adviser) providing invaluable guidance, encouragement and support at all stages of development. I have had immense learning during the development of the Activity and I hope to allow kids to experience learning while using the Activity as much as I experienced while making the Activity. |
|||
* Thanks to Mitch Bradley and John Watlington for their help and suggestions during the development of the Activity. |
|||
* Thanks for Bernardo Innocenti and Michael Stone for their valuable inputs towards code design. |
|||
=Contact= |
|||
==Acknowledgments== |
|||
(In no particular order. List in progress...) |
|||
Thanks to |
|||
* Walter Bender - (project adviser) for providing invaluable guidance, encouragement and support at all stages of development. |
|||
* Mitch Bradley for help on a number of fronts including teaching me about decimation and window functions. |
|||
* Benjamin Schwartz for providing critical feedback. |
|||
* John Watlington for suggestions and help on a number of hardware related fronts; and also for allowing me to borrow your book on the Tale of the Scale which I find very inspiring. |
|||
* Bernardo Innocenti for teaching me many things about Linux, Python and also for a lot of help on code design. |
|||
* Michael Stone for great inputs towards the code design and for being great company at 1cc. |
|||
* Tom Boonsiri and Jake for great applications of Measure Activity in health peripherals |
|||
* WvBailey for a '''huge''' number of invaluable projects and documentation efforts. Thanks a lot! |
|||
* seberg (on d.l.o) for suggestions on code optmization |
|||
* Mary Lou Jepsen for suggestions and feedback |
|||
* Kim for testing related suggestions |
|||
* Ted Selker for a lot of great suggestions |
|||
* SJ Klein for a lot of great suggestions |
|||
* Albert Cahalan for a lot of important critical feedback |
|||
* C.J Leonard for links to great resources |
|||
* Tomeu for a lot of help on the code |
|||
* Eben Eliason for help in UI design |
|||
* Ivan for connecting me with the NumPy group |
|||
* Henry Edward Hardy for providing feedback and suggestions |
|||
* Daniel Drake for testing help |
|||
* C Scott for suggestions and help related to coding |
|||
* David Cavallo for suggestions and feedback |
|||
* Rafael Ortiz for help in testing and feedback |
|||
* Cody Lodridge for great drawing code optimizations |
|||
* Mel Chua for being the number one fan of Measure Activity and telling the whole world about it. Thanks Mel! |
|||
* Dan Winship for great help on the code and for teaching me about GObject. |
|||
* Jim Gettys for thinking of the Activity as an important part of the build system. |
|||
* The teacher at Khairat- Sandeep Surve for showing great enthusiasm towards it as it being an important learning tool and thereby increasing my enthusiasm to work in it further. |
|||
* Carla Gomez Monroy for teaching me so much about learning, team work and many other things, and also for great feedback from the field and for implementing many of my efforts on the field. |
|||
* Erik Blankinship and Mihir Bakhtiar for many engrossing discussions that allowed me to shape the development course of the Measure Activity. |
|||
* Julia Reynolds for thinking of Measure as the 'coolest Activity on the XO' |
|||
* Seth Woodworth for great suggestions and feedback |
|||
* Arnans Roger for introducing me to his work at MIT that allowed me to learn a lot about shaping the development course of the Activity. |
|||
* Henry Holtzman for great encouragement and support on the Activity |
|||
* Barry Vercoe for allowing me to demo my work to his class at MIT and for giving me great ideas about sensors in music |
|||
==Proposed re-organization of this page== |
|||
===General goals=== |
|||
* small overall size of page |
|||
* links to other pages with a picture accompanying what the link is about |
|||
* links depend on the user and what he/she has come to look for on the page |
|||
===Possible links=== |
|||
* Educators |
|||
* Getting started (perhaps on the main measure page itself) |
|||
* Activity activities |
|||
* Developers |
|||
===Work in progress here=== |
|||
[[Measure/New_temp]] |
|||
==Contact== |
|||
Contact Arjun Sarwal through - |
Contact Arjun Sarwal through - |
||
Email : arjun |
Email : arjun AT laptop dot org |
||
IRC : arjs on #olpc #sugar |
IRC : arjs on #olpc #sugar |
||
| Line 232: | Line 301: | ||
'''Give a child a hammer and the world becomes his nails...''' |
'''Give a child a hammer and the world becomes his nails...''' |
||
[[Category:Measure]] |
|||
{{Activity page |
|||
|icon=Image:Activity-measure.svg |
|||
|genre=Math and Science |
|||
|activity group=Activities/G1G1 |
|||
|short description=TODO!: Measure lets kids measure the real world with their XO and provides a visual and statistical representation. |
|||
|long description=Using the Measure Activity on the XO, one can: |
|||
* Connect sensors (light, heat, magnetic field etc) and view their signal. Thus it is possible to view and study physical phenomena |
|||
* Input voltages and signals into the XO laptop and use it as an oscilloscope and |
|||
* Log data at a specified interval and store and retrieve waveforms |
|||
|contact person=User:Arjs |
|||
|activity source=http://dev.laptop.org/git?p=projects/measure |
|||
|team=user:Walter |
|||
|bundle URL=http://dev.laptop.org/~arjs/Measure-21.xo |
|||
|activity version=21 |
|||
|releases=8.2.0 (767) |
|||
}} |
|||
{{Activity bundle |
|||
|bundle URL=http://dev.laptop.org/~arjs/Measure-21.xo |
|||
|activity version=21 |
|||
|releases=7.1.0 (650), 7.1.1 (653), 7.1.2 (656) |
|||
}} |
|||
Latest revision as of 23:13, 9 March 2016
| ?Sugar icon}} | This activity is now hosted at the Sugar Activity Library. The information here is likely to be out-of-date. Consult the new pages for "Measure" first: |
see more templates or propose new |
What is the Measure Activity ? (Introduction)
The Measure Activity is a tool on the XO that allows kids to indulge in "learning by doing". It provides an interface for the kids to connect with the physical world and an opportunity to view and understand through a visual and statistical representation of the physical phenomena.
Using the Measure Activity on the XO, one can:
- Connect sensors (light, heat, magnetic field etc) and view their signal. Thus it is possible to view and study physical phenomena
- Input voltages and signals into the XO laptop and use it as an oscilloscope and
- Log data at a specified interval and store and retrieve waveforms
Learning Activities
Children learn by doing things. It is said "Give a child a hammer, and the world becomes his nails." This activity is a tool that allows kids to express their curiosity. It is a tool that allows kids to explore and learn by doing, by connecting and observing, span physical phenomena and real world events.
See the projects page for detailed instructions on a few projects. Also see the hardware page for other ideas.
Projects and Activities Index
All these activities in some way involve transducers. A transducer is a mechanism that converts a physical event -- motion of atoms in a gas or liquid or solid (heat), air-pressure waves (sound), photons hitting a surface (light), vibration of a wire, etc. -- into an electrical signal suitable for measurement by an "apparatus".
- Example: Our inner ears serve both as sound- and balance-transducers for our brain. Each tiny hair in the cochlea has its own resonant frequency. When presented with a sound at its given frequency the hair vibrates; this motion causes the hair to transmit an electro-chemical "wave" on a neuron to the brain. Balance-signals come from the three semicircular canals that also have hairs that move in response to the position of our head. While electricity moves in a wire differently than does the electro-chemical "wave" in a neuron, the fact that electricity is involved in both cases emphasizes its biological and practical importance.
Projects and Activities Index
Measure Lesson ideas from Nick Doiron and others, from work in Uganda, Uruguay and Haiti:
- Record neurons from insects Projects/SpikerBox. The Spikerbox allows you to record neural activity from insects to learn how the brain works.
- Measure and record temperature Measure/Projects/Measure Temperature
- Build an oscilloscope probe Measure/Projects/Oscilloscope probe. Build a laptop-protective probe that allows you to measure voltages up to 24 VAC (40 volts peak) without damaging the laptop.
- Build a lighted graticule Measure/Projects/Lighted Graticule. Together with the oscilloscope probe, the graticule calibrates the screen in the following ranges: 0.5 volt per division, 0.1 volt per division or 0.010 volts per division, where a "division" appears as a lighted line on the graticule. The "zero" is adjustable up and down over the entire screen.
- Explore magnets and coils of wire: Measure/Activities/Magnets and Wire. For the basics all you need is a couple little cylindrical magnets, a couple plastic sewing bobbins, some (ie.. 100 feet of 30 AWG) magnet wire, glue, tape and a couple paper cups. This also includes the following additional activities:
- Build your own microphone and speaker: (the speaker requires a 1:100 amplifier+driver circuit).
- Build your own telephone (requires two magnets+coils, the amplifier, and a "driver" circuit).
- Build a guitar "pick-up probe" Requires a 0.25 inch magnet (it fits nicely inside the coil) to convert a guitar-wire's vibrations into voltage that you can see on the laptop -- see the harmonics etc.
- Build a tuning fork oscillator: Build a steel tuning-fork, stick a magnet on each of its two tines, and then use the microphone probe to see its sinewave vibrations. Explore feedback (requires the 1:100 amplifier+driver circuit) to make your tuning fork hum at its natural frquency. Explore resonance (requires the signal generator -- see below). Careful design results in a useable frequency reference for other experiments.
- Build a signal-generator: Measure/Projects/Signal-Generator. Describes the design of a voltage-to-frequency converter with better than 1% accuracy between 0 and 2000 Hz (0 to 2.000 volts). Together with a frequency-counter project (see below), the signal generator can double as a digital voltmeter. This, or a commercial equivalent, is necessary for a number of interesting activities.
- Build an ammeter: Measure/Projects/Ammeter. An ammeter or "amp(ere)-meter" measures electrical current (flow of electrons). A speaker coil, a magnetic compass, a 1000 ohm resistor and 5 volts from the laptop readily demostrate that (electro-)magnetism -- electrons moving in a coil of wire -- can cause motion. This experiment pursues the observation. With a magnet and a homemade -- but very-sensitive, balance-beam scale (made from the same 1/8 inch diameter steel rod used to build the tuning forks) -- I've detected (not measured) electric currents as low as 50 one-millionth of an ampere. The balance-beam scale's design is the fussy part, a more-suitable design is TBD.
- Build a weight-measuring scale: The first step is a suitable balance beam scale with one side being pulled by the magnet+coil to "null" out weight in a pan on the other side. We then measure the "amps" required to null the weight.
- Build a length-transducer:Measure/Projects/Length transducer. The simplest transducer for measuring length -- distance between two points in a straight line -- is a resistive "slider potentiometer". Although more complex this activity is more interesting because it reinforces the notions of electromagnetism.
- Part I: Build a transformer: Transformers can protect us from electrocution -- but they only work with alternating electricity (AC). They move, and change the voltage of, AC electrical energy without the input and output wires being in "galvanic" or direct physical contact. To build a "transformer" requires two pickup probes (coils of wire), an oscillator plus the driver/amplifier. The bottom-most coil serves as the driver (the input) and the top coil is the pickup (the output). What happens when the driving frequency changes?
- Teaching point -- transformers and steel: Transformers work better when iron (steel) is inside the coils. Move the steel rod up and down inside the two coils and watch the "induced voltage" change on the screen.
- Interesting teaching point about permanent magnets: A string of permanent magnets won't work as the "steel rod". Why? Because all the iron, cobalt etc atoms are lined up stiffly and can't be made to move by the teensy electrical field "induced" by the signal generator.
- Part II: Build an LVDT (length-measuring device): Although the basic principle is shown with the moving-steel-rod experiment above, this experiment makes a better demonstration. This requires a third coil to be placed top-most in a stack of three coils with the driver coil in the middle, plus an appropriate hookup of the bottom and top coils "in series". The output can be seen on the screen to change dramatically with the location of the steel rod inside the three coils.
- Can the LVDT be used together with a 4th coil to build an ammeter? TBD.
- Build a (frequency-) counter: Measure/Projects/Frequency counter. This project can be used with the other projects and also -- together with the voltage-to-frequency oscillator -- serve as a voltmeter. It comes in two parts:
- Build a 1-second "time base": Digital watches contain tiny crystal tuning forks -- remarkably inexpensive at $0.30 in single units -- that vibrate at at 32,768 Hz (cycles per second). With one of these and a couple inexpensive integrated circuits we can build a 1-second "time base". From the time base we derive "zero-the-counter" and "load-the-counts-to-the-display" pulses required by the event-counter.
- Build an event-counter: A preliminary design uses four divide-by-ten counters (CD40110BE), four resistor arrays and four 7-segment LED to display accumulated counts -- over the one-second interval-- ranging from 0000 to 9999. (I have not found an inexpensive (e.g. less than $5.00) way of doing this -- exact design TBD).
- Build a "port-expander": Measure/Projects/Port expander. There aren't enough USB ports on the laptop to supply +5 volts to all the various projects described above. Also the heavy current draw of the 100:1 amplifer/driver can interfere with the other devices. A simple port expander can solve this problem (design TBD).
Some threads for interesting learning experiments are below -
- Record animal sounds, for example, sounds of birds and observe their waveforms. Which of these are high frequency sounds, which are the low frequency ones? Adjust the frequency sliders accordingly.
- Whistle into the microphone and compare the loudness and frequency of whistles by observing the waveforms.
- Get two people to try to whistle the same note, and look into Beat Frequencies.
- Turn the sensitivity slider up to the maximum and observe ambient noise - in a quiet room, near a noisy road.
- Measure the voltage of an AA size pencil cell. What settings do you use? AC or DC?
- Measure resistance of water, other liquids
- Log temperature using a temperature sensor at one hour intervals. When in the day is it the hottest? The coldest?
- Some very interesting sensor ideas given by Arnans Roger, see - http://padthai.media.mit.edu:8080/cocoon/gogosite/documentation/makingSensors.xsp?lang=en
How to build low cost sensors
- Specifications:
| Name | Description | Vendor | Reference |
|---|---|---|---|
| Switch lever spdt 3A PCB | http://www.digikey.com | SW773-ND | |
| Thermisor NTC 10K OHM 5% | http://www.digikey.com | 317-1258-ND | |
| Photocell 5K-20K OHM 4.20 MM | http://www.digikey.com | PDV-P9203-ND | |
| Switch Reed 10-15AT SPST .5A | http://www.digikey.com | 420-1047-ND | |
| Magnetic switch(2) | Switch Reed SPST .5A 12-23 A/T | http://www.digikey.com | HE502-ND |
| Consists of a metal electrode on a humidity sensitive membrane mounted on a ceramic substrate | http://www.rhopointcomponents.com | SYH-1NC |
- Instructions in English:
- Making a Switch Sensor
- Making a Light Sensor
- Making a Humidity Sensor
- Making a Magnetic Sensor
- Making a Thermistor
Downloading the Activity
Please visit the download page to download the latest stable and unstable releases of the Activity.
Kids guide to Measure
Teachers guide to Measure
- Talking about Sound and Music. This content could make an excellent teaching supplement to Measure. Explains acoustic concepts.
- Acoustics for Music Theory, another possibly useful teaching supplement.
Hacker's guide to Measure
Getting started
Measure Temperature
See also Category:XO sensors for instructions on making other kinds of sensors.
Construction
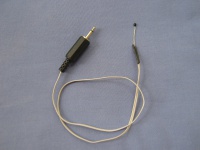
See Making XO sensors/Making a Temperature Sensor for detailed construction instructions.
Operation and measurement
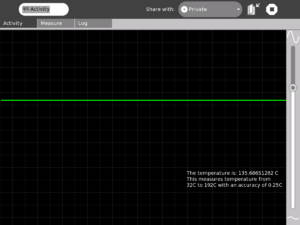
Please download the Activity from the link title "For LM35" from the unstable branch by going to the downloads page. This release is a pre-calibrated version for using with this temperature sensor.'
$2 USB I/O and sensor board
See Edward Baafi's low cost USB sensor board here
Learning activities
Sensor Input into Turtle Art
Turtle Art is an abstraction. By allowing sensors to control various aspects of motion of the Turtle, one is enabling kids to connect with their physical world and bring that connection into the abstraction that Turtle Art represents
I've integrated sensor support into Turtle Art. This basically allows one to add a "Sensor Input" block into Turtle Art. One can thereby control any aspect of the Turtle's motion depending upon the value of the sensor. When no sensor is connected, the default input is taken from the Mic.
The code is in the git repository of Measure (look for the TurtleArt.activity folder)
- This is weird. Talk to Arjun about fixing this so that it's merged into Turtle Art proper.
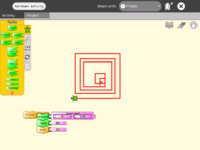
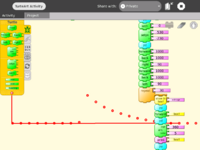
Screen shots
Try it out!
If you wish to try out Turtle Art with sensors, please click here to go the download and usage guidelines page.
Work remaining
- Input based on the frequency of signal. This would allow whistling at a higher frequency give a higher input
- Incorporating the various options (Bias/NoBias and AC/DC) into the UI of Turtle Art
Acknowledgments
Thanks to Brian Silvermann for helping me find my way in the existing Turtle Art code.
Getting involved
Educators/Teachers
We'd love help from educators. You can help by organizing learning activities around children wherever you are. Feel free to get in touch with us to discuss your ideas and co-ordinate efforts.
Document these learning activities that you undertake and help teachers and educators all around the world to replicate the same activities!
Software developers
Help is needed from volunteers from Python developers. Please visit this page to find out details. If you have experience in writing optimized Python code, please leave a note on the discussion tab of this page and someone will get in touch with you.
Hardware enthusiasts
Do interesting hardware projects around the XO. Visit the Measure hardware page to learn more. You might also want to see the projects page.
We are B.E students working on Measuring activity of various sensors in OLPC. We are having Temperature and humidity sensor, which we have to connect to OLPC. We have checked it through Terminal window whether anything is connected to that port or not. But it was not detected and the log format also does not appear.. So can you tell us how it can be detected? So please help us as early as possible.
Community Photos
http://www.flickr.com/photos/tiayiti/sets/72157629707249381/
[ADD YOUR OWN PHOTOS/VIDEOS HERE!]
A note about safety
SAFETY FIRST!
- Make measurements of AC line voltages with the proper equipment only -- for example, a multimeter designed for the purpose. The laptop is not a multimeter.
If you don't know what you are doing or are unsure, don't do it. Electricity can be dangerous.
Future plans
- Comparison of many graphs
- Sharing of the graphs
- Analog Input support into TamTam jam
For a version by version plans page see here
Acknowledgments
(In no particular order. List in progress...)
Thanks to
- Walter Bender - (project adviser) for providing invaluable guidance, encouragement and support at all stages of development.
- Mitch Bradley for help on a number of fronts including teaching me about decimation and window functions.
- Benjamin Schwartz for providing critical feedback.
- John Watlington for suggestions and help on a number of hardware related fronts; and also for allowing me to borrow your book on the Tale of the Scale which I find very inspiring.
- Bernardo Innocenti for teaching me many things about Linux, Python and also for a lot of help on code design.
- Michael Stone for great inputs towards the code design and for being great company at 1cc.
- Tom Boonsiri and Jake for great applications of Measure Activity in health peripherals
- WvBailey for a huge number of invaluable projects and documentation efforts. Thanks a lot!
- seberg (on d.l.o) for suggestions on code optmization
- Mary Lou Jepsen for suggestions and feedback
- Kim for testing related suggestions
- Ted Selker for a lot of great suggestions
- SJ Klein for a lot of great suggestions
- Albert Cahalan for a lot of important critical feedback
- C.J Leonard for links to great resources
- Tomeu for a lot of help on the code
- Eben Eliason for help in UI design
- Ivan for connecting me with the NumPy group
- Henry Edward Hardy for providing feedback and suggestions
- Daniel Drake for testing help
- C Scott for suggestions and help related to coding
- David Cavallo for suggestions and feedback
- Rafael Ortiz for help in testing and feedback
- Cody Lodridge for great drawing code optimizations
- Mel Chua for being the number one fan of Measure Activity and telling the whole world about it. Thanks Mel!
- Dan Winship for great help on the code and for teaching me about GObject.
- Jim Gettys for thinking of the Activity as an important part of the build system.
- The teacher at Khairat- Sandeep Surve for showing great enthusiasm towards it as it being an important learning tool and thereby increasing my enthusiasm to work in it further.
- Carla Gomez Monroy for teaching me so much about learning, team work and many other things, and also for great feedback from the field and for implementing many of my efforts on the field.
- Erik Blankinship and Mihir Bakhtiar for many engrossing discussions that allowed me to shape the development course of the Measure Activity.
- Julia Reynolds for thinking of Measure as the 'coolest Activity on the XO'
- Seth Woodworth for great suggestions and feedback
- Arnans Roger for introducing me to his work at MIT that allowed me to learn a lot about shaping the development course of the Activity.
- Henry Holtzman for great encouragement and support on the Activity
- Barry Vercoe for allowing me to demo my work to his class at MIT and for giving me great ideas about sensors in music
Proposed re-organization of this page
General goals
- small overall size of page
- links to other pages with a picture accompanying what the link is about
- links depend on the user and what he/she has come to look for on the page
Possible links
- Educators
- Getting started (perhaps on the main measure page itself)
- Activity activities
- Developers
Work in progress here
Contact
Contact Arjun Sarwal through -
Email : arjun AT laptop dot org
IRC : arjs on #olpc #sugar
Give a child a hammer and the world becomes his nails...
Activity Summary
| Icon: | Sugar icon::Image:Activity-measure.svg |
| Genre: | Activity genre::Math and Science |
| Activity group: | ,|x|Activity group::x}} |
| Short description: | Short description::TODO!: Measure lets kids measure the real world with their XO and provides a visual and statistical representation. |
| Description: | [[Description::Using the Measure Activity on the XO, one can:
|
| Maintainers: | ,|x|Contact person::x}} |
| Repository URL: | Source code::http://dev.laptop.org/git?p=projects/measure |
| Available languages: | ,|x|Available languages::x}} |
| Available languages (codes): | ,|x|Language code::x}} |
| Pootle URL: | |
| Related projects: | Related projects,|x|Related projects::x}} |
| Contributors: | ,|x|Team member::x}} |
| URL from which to download the latest .xo bundle | Activity bundle::http://dev.laptop.org/~arjs/Measure-21.xo |
| Last tested version number: | Activity version::21 |
| The releases with which this version of the activity has been tested. | ,|x|Software release::x}} |
| Development status: | |
| Ready for testing (development has progressed to the point where testers should try it out): | ,|x|Ready for testing::x}} |
| smoke tested : | |
| test plan available : | |
| test plan executed : | |
| developer response to testing : |
| URL from which to download the last .xo bundle that works with old releases | Activity bundle::http://dev.laptop.org/~arjs/Measure-21.xo |
| Activity version number: | Activity version::21 |
| The releases with which this version of the activity has been tested. | ,|x|Software release::x}} |
| Development status: |

