User:Az990tony/edublog-beta-hw
The following system was built from parts purchased at [SWS Electronics and Computers ] a local computer parts store in Tucson, Arizona (USA).
- [[ http://www.asus.com/products.aspx?l1=1&l2=1&l3=380&l4=0&model=1679&modelmenu=2 | V3-M2A690G barebones PC ]]
- tower case
- power supply
- includes one black SATA power connection cable
- [[ http://www.asus.com/products.aspx?modelmenu=1&model=1585&l1=3&l2=101&l3=496 | M2A-VM motherboard ]]
- ATI SB600 RAID controller
- ATI Radeon 1200 Graphics
- 8 USB ports (four in front panel, four in back)
- Multi-card reader SD/MMC/MiniSD/Compact Flash
- One built-in NIC (1GbE gigabit ethernet)
- includes one 18-inch red SATA connection cable
- AMD Athlon64 X2 dual-core 2.3 Ghz processor with heatsink/fan
- The AMD single-core Sempron might have also met the CPU requirement
- Two extra NIC cards (PCI)
- One DVD-RW drive, attached on primary IDE-Master, [[ http://us.liteonit.com/us/index.php?option=com_content&task=view&id=221&Itemid=67 | Lite-On DH-20A4H ]]
- Two SATA drives, 160GB each.
- One 2GB DIMM
- One extra power-plug cable (converts white EIDE to black SATA power connector)
- One extra 18-inch red SATA cable
Assembling the Parts Together
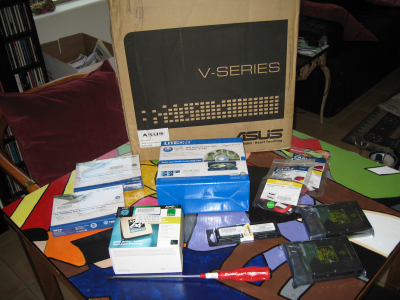
I had purchased two extra red SATA cables, but then learned that one was already included with the Barebones PC. Also, had to go back to the store for an extra EIDE-to-SATA (white to black) power cable adapter. The screwdriver #2 (shown with red handle) is all that you need for tools.
Since this motherboard has an AM2 socket, we could have gone with either an AMD Sempron or Athlon64 X2. I chose the Athlon64 X2 which was more expensive, but runs faster.
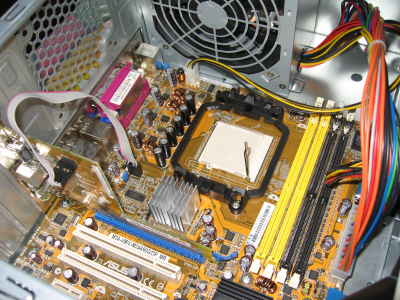
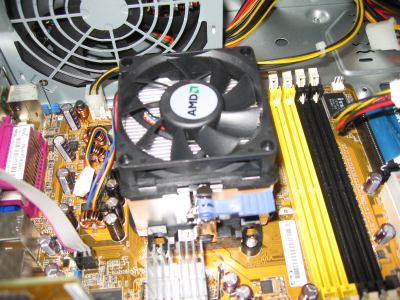
Installation was tricky, and I watched some YouTube videos to see how others had done this. Basically, you raise the shiny lever (shown in the up position above), align the corner with the triangle on the chip with the triangle on the motherboard (it is the corner nearest the power supply in the picture above). Line up all the pins, and push down into place. If it didn't work, lift the CPU up, and try again. Once in place, move the shiny lever back down to snap everything in place. If you fail to do this step correctly, you might end up buying another CPU.
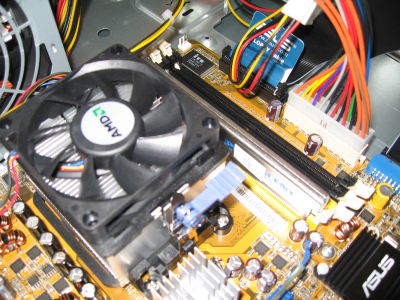
The fan was also a bit tricky. There are two silver brackets. Align the fan so that the blue-purple level is away from the power supply. Put the fan on the processor, and snap in the bracket that is nearest the power supply. Turn the lever all the way to the left, push down on the fan, and attach the other bracket. This second bracket is then made tighter by turning the blue-purple lever clockwise until it is snug against the processor.
There are four slots for memory, two yellow and two black. Starting near the CPU, they are:
- DIMM_A1 (yellow)
- DIMM B1 (yellow)
- DIMM A2 (black)
- DIMM B2 (black)
Channel A is A1,A2 and Channel B is B1,B2. If you are going to have DIMMS in both channels, then A1+A2 amount must match B1+B2. All of them need to be the same speed, either 533, 667 or 800. I could have gotten two 1GB DIMMs in A1 and B1 to get dual-channel, but it was cheaper to get one 2GB DIMM and put it only in A1. (Read the [[ http://support.asus.com/download/download.aspx?SLanguage=en-us&model=V3-M2A690G | ASUS Manual ]] if you need more details on this.
