User:NeoAmsterdam/11.2.0/Bootable SD
If you've been following the OS installation sagas you'll know that there is no cheat code or OpenFirmware command for installing an OS image to an SD card on an XO-1 (as there is for the XO-1.5). Previously we grafted the OS from /versions/pristine onto the SD card. Unfortunately this approach doesn't appear to work with Relese 11.2.0 (Build 874) (phooey!). Worse still, bootstrapping the process by making a 10.1.3 bootable SD card and applying the “simple” offline update instructions to mosey on up to 11.2.0 didn't work either. In fact, I've just about given up entirely on installing 11.2.0 to an SD card.
This document addresses a few issues that cropped up along the way in my attempts to make 11.2.0 boot from an SD card. If you love your XO (and I know you do), then do not attempt this procedure — it'll end up costing you days of effort per attempt, and it will only end up in failure.
Hopefully, 11.3.0 will be more coöperative; realistically, 10.1.2 might be the last build to boot off an SD card. Only time will tell.
So... for the benefit of the curious, here you go:
Before you Begin
- This procedure will erase any data stored on the XO-1.
- This procedure will erase any data stored on the SD card.
- Do not execute these instructions on battery power.
- This procedure requires the SD card to be partitioned.
Disk partitioning is beyond the scope of this document. - The SD will be formatted as an ext3 filesystem.
This is not an optimal arrangement for SD cards. - Refrain from altering the volume label.
/boot/olpc.fth expects it to be "OLPCRoot". - Children should get permission from a parent, guardian, teacher, and/or Linux guru before attempting this procedure.
Adult supervision is not required, but it is highly recommended.
Requirements
- An XO-1
- A USB drive with ≥2GB capacity and formatted as FAT-32
Actally, you need at least 1,052,798,976 bytes of storage space to hold build 874. This is less than the "traditional" gigabyte (1,073,741,824 bytes) but larger than the "redefined" gigabyte (1,000,000,000 bytes). Since USB drive manufacturers rarely (if ever) measure capacity in base 1024, we have to assume that all "1GB" sticks are in fact 50.35MB/52.79MB too small to be used for our purposes. - An SD card with at least 2GB of storage capacity
When I tried to update the OS on the built-in NAND drive using this method, I ended up with a "no space left on device" error. Since the NAND is 1GB, and considering the "when isn't a gigabyte a gigabyte" schpiel, let's play it safe and use a 2GB SD card. - A Developer's key ("Dev Key")
- Internet access
Procedure
Pre-Installation
- Back up your data!
I take no responsibility for preventable data loss. - Download build 860, build 874, the build 874 update, and their associated filesystem information:
- Build 860
- os860.img (604MB)
- os860.img.fs.zip (398KB)
- Build 874
- os874.img (647MB)
- os874.img.fs.zip (444KB)
- Build 874 Update
- Build 860
- Copy os860.img, os860.img.fs.zip, os874.img, os874.img.fs.zip, and your Dev Key to the root directory of the USB drive.
- Create two folders called "860" and "874"
- Copy os874.img and os874.img.fs.zip into a folder called 874 on your USB drive.
- Rename os860.img.fs.zip to fs.zip
Installing 10.1.3 to the NAND

- Shut down the XO-1.
- If there is an SD card in the SD card slot, eject it now.
- Insert the USB drive.
- Hold down all four game keys (✓ + ◻ + O + ×) while pressing the power button.
Keep all four game keys depressed until the XO-1 prompts you otherwise (see illustration).
Release 10.1.3 will now "automagically" be installed to the XO-1's internal storage. When it finishes (about 8½ minutes later), the XO-1 will restart. Wait until you are presented with the "Name" screen (see illustration) before moving on to the next phase.

Grafting 10.1.3 to the SD Card
- Drop into a console.
♦ ctrl + ♢ alt + f1
f1 - Drop runlevels.
/sbin/init 3 - Insert the SD card into the SD slot.
If you have not partitioned the SD card, do so now. See the 10.1.2 Bootable SD note for more information. - Initialize a filesystem on the SD card.
mkfs.ext3 -L OLPCRoot /dev/mmcblk0p1 - Create a mount point for the SD card.
mkdir /mnt/sd - Mount the SD card.
mount -t ext3 /dev/mmcblk0p1 /mnt/sd - Copy the OS's files from the pristine build directory to the SD card.
This can take as long as three hours. Have patience.
cp -pr /versions/pristine/860/* /mnt/sd/. - Copy the pristine build directory itself to the SD card.
cp -pr /versions/* /mnt/sd/versions/.
This takes just as long as the first copy. This second copy is necessary because the upgrading/synchronizing will fail if these files are missing. - Create a mount point for the USB drive.
mkdir /mnt/usb - Mount the USB drive.
mount -t vfat /dev/sda1 /mnt/usb
Note: There is no guarantee that sda1 is the correct device, but if no other USB device has been plugged in since the XO restarted, then it will be the most likely case. - Copy your Dev Key to the SD card now
cp /mnt/usb/develop.sig /mnt/sd/security/develop.sig - Unmount the USB drive.
umount /mnt/usb - Remove the USB drive's mount point.
rmdir /mnt/usb - Create the home directory.
mkdir -p /mnt/sd/home/olpc - Change ownership of the home directory.
chown -R olpc:olpc /mnt/sd/home/olpc - Unmount the SD card.
umount /mnt/sd - Remove the SD card's mount point.
rmdir /mnt/sd
Release 10.1.3 has now been grafted onto the SD card. If the USB drive is plugged in, remove it now. shutdown -r now and your XO-1 should reboot from the SD card.
Upgrading to 11.2.0
Confirm the Boot Device
- As with last time, wait until you are presented with the "Name" screen.
- Drop into a console.
♦ ctrl + ♢ alt + f1 - List the currently mounted devices.
mount
If the first line of the output begins with /dev/mmcblk0p1 on / then you have sucessfully booted from the SD card. If not, stop: you probably booted from the NAND.
Issuing the Update
- Drop runlevels.
/sbin/init 3 - Plug in the USB drive.
- Create a mount point within /media for the USB drive.
mkdir /media/usb
The mount point must be within /media - do not use /mnt! - Mount the USB drive.
mount -t vfat /dev/sda1 /media/usb
Note: There is no guarantee that sda1 is the correct device, but if no other USB device is plugged in and the XO has just restarted, then it will be the most likely case. - Update the SD card to 11.2.0 using the “simple” offline updater.
Technically we're synchronizing files; practically, we're upgrading the OS. This took about 110 minutes. Have patience.
olpc-update -v --usb- Resist temptation and do not use the --reboot flag. You'll be sorry.
- Interestingly enough, when I tried to update the OS on the built-in NAND drive using this method, I ended up with a "no space left on device" error. Go figure.
- Unmount the USB drive.
umount /media/usb - Remove the USB drive.
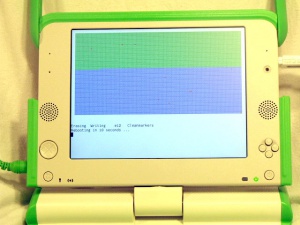
Release 11.2.0 has now been grafted onto the SD card... sort of: if you were to restart, you will find that the XO locks up at the bootsplash. This is because the XO is trying to boot an "old" kernel and the bootsplash is masking that error from the user (see illustration). This is why you should not the --reboot flag with olpc-update. Instead, shutdown -h now and wait for the system to power off.

Don't ask me why the kernel doesn't get upgraded along with every other package because I just don't know - it's even possible that the developers don't know. In any event, we will have to copy the kernel for 11.2.0 from a clean installation onto the SD card - coincidentally, that will take place a few minutes from now.
Installing 11.2.0 to the NAND
Before we can install 11.2.0 to the NAND, we have to move the installation files for 10.1.3 out of the way.
Preparing 11.2.0 for Installation from USB
- Once the XO has been powered off, eject the SD card from the SD card slot.
- Power up the XO.
You'll be booting into Release 10.1.3 from the NAND. Wait for the "Name" screen to appear. - Drop into a console.
♦ ctrl + ♢ alt + f1 - Insert the USB drive.
- Create a mount point for the USB drive.
mkdir /mnt/usb - Mount the USB drive.
mount -t vfat /dev/sda1 /mnt/usb
Note: There is no guarantee that sda1 is the correct device, but if no other USB device has been plugged in since the XO restarted, then it will be the most likely case. - Change into the USB's directory
cd /mnt/usb - Move the 10.1.3 installation files from the USB's root directory to the 860 directory.
mv os860.img 860/os860.img ;
mv fs.zip 860/os860.img.fs.zip ; - Move the 11.2.0 installation files from the 874 directory to the USB's root directory.
mv 874/os874.img os874.img ;
mv 874/os874.fs.zip fs.zip ;
Your USB drive is now properly prepared for installing Release 11.2.0 to the NAND. - Move out of the USB's directories
cd / - Unmount the USB drive.
umount /mnt/usb - Remove the USB drive's mount point.
rmdir /mnt/usb
Do not unplug the USB drive. - Power off the XO
shutdown -h now - Once powered off, hold down all four game keys (✓ + ◻ + O + ×) while pressing the power button.
Keep all four game keys depressed until the XO-1 prompts you otherwise (you've done this before).
This is where everything went to /dev/null in a handbasket. The idea was as follows...
Graft 11.2.0's Kernel onto the SD Card
Now that Release 11.2.0 has been installed to the NAND, we can copy the "new" kernel onto the SD card.
- Drop into a console.
♦ ctrl + ♢ alt + f1 - Drop runlevels.
/sbin/init 3 - Insert the SD card into the SD slot.
- Create a mount point for the SD card.
mkdir /mnt/sd - Mount the SD card.
mount -t ext3 /dev/mmcblk0p1 /mnt/sd - Copy the kernel... or should it be the whole of /boot/*???... to /mnt/sd/boot/ - I don't know yet, but the answer will definitely be here-ish. I hope.
- Unmount the SD card.
umount /mnt/sd - Remove the SD card's mount point.
rmdir /mnt/sd
Well, it didn't work: the XO failed to boot past OpenFirmware. Worse still, attempting to graft the kernel and its entourage of files onto the SD card by employing a different computer as a go-between didn't work either. That's why I gave up: I couldn't think of any other way to clone the contents of the NAND onto the SD card so that the SD card became a bootable device.
So there you have it. If you can think of something, and if you can spare a few days of effort on it, then by all means use this document as a guide. In the meantime, I'll be paring down the copy of Fedora 14 Live I installed on my SD card.