XO 1.75 A3
XO-1.75 Laptop Alpha test model 3, also known as A3.
Contents
Description
The A3 are the third prototypes of the XO-1.75 built. The main change is to the power distribution circuitry, but they also use a fully tested A2 silicon stepping of the Armada 610 SoC, which did wonders for yields. The number of boards obtained was thirty, and distribution was limited to hardware testing, OFW and Linux kernel driver development.
Identification
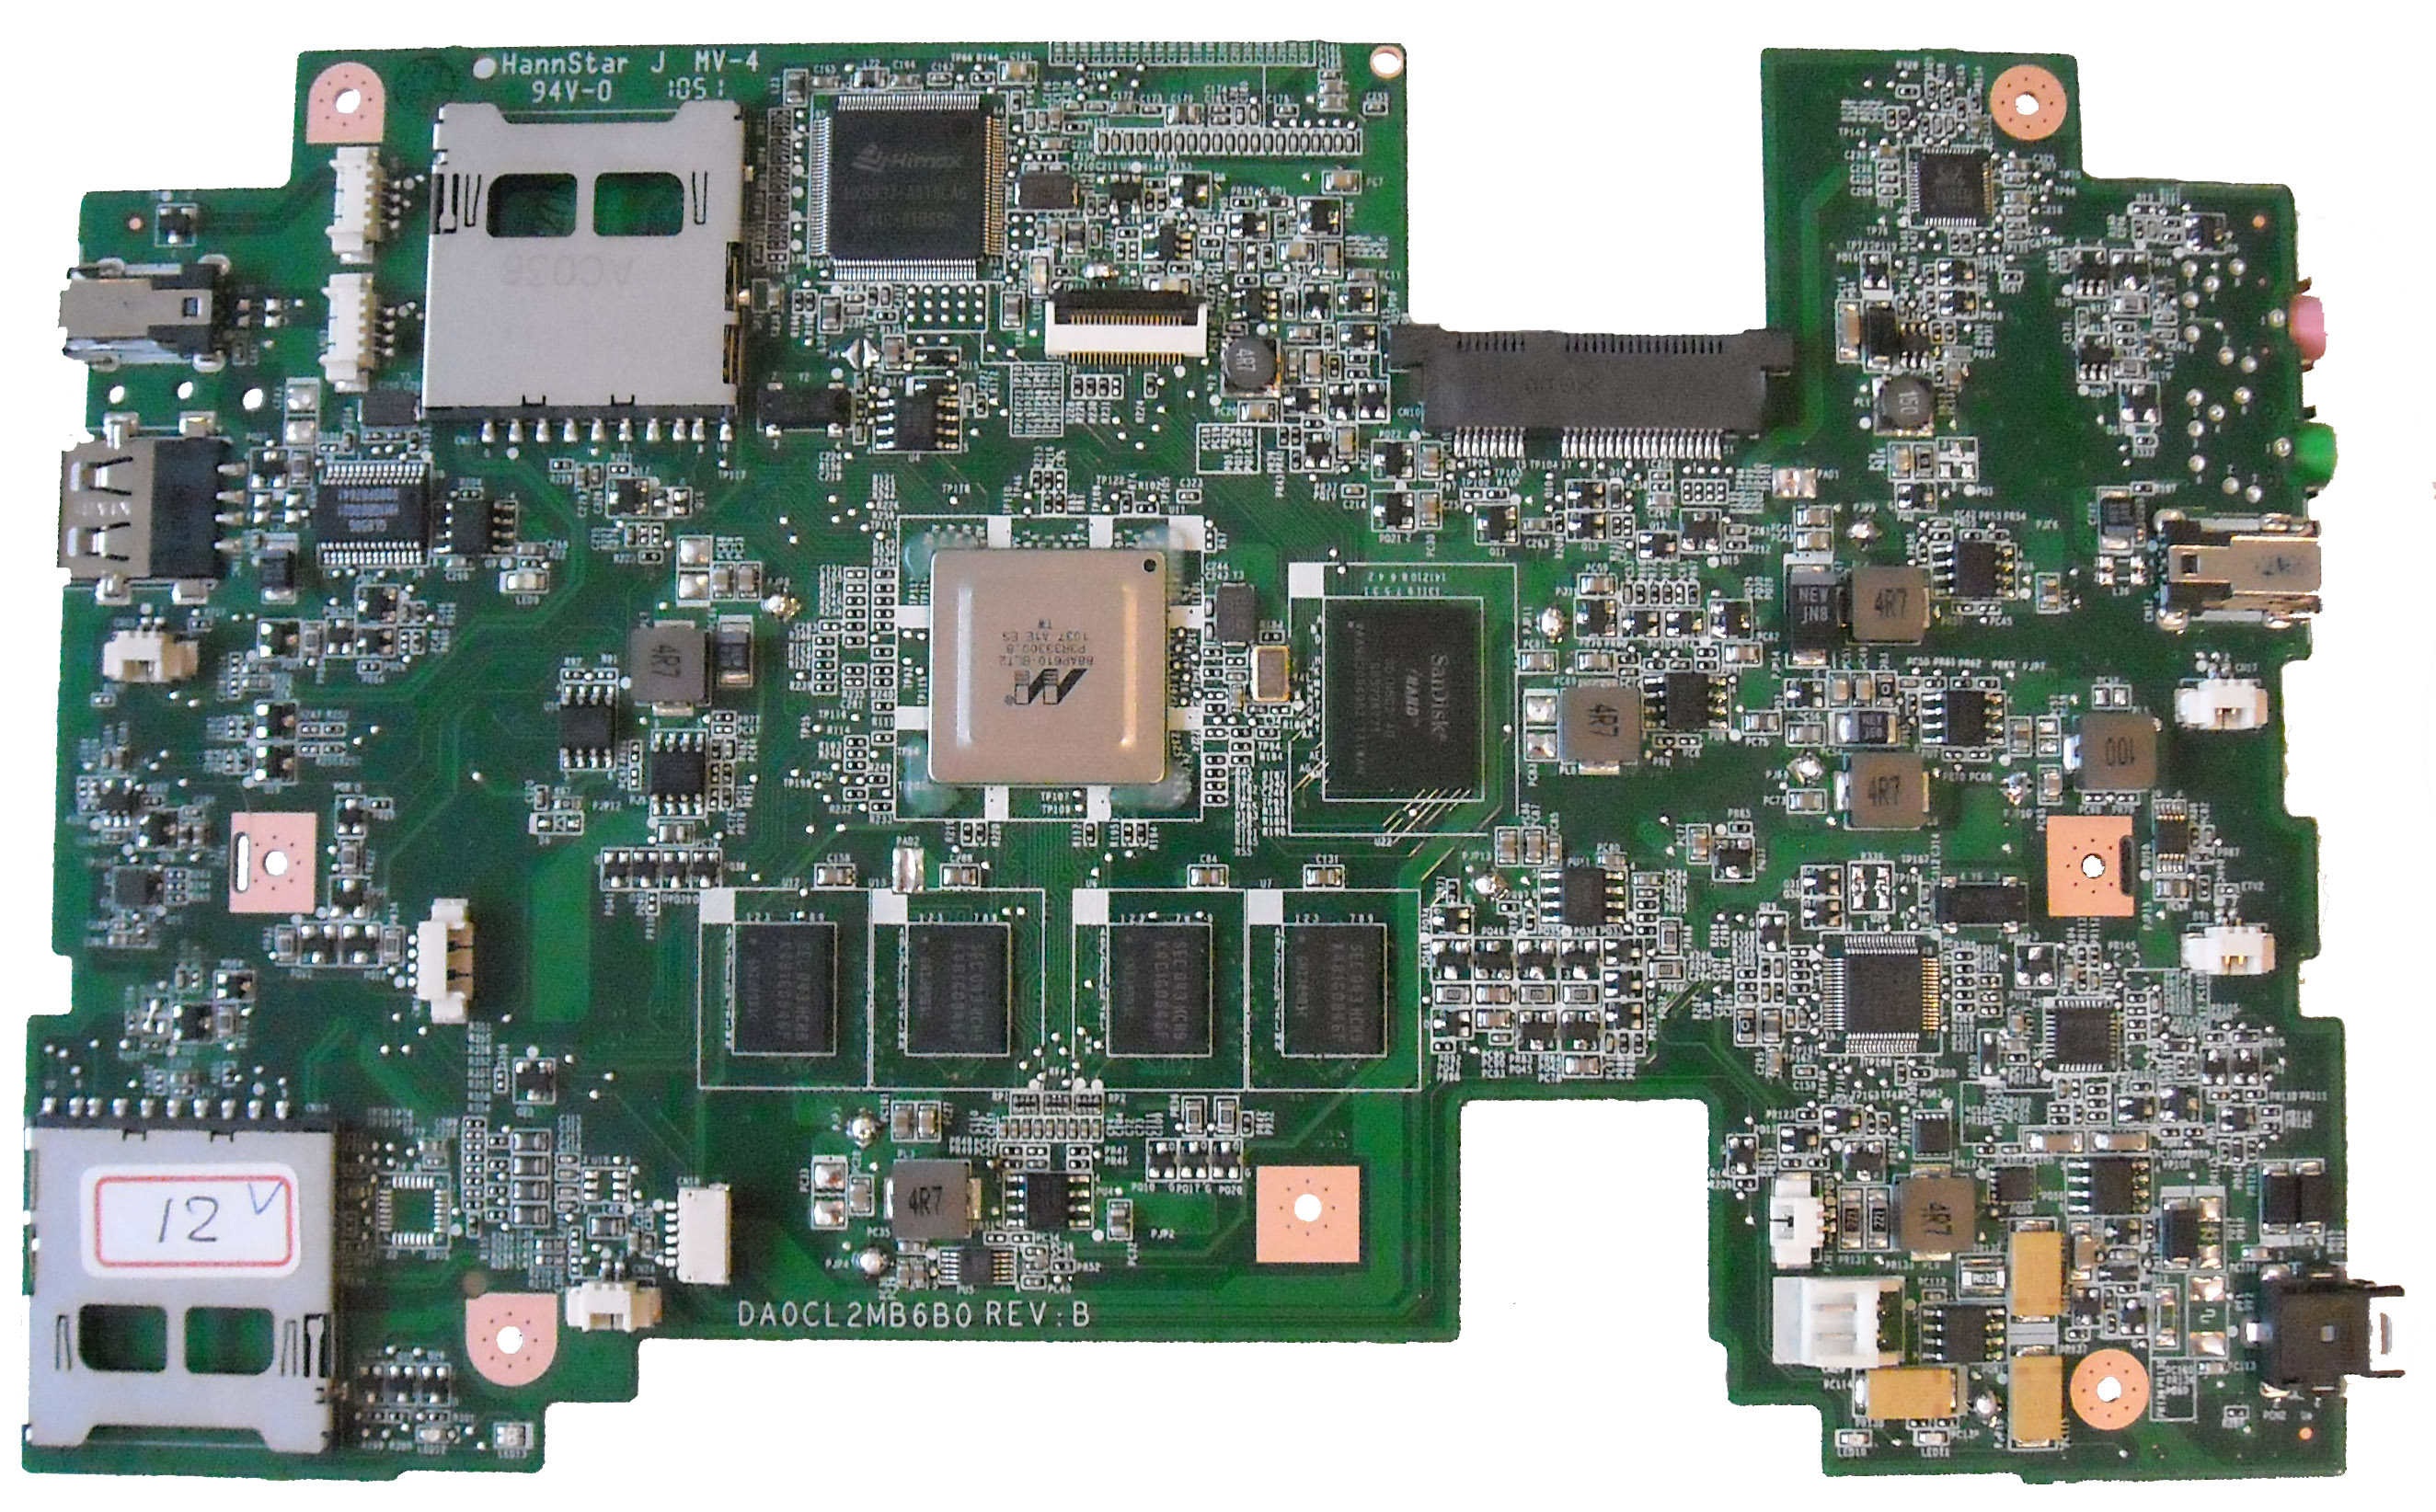
- Although these were bare circuit boards, with no case or display, most developers obtain one pre-assembled into an earlier XO laptop enclosure with all peripherals attached. They should be marked as "XO-1.75 A3" with a serial number handwritten in the battery compartment.
Photographs:
If you disassemble the laptop (instructions), you will see:

Software Support
XO-1.75 use Q4xxx firmware releases. These will not work on an XO-1 or XO-1.5. For the first time, Open Firmware is provided as part of the Linux image, and the EC firmware is separate. The current firmware release for A3 is [[1]].
It is strongly recommended that you have two sources of power (a charged battery and an external power source) when you upgrade your EC or Open Firmware. Failure to do so may require the use of an SPI programmer to recover your laptop.
Upgrading OFW
To upgrade the version of Open Firmware, place a recent release of the Q4XYY firmware onto an SD device, and place it in the external SD slot.
Interrupt the Open Firmware (OFW) boot process by pressing the ESC key.
Type (assuming a q4a14 release):
flash ext:\q4a14.rom
Reboot by holding down the power button once this is completed. If you need to do this to a bare motherboard, you can use the flash! command.
Upgrading the EC code
Requires version q4a13.rom or later of Open Firmware
Download the latest EC code from: http://dev.laptop.org/pub/ec/. It should be prefixed by "cl2" (e.g. cl2-4.0.0.10.img). Place this file on a USB stick or SD card, and insert it into the laptop being reprogrammed.
From OFW, type:
flash-ec u:\your_filename.img
Upgrading Linux
A Linux image for the A3 is available at http://build.laptop.org/F12-arm/os4/.
Installing from OpenFirmware
You will need the .zd version of the OS image. Download it, then:
- Place the image on an SD card, and insert it into the XO-1.75 laptop's external SD slot.
- Get the Ok prompt,
- Install onto the internal SD card, type:
fs-update ext:\os3.zd
Installing from Linux using an XO-1.5
To install on an XO-1.5, boot an XO-1.5 to Linux, insert the SD card in the XO-1.5 external slot, then:
zcat os3.img.gz > /dev/mmcblk1
... and then power down, remove the SD card, and insert it in the XO-1.75.
Installing from OpenFirmware using an XO-1.5
You will need the .zd version of the OS image. Download it, then:
- Place the image on a USB stick, and insert it into the XO-1.5 laptop's USB port.
- Get the Ok prompt,
- To install onto the internal SD card, type:
fs-update u:\os1.zd
To install an image onto the external SD card, you need to type:
devalias fsdisk ext:0
fs-update u:\os1.zd
... and then power down, remove the SD card, and insert it in the XO-1.75.
Restrictions
There is a list of recommended modifications (ECOs).
WLAN card
XO-1.75 require the new, +1.8V tolerant, WLAN card. Do not place the WLAN card from an pre-production or early production XO-1.5 in an XO-1.75! It will release its smoke and stop working.
The WLAN card used for XO-1.5 production since Sept. 2010 is a +1.8V tolerant WLAN card. We have a supply of these at 222 for prototypes.
Selecting the internal SD
Only one of the internal SD slot and the eMMC may be used at any time. If an SD card is present in the internal slot when OFW boots, it will be used. Otherwise, the onboard eMMC device is selected.
Documentation
Supporting documentation for these boards (all in PDF):
Please note that production boards will likely have different pin mappings and connector locations.